Introduction
While many breakfast dishes have come and gone over the years, scrambled eggs remain a timeless classic that’s hard to beat. If you’re following a carnivore diet, you’ll love this simple yet satisfying version made with nutrient-rich beef tallow.
I’ve been making my eggs this way for years, and I can tell you there’s something special about using tallow instead of butter or oil. The rich, slightly buttery flavor of beef tallow transforms ordinary scrambled eggs into something extraordinary. Plus, you’re getting the added benefits of stable cooking fat that’s perfect for higher heat.
You don’t need fancy equipment or special skills to make these eggs – just quality ingredients and a few minutes of your time. Let me show you how it’s done.
Recipe
Scrambled eggs cooked in tallow represents a classic carnivore-friendly breakfast that combines simplicity with rich nutrition. The use of beef tallow as the cooking fat elevates ordinary scrambled eggs into a hearty, satisfying dish with deeper flavor and better texture.
This recipe focuses on achieving the ideal consistency through proper temperature control and timing, resulting in creamy, tender eggs that maintain their moisture. The combination of quality eggs with nutrient-dense tallow creates a meal that works equally well for breakfast, lunch, or dinner.
- 4 large eggs
- 2 tablespoons beef tallow
- 1/4 teaspoon salt
- 1/8 teaspoon black pepper
- 1 tablespoon heavy cream
Melt the tallow in a non-stick skillet over medium heat. While the pan heats, whisk the eggs, cream, salt, and pepper in a bowl until well combined. Once the tallow is hot but not smoking, pour in the egg mixture and let it sit for 30 seconds. Using a rubber spatula, gently push the eggs from the edges toward the center while tilting the pan to allow uncooked egg to flow to the sides. Continue this process until the eggs are just set but still slightly glossy, then remove from heat immediately.
For best results, always start with room temperature eggs and avoid overbeating them during the whisking process. The key to maintaining creamy texture lies in removing the eggs from heat while they still appear slightly wet, as they will continue cooking from residual heat. Never cook the eggs on high heat, as this can lead to dry, rubbery results. Clean your pan immediately after cooking to prevent egg residue from sticking.
Prep Time
The total prep time for these delicious tallow-cooked scrambled eggs is just 5 minutes. You’ll spend about 2 minutes gathering your ingredients and equipment, and another 3 minutes cracking eggs, adding cream, and whisking everything together. I’ve found that having all ingredients at room temperature makes the process even smoother.
Here’s how I break down the prep:
- Gathering ingredients (1 minute)
- Setting out cooking equipment (1 minute)
- Cracking and whisking eggs (1.5 minutes)
- Measuring cream and seasonings (1 minute)
- Final mix and temperature check (30 seconds)
If you’re new to cooking with tallow, don’t worry – it’s as simple as using butter or oil. Just make sure your tallow is ready to melt when you begin prepping the eggs.
Equipment needed
Making perfect scrambled eggs in tallow requires just a few basic kitchen tools that you’ll probably already have on hand. Here’s what you’ll need to get started:
- A non-stick skillet (8-10 inch) or well-seasoned cast iron pan
- A sturdy silicone or wooden spatula
- A medium mixing bowl
- A whisk or fork for beating eggs
- Measuring spoons
- A timer (your phone works great)
I’ve found that while you can use any pan, non-stick works best for beginners since tallow can make eggs stick to stainless steel. Your spatula should be heat-resistant and gentle on your cookware – I learned this the hard way after scratching my favorite pan! Keep these tools clean and ready, and you’ll be set for perfect scrambled eggs every time.
Basic Cooking Method and Time
With your tools ready to go, let’s get cooking! Start by melting your tallow over medium heat in your skillet until it’s just hot but not smoking. While that’s heating up, crack your eggs into a bowl and add the cream, salt, and pepper.
Once your tallow’s ready, pour in those whisked eggs and let them sit for about 30 seconds. Here’s where the magic happens – use your spatula to gently push the edges toward the center, tilting your pan so the runny eggs flow to the sides. Keep this up for about 2-3 minutes until they’re just set but still glossy. You’ll want to pull them off the heat while they’re slightly wet since they’ll keep cooking from residual heat.
Cooking Steps
You’ll want to heat your pan with tallow until it’s shimmering before adding your thoroughly whisked eggs. Once the tallow is ready, pour your beaten eggs slowly into the pan, giving them time to start setting around the edges. After cooking to your desired consistency, let the eggs rest for a minute before serving them warm to bring out their best flavor and texture.
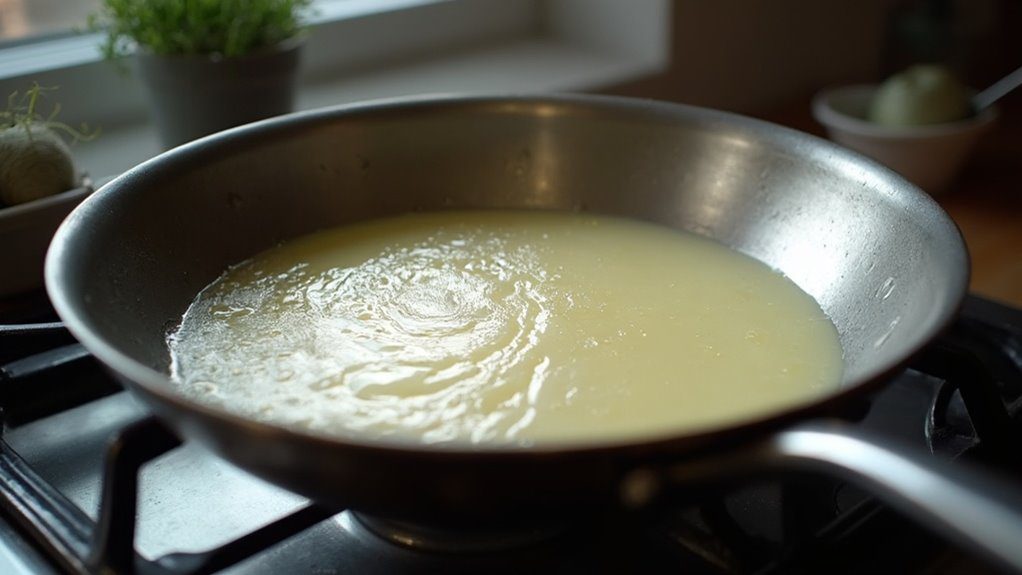
Step 1. Heat Pan Until Shimmering

Before adding your eggs, properly heating the pan with tallow is essential for achieving that perfect scramble. You’ll want to place your non-stick skillet over medium heat and add the tallow, letting it melt completely. Watch closely as the melted tallow begins to shimmer – this visual cue tells you it’s reached the ideal temperature.
I’ve learned through trial and error that if the tallow starts smoking, you’ve gone too far and should start over. The sweet spot is when you see that gentle shimmer across the surface, similar to heat waves rising from hot pavement. At this point, your pan is perfectly prepped to receive the egg mixture, ensuring those first vital seconds of cooking create the foundation for creamy, delicious scrambled eggs.
Step 2. Whisk Eggs Until Combined

Cracking your eggs into a medium bowl marks the start of creating perfectly scrambled eggs. Add your heavy cream, salt, and pepper to the bowl – these ingredients will help create that creamy texture we’re looking for. Now, grab your whisk and beat the mixture with purpose, making sure you break up all the yolks completely.
You’ll want to whisk until you see a uniform color throughout, usually a pale yellow. I’ve found that about 30 seconds of vigorous whisking does the trick. Don’t worry about incorporating too much air – we’re not making a soufflé here. Once your mixture looks smooth and the seasonings are evenly distributed, you’re ready to pour it into your waiting tallow-heated pan.
Step 3. Add Tallow to Pan
The first step in preparing your pan is adding 2 tablespoons of tallow and letting it heat over medium flame. You’ll want to watch closely as the tallow melts and begins to shimmer across the surface of your non-stick skillet. It’s important not to let it get too hot – we’re looking for that sweet spot where the tallow is fully melted but not smoking.
I’ve found that this usually takes about 1-2 minutes, depending on your stove. If you see wisps of smoke, your pan’s too hot – simply remove it from the heat for a moment to cool down. The perfect temperature will give you a clear, shimmering surface that’s ready for your egg mixture. Trust me, getting this step right makes all the difference in achieving those creamy, perfectly scrambled eggs.
Step 4. Pour Beaten Eggs Slowly
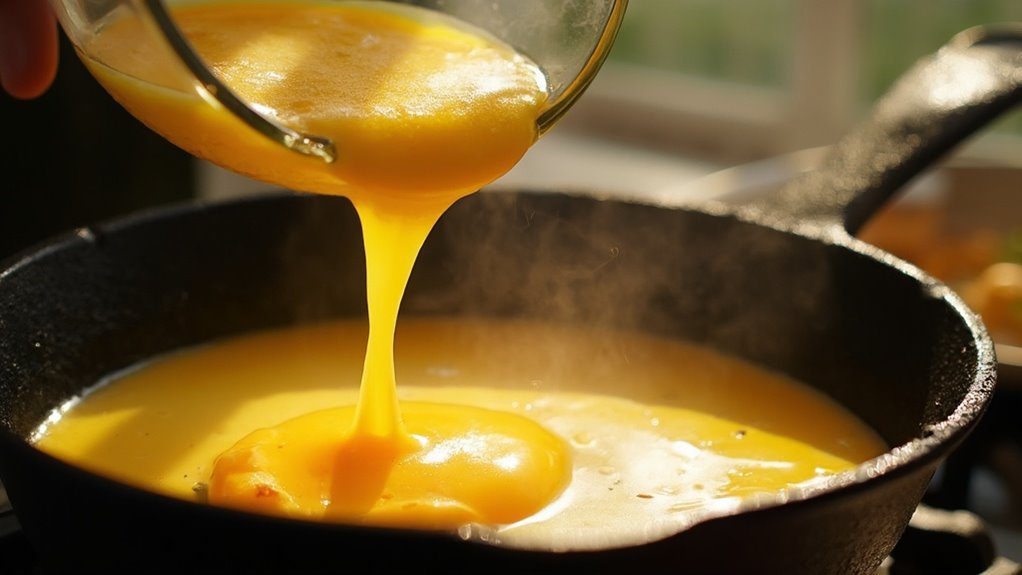
Once your tallow reaches that perfect shimmering temperature, gently pour your beaten egg mixture into the pan in a slow, steady stream. I’ve learned through trial and error that rushing this step can lead to uneven cooking and those dreaded rubbery spots nobody wants.
You’ll want to watch as the edges start to set, which happens pretty quickly. Let the eggs sit untouched for about 30 seconds – trust me on this one. I’ve found that pouring the mixture slowly helps create those lovely, tender curds we’re after. Don’t worry if you see some liquid eggs on top; that’s exactly what you want at this stage. The gradual pour also helps prevent the eggs from cooking too quickly, giving you better control over the final texture.
Step 5. Rest Before Serving Warm

After your perfectly scrambled eggs have reached that glossy, just-set stage, resist the urge to serve them immediately. Let them rest for 30-45 seconds in the warm pan while you grab your serving plate. I’ve learned that this brief pause allows the eggs to finish cooking gently from residual heat, creating that ideal creamy texture we’re after.
Transfer your eggs to a warmed plate – I like to run mine under hot water for a few seconds beforehand. You’ll notice how the eggs maintain their silky consistency better on a heated surface. Give them a final light sprinkle of salt if needed, then serve and enjoy while they’re still warm. The combination of tallow-cooked eggs and proper resting makes for an incredibly satisfying meal.
Customization Options
While basic scrambled eggs in tallow provide a delicious foundation, you’ve got plenty of ways to customize this recipe to match your dietary preferences and taste. Try adding diced uncured bacon or leftover steak for extra protein and flavor. If you’re not strictly following a carnivore diet, you can incorporate herbs like chives, thyme, or parsley.
For texture variations, experiment with different cooking times – a shorter cook yields creamier eggs, while longer cooking creates firmer curds. You can also adjust the amount of heavy cream or swap it with bone broth. Some carnivore enthusiasts enjoy mixing in crushed pork rinds for crunch, or topping their eggs with crumbled, crispy beef bacon. The key is finding your perfect combination while keeping the core technique intact.
Ingredients list (with precise measurements)
A complete ingredients list guarantees you’ll have everything ready before starting these rich, tallow-cooked scrambled eggs. You’ll need:
- 4 large eggs (room temperature works best)
- 2 tablespoons beef tallow
- 1/4 teaspoon salt
- 1/8 teaspoon black pepper
- 1 tablespoon heavy cream
I’ve found that using exactly these amounts creates the perfect single serving for a hearty breakfast. The tallow measurement is particularly important – you’ll want enough to coat your pan well without making the eggs greasy. While the heavy cream is technically optional, I never skip it since it makes the eggs extra fluffy and creamy. Trust me, once you try this combination, you’ll understand why these measurements are spot-on.
Storage Information
Since freshly made scrambled eggs taste best immediately, I recommend eating them right after cooking. However, if you need to store leftovers, you’ll want to follow proper food safety guidelines to keep them fresh.
You can store your leftover scrambled eggs in an airtight container in the refrigerator for up to 2 days. When you’re ready to reheat them, add a small amount of tallow to a pan and warm them over medium-low heat. I’ve found that microwaving tends to make them rubbery, so I prefer the stovetop method.
I don’t recommend freezing scrambled eggs as they’ll become watery and lose their creamy texture. If you’ve made too much, it’s better to reduce your portion size next time rather than trying to save them for later.
Health Benefits or Special Features
Beyond ideal storage practices, the nutritional profile of tallow-cooked scrambled eggs packs an impressive punch for your health. You’ll get high-quality protein from the eggs, plus fat-soluble vitamins A, D, E, and K from the tallow. This combination is particularly beneficial for muscle maintenance and hormone production.
When you cook eggs in tallow, you’re also getting CLA (conjugated linoleic acid), which supports healthy weight management and immune function. I love how the stable saturated fats in tallow prevent oxidation during cooking, unlike vegetable oils that can become rancid at high temperatures. The addition of heavy cream boosts the fat-soluble vitamin content while creating that silky texture we all crave. Plus, this meal is perfect for those following ketogenic or carnivore diets, providing sustained energy without any plant-based ingredients.
Prep Time
Whether you’re rushing to make breakfast or planning a leisurely brunch, scrambled eggs in tallow comes together incredibly quickly. You’ll only need about 5 minutes total to prep and cook this satisfying meal.
The prep work is minimal – just crack your eggs into a bowl, add the cream and seasonings, and give them a good whisk. While you’re doing this, let your pan heat up with the tallow. I’ve found that gathering ingredients beforehand helps streamline the process even more. Here’s a quick breakdown of timing:
- Gathering ingredients: 1 minute
- Cracking and whisking eggs: 2 minutes
- Heating pan and tallow: 1-2 minutes (happens simultaneously)
- Setting up your workspace: 1 minute
Cook Time
Once your prep work is complete, you’ll find that the actual cooking process moves quickly – taking just 2-3 minutes from start to finish. When your tallow’s melted and shimmering (but not smoking), pour in your egg mixture and let it sit for that essential first 30 seconds.
Now comes the fun part – grab your spatula and gently push the eggs from the edges toward the center. As you do this, tilt your pan to let the uncooked egg flow to the sides. Keep this gentle pushing motion going until your eggs are just set but still look a bit glossy. You’ll want to pull them off the heat while they’re still slightly wet since they’ll continue cooking from residual heat.
Total Time
When you factor in both preparation and cooking steps, this recipe takes about 5-7 minutes from start to finish. You’ll spend about 2-3 minutes gathering ingredients and cracking eggs, plus another minute to heat the tallow and whisk everything together. The actual cooking process moves quickly, requiring just 2-3 minutes of your attention.
I love how this recipe fits perfectly into my busy morning routine. Even on hectic days, I can have a nourishing breakfast ready before my coffee’s done brewing. If you’re really pressed for time, you can shave off a minute by measuring your ingredients the night before. Just remember to let those eggs come to room temperature – it’s worth the extra few minutes for the creamiest results.
Yield
This recipe comfortably serves two adults as a hearty breakfast, or one person if you’re extra hungry after a morning workout. I’ve found that each serving provides about two large eggs per person, which delivers plenty of protein to kickstart your day.
You’ll get roughly 1½ cups of finished scrambled eggs from this recipe, and I like to divide it into two bowls for a satisfying portion size. If you’re following a strict carnivore diet, you can always double the recipe to make a more substantial meal. The tallow adds richness that makes these eggs incredibly filling, so you might be surprised at how satisfying even a single serving can be. For meal prep, I don’t recommend making larger batches since scrambled eggs are best enjoyed fresh.
Final Thoughts
Although mastering scrambled eggs in tallow might seem simple, I’ve discovered it’s truly an art form that’s worth perfecting. After years of experimenting, I can tell you that the combination of quality eggs and tallow creates a breakfast experience that’s both nourishing and delicious.
Frequently Asked Questions
Can I Substitute Duck Fat or Lard for the Beef Tallow?
You can definitely use duck fat or lard instead of tallow in your recipe. They’ll provide similar high-heat cooking properties and rich flavor, though each will impart its own unique taste.
Why Do My Scrambled Eggs Sometimes Develop a Greenish Tint?
If you’re seeing a greenish tint in your scrambled eggs, you’re likely cooking them too long or at too high heat. This reaction occurs between the iron and sulfur in your eggs.
Should I Use Pastured Eggs or Regular Store-Bought Eggs?
You’ll get better nutrition and flavor from pastured eggs since the hens eat a natural diet. While regular eggs work fine, pastured eggs typically have darker yolks and higher nutrient content.
Can I Make This Recipe Dairy-Free by Omitting the Cream?
Where there’s a will, there’s a way! You can definitely skip the cream – your eggs will still be delicious. Simply add an extra egg yolk instead for richness, or just omit it entirely.
How Do I Prevent the Eggs From Sticking to Stainless Steel Pans?
You’ll prevent sticking in stainless steel by preheating your pan completely, adding enough tallow, and testing the temperature with a water droplet – it should dance across the surface.
Conclusion
You’ll find this simple preparation method delivers consistently delicious results. The rich, buttery flavor of tallow transforms ordinary scrambled eggs into a satisfying carnivore meal that’s both nourishing and delectable. Whether you’re new to animal-based eating or a seasoned carnivore cook, this recipe proves that sometimes the simplest combinations create the most memorable dishes. Master this technique, and you’ll never look at breakfast the same way again.


