Introduction
When I first discovered bacon and egg cups, they completely changed my weekend breakfast game. I’ll never forget the moment I pulled that first batch from the oven – the aroma of crispy bacon and melted cheese filled my kitchen, making my mouth water instantly.
You’re going to love how simple these are to make, yet they look so impressive when served. Trust me, your family and friends will think you’ve been taking secret culinary classes! The beauty of these cups is that they combine everyone’s favorite breakfast ingredients into perfect, portable portions. Each bite delivers the satisfying crunch of bacon, creamy melted cheese, and a perfectly cooked egg. I’ve even started making extra batches to reheat throughout the week, and they’re just as delicious.
Recipe
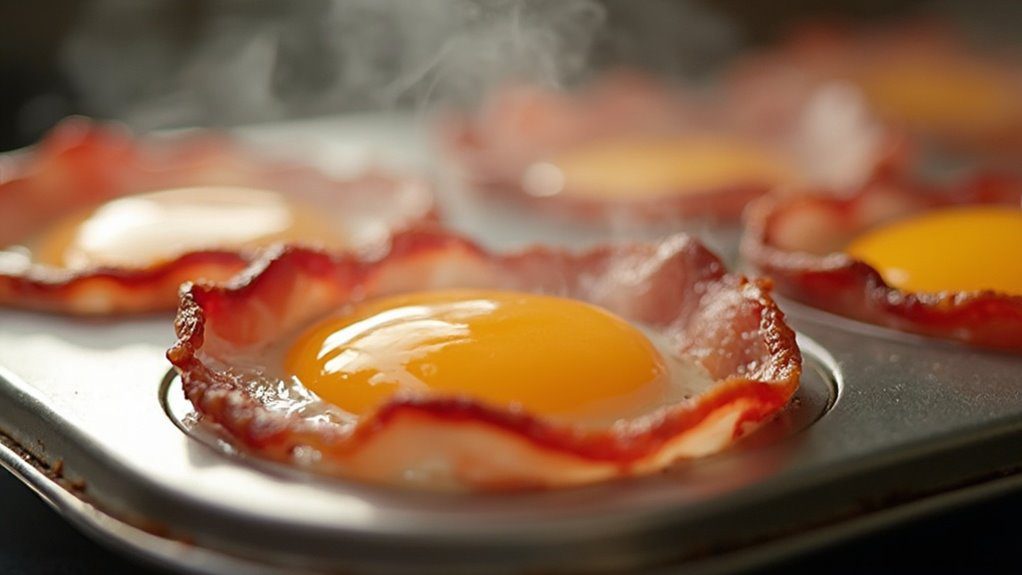
The classic bacon and egg cups combine crispy bacon with perfectly cooked eggs and melted cheese for a protein-packed breakfast. These individual portions baked in a muffin tin create an impressive presentation while delivering a satisfying morning meal that can be enjoyed at home or taken on the go.
This versatile recipe allows for customization based on personal preferences, from runny to firm yolks and mild to sharp cheese options. The natural cup shape formed by the bacon creates an edible vessel that holds the eggs and cheese, resulting in a mess-free breakfast option that’s perfect for busy mornings or weekend brunches.
- 6 slices bacon
- 6 large eggs
- 1 cup shredded cheddar cheese
- 1/4 teaspoon salt
- 1/4 teaspoon black pepper
- Cooking spray
Preheat oven to 375°F (190°C). Spray a 6-cup muffin tin with cooking spray. Wrap one slice of bacon around the inside of each muffin cup, creating a ring. Crack an egg into each bacon-lined cup, being careful not to break the yolk. Season each egg with salt and pepper, then top with shredded cheese. Bake for 15-20 minutes, until the bacon is crispy and eggs are cooked to desired doneness. Remove from oven and let rest for 5 minutes before carefully removing from the muffin tin.
For best results, bring eggs to room temperature before cooking to guarantee even cooking throughout. If the bacon slices are too thick, partially cook them in the microwave for 30 seconds to make them more pliable for wrapping. To prevent sticking, make sure the muffin tin is well-greased before adding the bacon. For fully cooked yolks, break them with a fork before adding cheese, and extend cooking time by 2-3 minutes.
Prep Time
Preparing bacon and egg cups requires minimal hands-on time, making them an ideal choice for busy home cooks. You’ll need just 10 minutes to assemble everything before popping them in the oven.
Start by getting your ingredients ready – it’s a real time-saver. I like to pre-measure my cheese and have my eggs at room temperature before I begin. Line your muffin tin with bacon strips while your oven preheats, which typically takes about 5 minutes. Then, crack your eggs into each cup, season them, and sprinkle with cheese. The whole prep process is straightforward – I can usually get a dozen cups ready in the time it takes my coffee to brew. Once they’re in the oven, you’re free to tackle other morning tasks.
Equipment needed
Making bacon and egg cups requires just a few basic kitchen tools that you’ll likely have on hand. Here’s what you’ll need to get started:
- A 6-cup or 12-cup muffin tin (non-stick works best)
- Measuring cups for the cheese
- A small bowl or ramekin for cracking eggs
- Cooking spray or oil brush
- Paper towels for draining excess grease
- Tongs for handling the hot bacon
- A spatula for removing the cups
I’ve found that using a dark, non-stick muffin tin helps create crispier bacon edges. You might also want to keep a baking sheet nearby to catch any drips during cooking. Trust me, this small investment in preventing oven messes is worth it! For easy cleanup, consider using silicone muffin cups as liners.
Basic Cooking Method and Time
Start your bacon and egg cup journey by preheating your oven to 375°F (190°C) – I’ve learned through trial and error that this temperature gives you the perfect balance of crispy bacon and properly set eggs.
Line your muffin cups with bacon strips, creating a nest-like shape that’ll cradle your eggs. I’ve found that gently pressing the bacon against the sides helps it stay in place. Crack a fresh egg into each bacon cup, and don’t forget to season with salt and pepper – these simple seasonings make a big difference. Sprinkle generous amounts of shredded cheese on top, then pop them in the oven for 15-20 minutes. You’ll know they’re done when the bacon’s crispy and the eggs have set to your liking.
Cooking Steps
You’ll want to start by lining each muffin cup with foil and carefully wrapping bacon slices around the sides to form perfect little cups. Next, crack a fresh egg into each bacon cup and sprinkle with your favorite seasonings and a generous helping of shredded cheese. Once they’re done baking to crispy perfection, let them cool for about 5 minutes before gently removing them from the tin, ensuring they keep their shape.
Step 1. Lining Muffin Tin With Foil
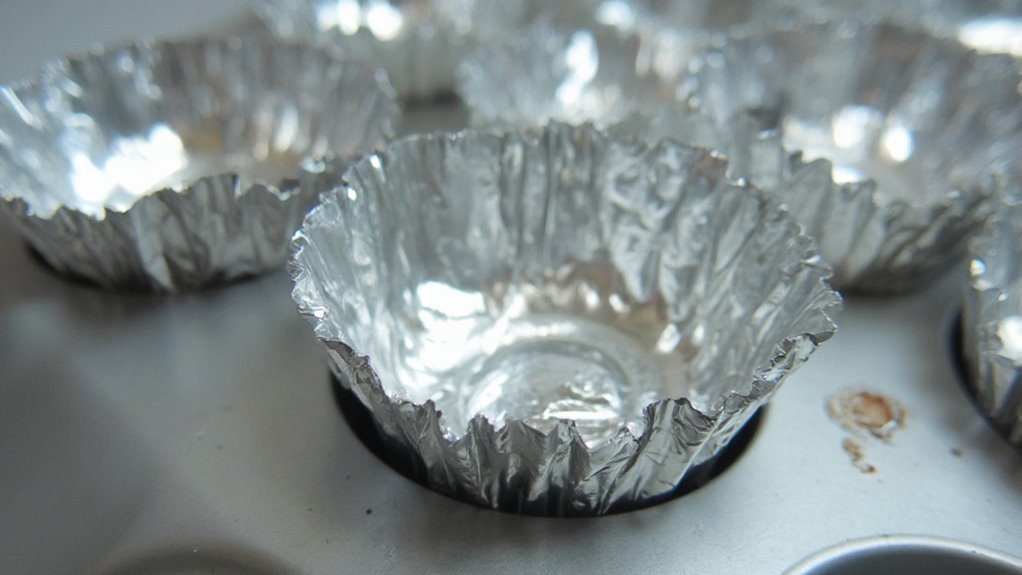
Proper preparation of your muffin tin prevents the bacon and eggs from sticking during cooking. For best results, you’ll want to line each muffin cup with foil, creating a slight overhang around the edges. The foil acts as a protective barrier and makes cleanup much easier.
I’ve learned through trial and error that spraying the foil with non-stick cooking spray before adding the bacon is essential. Make sure to press the foil firmly against the sides of each cup, smoothing out any wrinkles that could trap the eggs. The overhang you’ve created will help you lift the finished cups out cleanly. When I’m feeling extra cautious, I’ll double-layer the foil – it’s a trick I picked up after a few messy attempts with just single layers.
Step 2. Shape Bacon Into Cups

With your foil-lined muffin tin ready to go, shaping the bacon into perfect cups will give your breakfast that professional touch. Take each bacon strip and gently wrap it around the inside of each muffin cup, making sure it covers both the bottom and sides. You’ll want to press the bacon against the foil, creating that distinctive cup shape.
I’ve found that slightly overlapping the bacon at the bottom prevents any egg from leaking through later. If your bacon strips are too long, let them extend slightly above the rim – they’ll shrink during cooking. For extra stability, you can create a crisscross pattern with two half-strips of bacon per cup. Just remember not to stretch the bacon too thin, or it might tear during baking.
Step 3. Crack Eggs Into Bacon
Once your bacon cups have taken shape, cracking the eggs requires a steady hand and careful technique. I’ve found that gently tapping each egg on a flat surface works better than the edge of a bowl, creating a cleaner break. Carefully separate the shell over each bacon cup, letting the egg settle naturally into the center.
Don’t worry if some egg white spills over – that’s totally normal! You’ll want to crack one egg per cup, and I recommend keeping the yolks intact unless you prefer them fully cooked. If you’re having trouble with shell pieces, try cracking the eggs into a small bowl first, then sliding them into the bacon cups. This extra step has saved me from many shell-fishing expeditions in my early cooking days.
Step 4. Add Seasoning and Cheese

After your eggs are nestled in their bacon beds, it’s time to add the magic touch of seasonings and cheese. I always start with a pinch of salt and fresh cracked black pepper – you’ll want to season each egg individually for the best flavor distribution. Next, grab your shredded cheddar cheese and sprinkle about 2-3 tablespoons over each egg. Don’t skimp here – the melted cheese creates an irresistible golden crust that’ll make your breakfast extra special.
For extra flavor, you can experiment with different cheese varieties. I’ve found that sharp cheddar gives the best punch, but mozzarella creates an amazing cheese pull. Sometimes I’ll even mix in some finely chopped herbs like chives or parsley before adding the cheese for an extra burst of flavor.
Step 5. Cool Before Serving

The moment your bacon and egg cups emerge golden and sizzling from the oven, you’ll need to resist diving right in! These delicious cups need about 5 minutes to cool and set properly, which will make them much easier to remove from the muffin tin.
While you’re waiting, grab a butter knife to gently loosen the edges of each cup. You’ll notice the cheese starting to firm up and the bacon becoming more stable as it cools. Once the 5 minutes are up, carefully lift each cup out and transfer them to a serving plate. If you’re meal prepping, let them cool completely before storing them in an airtight container. Trust me, this short cooling period makes all the difference between perfectly formed cups and ones that fall apart!
Customization Options
Ready to make these bacon and egg cups your own? There are so many delicious ways to customize this breakfast favorite. You can swap regular bacon for turkey bacon or even prosciutto for a more sophisticated twist. I love adding diced bell peppers, onions, or mushrooms before cracking in the eggs.
The cheese options are endless too. Try mixing it up with pepper jack for some heat, Swiss for a nutty flavor, or crumbled feta for Mediterranean flair. You can even sprinkle in fresh herbs like chives, basil, or parsley. For a heartier version, add a sprinkle of cooked quinoa or diced potatoes before the egg. My family’s favorite variation includes spinach and goat cheese – it’s like a mini breakfast quiche!
Ingredients list (with precise measurements)
Making perfect bacon and egg cups starts with gathering these essential ingredients you’ll need to serve 6 portions:
- 6 slices of regular-cut bacon (not thick-cut, as it won’t shape as easily)
- 6 large eggs, brought to room temperature
- 1 cup shredded cheddar cheese (medium or sharp)
- 1/4 teaspoon salt
- 1/4 teaspoon freshly ground black pepper
- Cooking spray for the muffin tin
I’ve found that medium or sharp cheddar works best, but you can also experiment with different cheese varieties. Room temperature eggs are vital – I learned this the hard way when cold eggs caused uneven cooking. While regular bacon is recommended, turkey bacon can work too, though it won’t create quite as sturdy a cup structure.
Storage Information
Properly stored bacon and egg cups can stay fresh for several days, making them perfect for busy weekday breakfasts. You’ll want to let them cool completely before placing them in an airtight container. They’ll keep in your refrigerator for up to 4 days.
When you’re ready to enjoy your bacon and egg cups, you’ve got two reheating options. Pop them in the microwave for 30-45 seconds if you’re in a hurry, or reheat them in a 350°F oven for about 10 minutes to restore that crispy bacon texture. I’ve found that the oven method gives the best results, but both work just fine. Just don’t freeze these cups – the egg texture becomes rubbery, and the bacon loses its crunch.
Health Benefits or Special Features
While many breakfast options leave you hungry an hour later, bacon and egg cups provide lasting energy through their impressive nutritional profile. You’ll get roughly 20 grams of protein per cup, which helps maintain muscle mass and keeps you satisfied throughout the morning. Plus, they’re naturally low in carbohydrates, making them perfect if you’re watching your carb intake.
What I love about these cups is their versatility. You can customize them with different cheeses, add vegetables like spinach or mushrooms, or spice things up with hot sauce. They’re also great for meal prep – just make a batch on Sunday, and you’ll have a protein-packed breakfast ready to grab each morning. If you’re following a keto or gluten-free diet, these cups fit perfectly into your meal plan.
Prep Time
The total prep time for bacon and egg cups takes just 10 minutes of hands-on work. You’ll spend most of that time wrapping the bacon strips around your muffin tin cups and cracking eggs. I’ve found that organizing your ingredients beforehand makes the process even smoother.
Here’s a quick breakdown of your prep:
- Lining muffin tin with bacon: 5 minutes
- Cracking and seasoning eggs: 3 minutes
- Adding cheese topping: 2 minutes
The actual cooking time is 15-20 minutes, but that’s all hands-off while your oven does the work. Trust me, you can easily prepare these before jumping in the shower – they’ll be ready by the time you’re dressed and ready to start your day.
Cook Time
Getting your bacon and egg cups perfectly cooked takes exactly 15-20 minutes at 375°F (190°C). You’ll know they’re done when the bacon turns crispy and golden around the edges, while the egg whites are fully set. I’ve found that keeping a close eye on them after the 15-minute mark is vital.
If you’re like me and prefer your yolks a bit runny, stick to 15 minutes. For firmer yolks, let them go the full 20. Keep in mind that the eggs will continue cooking slightly even after you’ve taken them out of the oven. I always set my timer for 15 minutes and check every 2 minutes after that until they reach that perfect doneness. Trust me, once you nail the timing, you’ll get consistently delicious results every time.
Total Time
Making bacon and egg cups requires about 30 minutes from start to finish, which includes 10 minutes of prep time plus our 15-20 minutes of cooking time. You’ll want to factor in an additional 5 minutes for cooling, but don’t worry – you can use this time to brew your coffee or set the table.
When I’m meal prepping for the week, I’ll often double the recipe since the total time stays nearly the same. The only extra minutes you’ll need are for wrapping more bacon cups and cracking additional eggs. If you’re reheating these throughout the week, they’ll only need about 30 seconds in the microwave to warm up, making your future breakfast prep practically non-existent.
Yield
One standard recipe yields six delicious bacon and egg cups, perfect for feeding a small family or meal prepping for yourself. I’ve found that these portions work great when you’re cooking for a couple of people, with enough leftovers for the next day.
You’ll get the most bang for your buck with this yield since each muffin cup perfectly fits one slice of bacon and one egg. If you’re hosting brunch, I’d recommend doubling the recipe – trust me, these disappear quickly! The best part is that you can easily scale up by using multiple muffin tins. Just remember to keep an eye on the cooking time when you’re making larger batches, as your oven’s heat distribution might vary.
Final Thoughts
Whether you’re looking for a show-stopping breakfast or a protein-packed meal prep option, these bacon and egg cups won’t disappoint. You’ll love how versatile they are – perfect for busy weekday mornings, weekend brunches, or even as a grab-and-go snack. I’ve found they’re always a hit at potlucks and family gatherings too.
Don’t be afraid to experiment with different cheeses or add some extra ingredients like diced peppers or herbs. The beauty of this recipe is its flexibility. Just remember to keep an eye on them during the last few minutes of baking, as bacon can quickly go from perfectly crispy to overdone. Once you’ve mastered the basic recipe, you’ll find yourself making these delicious cups again and again.
Frequently Asked Questions
Can I Use Turkey Bacon Instead of Regular Bacon?
You can use turkey bacon, but it won’t create the same crispy cup shape. It’ll be flatter and less sturdy, so you’ll need to grease your muffin tin well.
Why Are My Bacon Cups Not Staying Crispy After Cooling?
While it’s frustrating, your bacon’s losing crispiness because of trapped moisture. You’ll keep them crunchier by letting them cool on a wire rack instead of in the muffin tin.
How Do I Prevent the Eggs From Sticking to the Muffin Tin?
You’ll need to grease each muffin cup well with cooking spray or butter before adding bacon. Using non-stick muffin tins and letting cups cool slightly before removal also prevents sticking.
Can I Freeze These Bacon and Egg Cups Raw?
Like playing with fire, freezing raw eggs leads to disaster. You shouldn’t freeze these uncooked – raw eggs expand and crystallize, while bacon’s moisture content changes. Instead, cook first, then freeze.
What’s the Best Way to Reheat Without Making the Bacon Rubbery?
You’ll get the crispiest results by reheating in an air fryer at 350°F for 3-4 minutes or in a regular oven at 350°F for 5-7 minutes until they’re heated through.
Conclusion
You’ll find these bacon and egg cups are both rustic and refined, offering homestyle comfort with an elegant presentation. While they’re incredibly simple to prepare, they’ll make you feel like a gourmet chef. Store them in the fridge for busy mornings or serve them fresh for weekend guests – either way, you’re getting restaurant-quality results from your own kitchen. They’re proof that sometimes the tastiest dishes come in small packages.


