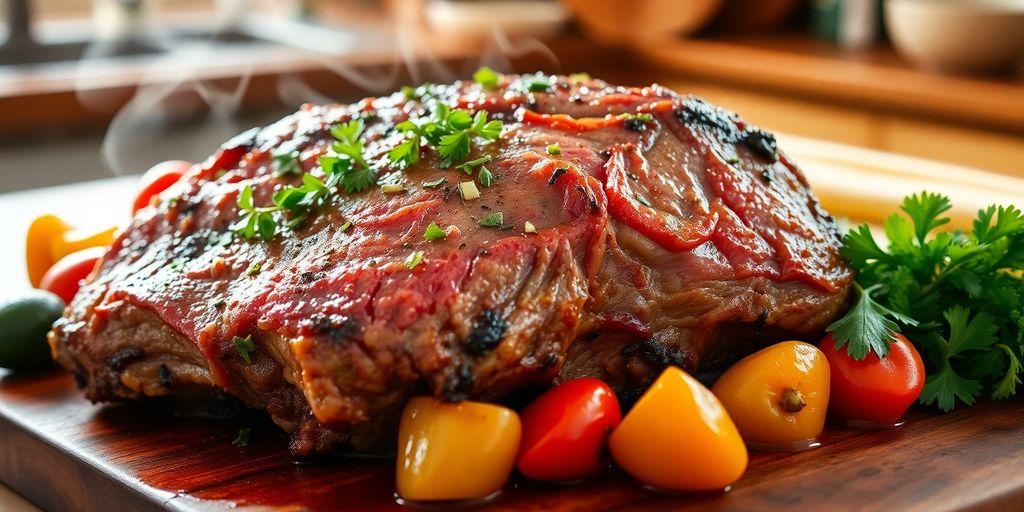
Cooking a boneless beef chuck roast can seem a bit daunting, but it doesn’t have to be. With the right techniques and ingredients, you can create a mouthwatering dish that’s perfect for any occasion. This guide will walk you through everything you need to know, from picking the best cut of meat to serving it up with delicious sides. Let’s dive into the savory secrets of cooking a boneless beef chuck roast!
Key Takeaways
- Choose a well-marbled boneless beef chuck roast for the best flavor and tenderness.
- Searing the roast before cooking locks in juices and adds a rich flavor.
- Use low-sodium beef broth to control saltiness in your dish.
- Don’t skip the gravy-making step; it’s essential for enhancing the dish’s flavor.
- Avoid adding too much liquid; the roast will release its own juices during cooking.
Choosing The Right Boneless Beef Chuck Roast
Understanding Marbling and Texture
When it comes to a boneless beef chuck roast, marbling is your best friend. Those little flecks of fat running through the meat? That’s flavor waiting to happen. The more marbling, the more tender and flavorful your roast will be. Look for a roast with even distribution of fat throughout the muscle. The texture should feel firm, not mushy. Avoid roasts that look pale or have excessive surface moisture.
Selecting the Perfect Size
Size matters, especially when planning a meal. A good rule of thumb is about 1/2 pound of uncooked chuck roast per person. So, for a family of four, aim for a 2-pound roast. Consider these points when deciding:
- Number of people you’re feeding.
- Whether you want leftovers (and who doesn’t love leftover roast?).
- The size of your cooking vessel (Dutch oven, slow cooker, etc.).
Don’t be afraid to go a little bigger. Leftover chuck roast is fantastic in sandwiches, tacos, or even as a topping for salads. Plus, it freezes well, so you can enjoy it later.
Identifying Quality Cuts
Not all chuck roasts are created equal. Here’s what to look for to ensure you’re getting a quality cut. You want a boneless beef chuck roast that’s thick cut and not rolled and tied with a string. The color should be a rich, deep red. Avoid roasts with brown spots or a dull appearance. Here’s a quick guide:
| Characteristic | Ideal | Avoid |
|---|---|---|
| Color | Deep red | Brown spots, dull color |
| Marbling | Evenly distributed flecks of fat | Lack of marbling, large clumps of fat |
| Texture | Firm to the touch | Mushy, slimy |
| Thickness | Consistent thickness throughout the cut | Uneven thickness |
Also, don’t hesitate to ask your butcher for advice. They can help you select the best roast for your needs and even trim it for you if necessary.
Essential Ingredients For A Flavorful Roast
High Smoking Point Oils
When you’re getting ready to sear that chuck roast, don’t just grab any old oil. You need something that can handle the heat. Oils with high smoking points are key because you want a good sear without the oil burning and imparting a nasty flavor. Think vegetable oil, canola oil, or even avocado oil. Olive oil? Maybe not the best choice here; it tends to smoke at lower temperatures. I usually go for vegetable oil because it’s what I have on hand.
Seasonings That Enhance Flavor
Okay, this is where the magic happens. You can’t just throw a roast in the oven with salt and pepper and expect amazing results. You need layers of flavor! I like to start with a good base of kosher salt and freshly ground black pepper. Then, I get creative. Garlic powder, onion powder, and smoked paprika are staples in my kitchen. Sometimes I’ll throw in some dried thyme or rosemary for an earthy note. Don’t be afraid to experiment! You can even try a Chinese 5 spice blend for something different. Here’s a basic blend I often use:
| Spice | Amount |
|---|---|
| Kosher Salt | 2 teaspoons |
| Black Pepper | 1 teaspoon |
| Garlic Powder | 1 teaspoon |
| Onion Powder | 1 teaspoon |
| Smoked Paprika | 1/2 teaspoon |
The Role of Beef Broth
Beef broth is more than just liquid; it’s a flavor carrier. It helps keep the roast moist during cooking, and it infuses the meat with even more beefy goodness. I always opt for low-sodium beef broth so I can control the saltiness of the final dish. You can also use red wine for deglazing the pan after searing.
I’ve found that adding a splash of Worcestershire sauce to the beef broth really deepens the flavor. It adds a savory umami element that complements the beef perfectly. Don’t overdo it, though; a little goes a long way.
Techniques For Searing Your Chuck Roast
Why Searing Is Important
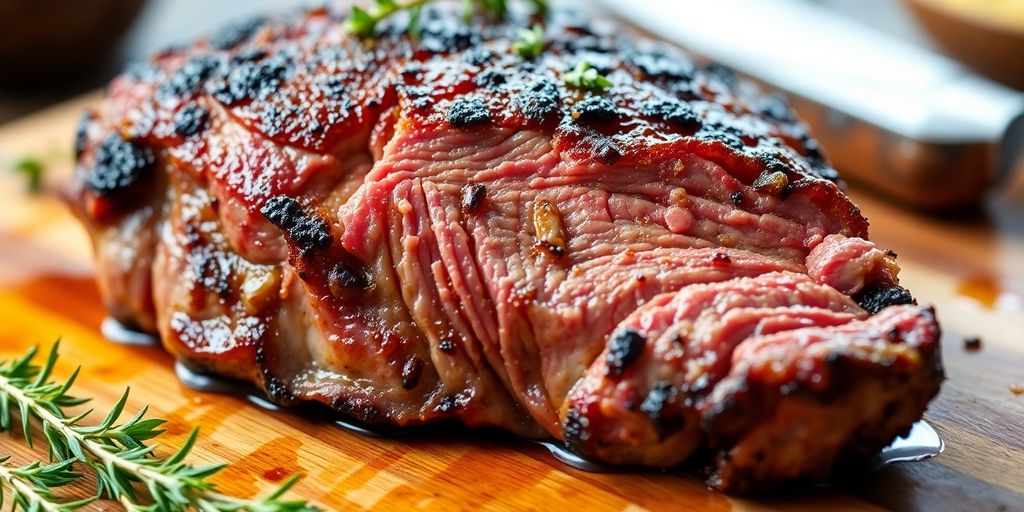
Searing a chuck roast isn’t just for looks; it’s a flavor bomb waiting to happen. The Maillard reaction, which occurs when the meat’s surface is exposed to high heat, creates hundreds of flavor compounds that you simply can’t get any other way. Think of it as building a foundation of deliciousness before the long, slow cooking process even begins. Plus, searing helps to retain moisture, keeping your roast juicy and tender.
How To Properly Sear
Alright, let’s get down to business. Searing isn’t complicated, but it does require a little attention to detail. Here’s the lowdown:
- Pat the roast dry: Excess moisture is the enemy of a good sear. Use paper towels to thoroughly dry the surface of the roast.
- Season generously: Don’t be shy with the salt and pepper. Season all sides of the roast evenly.
- Get your pan screaming hot: Use a heavy-bottomed skillet, preferably cast iron. Add a high smoking point oils like vegetable or canola oil. The oil should shimmer and almost smoke.
- Sear on all sides: Place the roast in the hot pan and sear for 3-4 minutes per side, until a deep, golden-brown crust forms. Use tongs to turn the roast.
- Don’t overcrowd the pan: If your roast is too big for your skillet, sear it in batches to maintain the high heat.
Tips For Achieving A Golden Crust
Getting that perfect crust can be tricky, but here are a few tips to help you nail it:
- Use the right pan: Cast iron is your best friend for searing. It retains heat well and distributes it evenly.
- Don’t move the roast too soon: Let the roast sit undisturbed in the pan for a few minutes per side to allow the crust to form.
- Avoid using olive oil: It has a lower smoke point and can burn easily, resulting in a bitter flavor. Stick to high smoke point oils.
- Consider adding aromatics: Throw in some garlic cloves or sprigs of rosemary to the pan while searing for extra flavor.
Searing is a game-changer. It’s the difference between a bland, forgettable roast and a mouthwatering masterpiece. Trust me, the extra few minutes are well worth the effort. It’s like adding a secret ingredient that everyone will notice, but no one can quite put their finger on. It’s just that good.
Cooking Methods For Boneless Beef Chuck Roast
Oven Roasting Techniques
Oven roasting is a classic way to cook a boneless beef chuck roast. It provides even heat distribution, resulting in a tender and flavorful roast.
- Preheat your oven to 325°F (160°C).
- Place the seared roast in a Dutch oven or roasting pan.
- Add beef broth or other liquids to about halfway up the side of the roast.
- Cover tightly and cook for 3-4 hours, or until fork-tender.
The key to a perfect oven-roasted chuck roast is low and slow cooking. This allows the connective tissues to break down, resulting in a melt-in-your-mouth texture. Don’t rush the process; patience is key.
Slow Cooking Options
Slow cooking is another excellent method for preparing a boneless beef chuck roast. It’s incredibly convenient and results in a very tender roast. You can even prepare easy slow cooker potatoes as a side.
- Place the seared roast in a slow cooker.
- Add beef broth, vegetables, and seasonings.
- Cook on low for 8-10 hours, or on high for 4-6 hours.
- Shred the roast with two forks before serving.
Pressure Cooking Benefits
Pressure cooking is the fastest way to cook a boneless beef chuck roast. It’s perfect for busy weeknights when you want a delicious meal without spending hours in the kitchen. The high pressure helps to tenderize the meat quickly. Here’s a quick guide:
| Step | Action |
|---|---|
| 1 | Sear the roast on all sides. |
| 2 | Place in the pressure cooker. |
| 3 | Add beef broth and seasonings. |
| 4 | Cook on high pressure for 60-75 minutes. |
| 5 | Allow for natural pressure release. |
Creating A Savory Gravy From Your Roast
Collecting Juices For Gravy
Okay, so you’ve got this amazing roast, and now you want gravy, right? The first step is getting all those delicious juices from the pan. Don’t just toss them! That’s liquid gold. What I usually do is carefully pour the juices through a fine-mesh sieve into a fat separator. If you don’t have one of those fancy gadgets, no biggie. You can use a freezer bag. Let the juices settle, and the fat will rise to the top. Snip a tiny hole in the corner of the bag and carefully drain the juice, leaving the fat behind. You want to end up with about two cups of liquid for a good amount of gravy. This is the base of your beef-flavored gravy, so make sure it’s flavorful!
Thickening Techniques
Alright, now for the magic. You’ve got your juices, and now you need to thicken them into a luscious gravy. There are a few ways to do this, but my go-to is a roux. It’s simple and reliable. Here’s how I do it:
- Melt about 4 tablespoons of butter in a saucepan over medium heat.
- Whisk in 1/4 cup of flour and cook, stirring constantly, for about 1-2 minutes. You want it to be lightly browned, but not burnt.
- Slowly whisk in your reserved roast juices, making sure to get rid of any lumps.
- Bring the gravy to a simmer and cook until it thickens to your liking. This usually takes about 5-10 minutes.
Another option is a cornstarch slurry. Mix a tablespoon of cornstarch with two tablespoons of cold water, then whisk it into the simmering juices. This will thicken the gravy quickly, but be careful not to add too much, or it can get gloopy. You can also use arrowroot powder if you’re avoiding gluten.
Flavor Enhancements For Gravy
So, you’ve got your gravy thickened, but maybe it’s missing that something. Here’s where you can really make it your own. I like to add a few things to boost the flavor. A splash of Worcestershire sauce adds depth. A little bit of Dijon mustard gives it a nice tang. And a pinch of dried thyme or rosemary complements the beef perfectly. Don’t be afraid to experiment! Taste as you go and adjust the seasonings to your liking. Remember, a little salt and pepper can go a long way. You can also add a bay leaf for extra flavor.
Sometimes, I even throw in a crumbled beef bouillon cube for an extra boost of beefy flavor. Just be careful with the salt, since bouillon can be quite salty already. The key is to taste and adjust until you get it just right. Gravy is all about personal preference, so have fun with it!
Serving Suggestions For Boneless Beef Chuck Roast
Pairing With Side Dishes
Okay, so you’ve got this amazing, tender boneless beef chuck roast. What do you serve with it? The possibilities are pretty much endless, but here are a few ideas to get you started. First off, you can’t go wrong with classic mashed potatoes. They’re creamy, comforting, and soak up all that delicious gravy. Roasted vegetables are another great option. Think carrots, parsnips, and potatoes all tossed with herbs and olive oil. For something a little different, try serving your roast with a side of creamy polenta or easy slow cooker potatoes. It’s unexpected and adds a nice textural contrast. Don’t forget a simple green salad to balance out the richness of the meat.
Presentation Tips
Presentation matters, even if you’re just serving dinner to your family. A beautifully presented roast can make the meal feel extra special. Here are a few tips to make your chuck roast look its best:
- Let the roast rest for at least 15 minutes before slicing. This helps the juices redistribute, resulting in a more tender and flavorful roast.
- Slice the roast against the grain. This makes it easier to chew.
- Arrange the slices on a platter and drizzle with gravy. Garnish with fresh herbs, such as parsley or thyme.
- Serve with your chosen side dishes in separate bowls or on individual plates.
Leftover Ideas
So, you’ve cooked a big chuck roast, and now you have leftovers. Don’t let them go to waste! There are tons of things you can do with leftover roast beef. Here are a few ideas:
- Make sandwiches. Thinly sliced roast beef on crusty bread with horseradish mayo is a classic.
- Shred the beef and use it in tacos or burritos. Add some salsa, guacamole, and your favorite toppings.
- Add the beef to soups or stews. It’s a great way to add protein and flavor.
- Make a shepherd’s pie. Top the beef with mashed potatoes and bake until golden brown.
One of my favorite things to do with leftover chuck roast is to make a hearty beef stew. I just chop up the beef, add it to a pot with some vegetables, broth, and seasonings, and let it simmer until everything is tender and flavorful. It’s the perfect comfort food on a cold day.
Common Mistakes To Avoid When Cooking Chuck Roast
Overcooking or Undercooking
It’s easy to mess up the doneness of a chuck roast. The biggest mistake is not using a meat thermometer. You really need one! Aim for an internal temperature of around 203°F (95°C) for that fall-apart tenderness. If you pull it out too early, it’ll be tough. If you cook it too long, it can dry out, even though it’s a pretty forgiving cut.
Skipping the Searing Step
I know, searing can seem like an extra step, but trust me, it’s worth it. If you don’t sear roast before cooking, you’re missing out on a ton of flavor. That browned crust is where all the good stuff is. Plus, it helps to seal in the juices, keeping the roast nice and moist. Just make sure your pan is hot and use an oil with a high smoking point, like vegetable oil. Don’t overcrowd the pan, or you’ll end up steaming the meat instead of searing it.
Using Too Much Liquid
It’s tempting to drown the roast in liquid, thinking it will keep it moist, but that’s not the way to go. Too much liquid can actually make the roast taste bland and kind of boiled. You want enough liquid to keep it from drying out, but not so much that it’s swimming. Usually, a couple of cups of beef broth is plenty. You can always add more later if needed. Also, don’t forget to check the liquid level halfway through cooking and add broth if necessary.
I’ve made this mistake before, adding way too much liquid. The roast ended up tasting like pot roast soup, which isn’t exactly what I was going for. Now I’m much more careful about measuring the liquid and checking it during cooking.
Wrapping It Up
So there you have it! Cooking a boneless beef chuck roast isn’t as tricky as it seems. With the right cut of meat, some good seasoning, and a bit of patience, you can whip up a meal that’s sure to impress. Just remember to sear that roast for maximum flavor and let it cook low and slow. Trust me, the end result will be a tender, juicy roast that practically falls apart. Whether it’s a Sunday dinner or a special occasion, this dish is a winner. Give it a shot, and enjoy the deliciousness!
Frequently Asked Questions
What is the best cut of beef for a pot roast?
The best cut of beef for a pot roast is a boneless chuck roast. It has a lot of fat and flavor, making it very tender when cooked.
Do I need to sear the roast before cooking it?
Yes, searing the roast is important because it adds a lot of flavor and helps keep the meat juicy during cooking.
What type of oil should I use for searing?
You should use vegetable oil because it has a high smoking point. Avoid using olive oil.
How long should I cook a boneless chuck roast?
Cook the roast for several hours at a low temperature until it is very tender. It usually takes about 3 to 5 hours.
Can I use a slow cooker for a chuck roast?
Yes, a slow cooker is a great option for cooking a chuck roast. It allows the meat to become very tender over a long cooking time.
What can I do with leftovers from the roast?
Leftovers can be used in sandwiches, tacos, or mixed into soups and stews for a delicious meal.


