Introduction
Everyone deserves a treat that’s both delicious and nutritious, and I’ve found the perfect solution in this Chocolate Protein Cottage Cheese Mousse. After years of trying different healthy desserts, I can tell you this recipe hits all the right notes – creamy, chocolatey, and protein-packed.
You’ll love how this mousse transforms simple cottage cheese into a decadent treat that feels like you’re indulging, but you’re actually fueling your body. I discovered this recipe when looking for post-workout snacks that wouldn’t undo my hard work at the gym. The best part? It takes just 10 minutes to whip up, and you can customize it with your favorite toppings. Whether you’re craving dessert or need a protein boost, this mousse has got you covered.
Recipe

Chocolate Protein Cottage Cheese Mousse transforms simple ingredients into a luxurious, protein-rich dessert that satisfies sweet cravings without compromising nutrition goals. This guilt-free treat combines the smoothness of cottage cheese with rich chocolate flavors, creating a creamy mousse that’s perfect for health-conscious individuals.
This versatile dessert requires minimal preparation time and basic kitchen equipment, making it an ideal option for busy schedules. Whether enjoyed as a post-workout refuel, healthy breakfast, or nutritious dessert, this mousse delivers both satisfaction and sustenance while keeping calories in check.
- 1 cup low-fat cottage cheese
- 1 scoop chocolate protein powder
- 1 tablespoon cocoa powder
- 2 tablespoons honey
- 1/2 teaspoon vanilla extract
Add cottage cheese, chocolate protein powder, cocoa powder, honey, and vanilla extract to a food processor or blender. Process on high speed for 2-3 minutes until the mixture becomes completely smooth and creamy with no visible cottage cheese curds. Transfer the mixture into serving bowls and refrigerate for at least 30 minutes to allow the mousse to set and develop a thicker consistency.
For best texture, drain excess liquid from the cottage cheese before blending. The mousse can be prepared up to three days in advance and stored in an airtight container in the refrigerator. If the mixture becomes too thick after refrigeration, blend with a small splash of milk to reach desired consistency. Consider garnishing with fresh berries, crushed nuts, or dark chocolate shavings just before serving for added texture and visual appeal.
Prep Time
While many dessert recipes demand hours in the kitchen, this protein-packed chocolate mousse comes together in just 10 minutes of active prep time. You’ll spend about 2-3 minutes gathering your ingredients and another 2-3 minutes measuring them out. The actual blending process takes just 2-3 minutes to achieve that perfectly smooth consistency.
After you’ve blended everything, you’ll need just a minute to transfer the mixture to your serving bowls. While there’s a 30-minute waiting period for the mousse to set in the fridge, it’s completely hands-off time. That means you can go about your day, squeeze in a quick workout, or prepare the rest of your meal while your protein-rich dessert chills to perfection.
Equipment needed
Making this quick and dreamy mousse requires just a few basic tools you likely already have in your kitchen. You’ll need a reliable food processor or high-speed blender to achieve that silky-smooth texture we’re aiming for. I prefer using my food processor since it handles thick mixtures better.
Essential equipment includes:
- Food processor or blender
- Measuring spoons
- Measuring cups
- Rubber spatula
- Storage containers or serving bowls
- Fine-mesh strainer (optional, for draining cottage cheese)
Don’t worry if you’ve only got a basic blender – it’ll work just fine, though you might need to blend a bit longer. I’ve made this recipe countless times with both types of equipment, and they’ve given me equally delicious results.
Basic Cooking Method and Time
Creating this protein-packed mousse couldn’t be simpler or faster – you’ll have it ready in under 10 minutes of active prep time. You’ll start by adding your cottage cheese, protein powder, cocoa powder, honey, and vanilla extract to your food processor or blender. Then, blend everything on high speed for 2-3 minutes until you’ve got a silky-smooth consistency without any lumps.
Once it’s blended to perfection, just transfer your mousse to serving bowls. Pop them in the refrigerator for at least 30 minutes to let the mixture set and thicken up. That’s all there is to it! You don’t need any cooking skills or special techniques – just blend, chill, and enjoy your protein-rich chocolate treat.
Cooking Steps
The detailed steps for this protein-rich dessert break down into a simple process you’ll master in no time. Here’s what you’ll do:
- Start by draining your cottage cheese well to remove excess liquid – this guarantees the perfect texture.
- Add your cottage cheese, protein powder, cocoa powder, honey, and vanilla extract to your food processor or blender.
- Blend everything on high speed for 2-3 minutes, making sure to scrape down the sides occasionally. You’re looking for a completely smooth consistency without any lumps.
- Pour the mixture into your serving bowls – I like using clear glass ones to show off the chocolatey goodness.
- Pop them in the fridge for at least 30 minutes to set. Trust me, the wait is worth it for that perfect mousse texture!
Step 1. Gather Ingredients for Blending
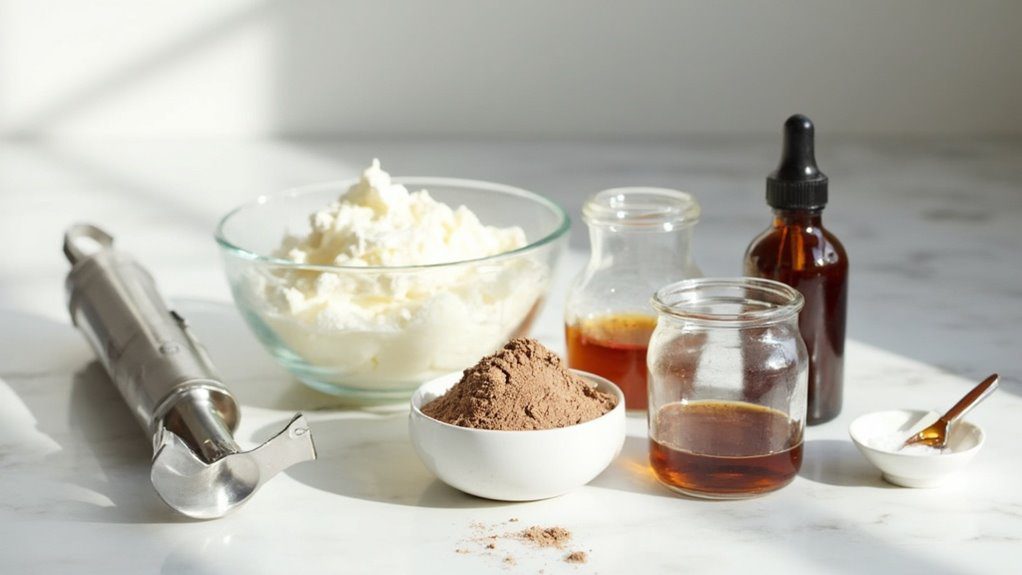
Before you start blending your protein-packed chocolate mousse, let’s round up everything you’ll need on your counter. You’ll want to grab a cup of low-fat cottage cheese – make sure it’s well-drained to avoid a runny texture. Next, reach for your favorite chocolate protein powder and a tablespoon of cocoa powder for that rich, chocolate intensity.
Don’t forget two tablespoons of honey to add natural sweetness, and half a teaspoon of vanilla extract for depth. I always measure these out in advance, which makes the blending process so much smoother. While you’re at it, pull out your food processor or blender, plus measuring spoons and a spatula. Trust me, having everything ready to go will make this healthy treat come together in no time!
Step 2. Blend Until Silky Smooth
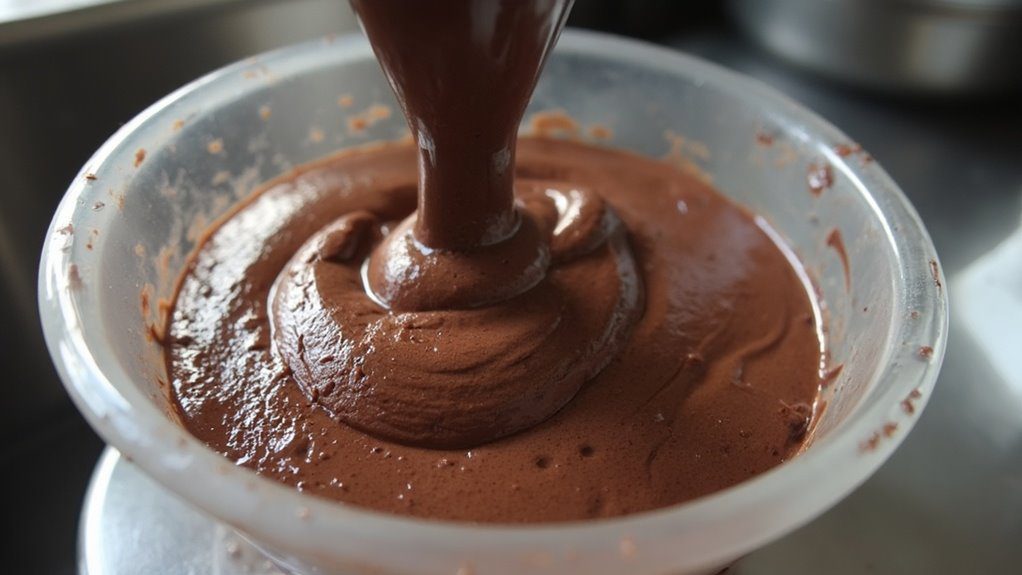
Now that your ingredients are measured and ready, let’s transform them into silky-smooth chocolate heaven! Add your cottage cheese, protein powder, cocoa powder, honey, and vanilla extract to your food processor or blender.
You’ll want to blend on high speed for 2-3 minutes, stopping once or twice to scrape down the sides. Don’t rush this step – it’s essential for achieving that dreamy, mousse-like texture you’re after. You’ll know you’re done when there’s absolutely no graininess from the cottage cheese, and the mixture looks completely uniform and creamy. If you spot any lumps, keep blending until they disappear. Trust me, your patience here will pay off with the smoothest, most decadent-tasting protein mousse you’ve ever had.
Step 3. Pour Into Serving Dishes
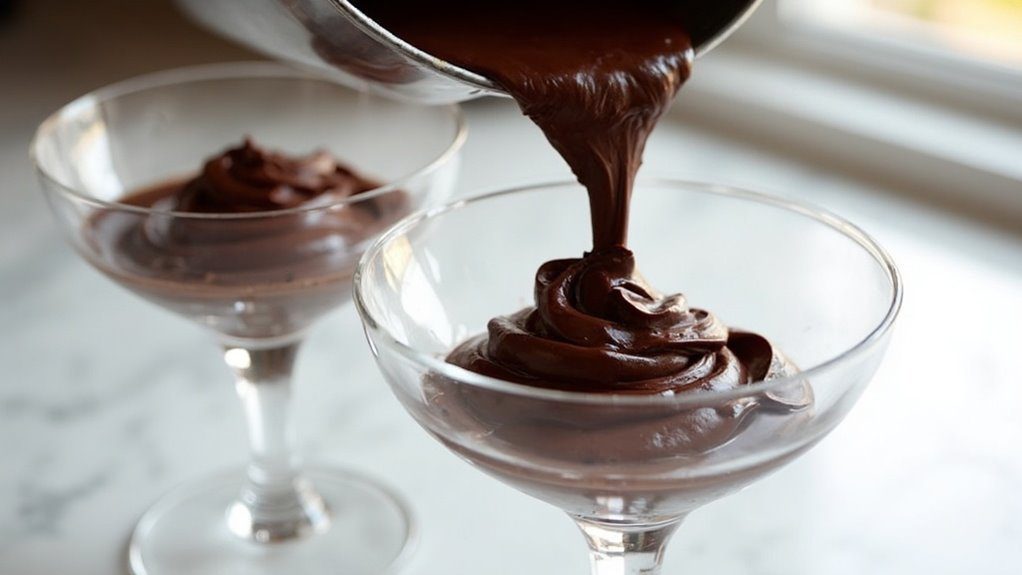
Gently pour your silky chocolate mixture into individual serving dishes, making sure to divide it evenly for the best presentation. If you’re planning to serve guests, clear glass dessert bowls work beautifully to show off the mousse’s rich, chocolatey layers. I like to use a rubber spatula to scrape down every bit of goodness from the blender – trust me, you won’t want to waste any of this protein-packed treat!
Leave about half an inch of space at the top of each dish to allow room for optional toppings later. You’ll also want to smooth the surface with the back of a spoon to create an even, professional-looking finish. Once you’ve portioned everything out, cover each dish with plastic wrap, making sure it touches the surface to prevent a skin from forming.
Step 4. Refrigerate for Thirty Minutes
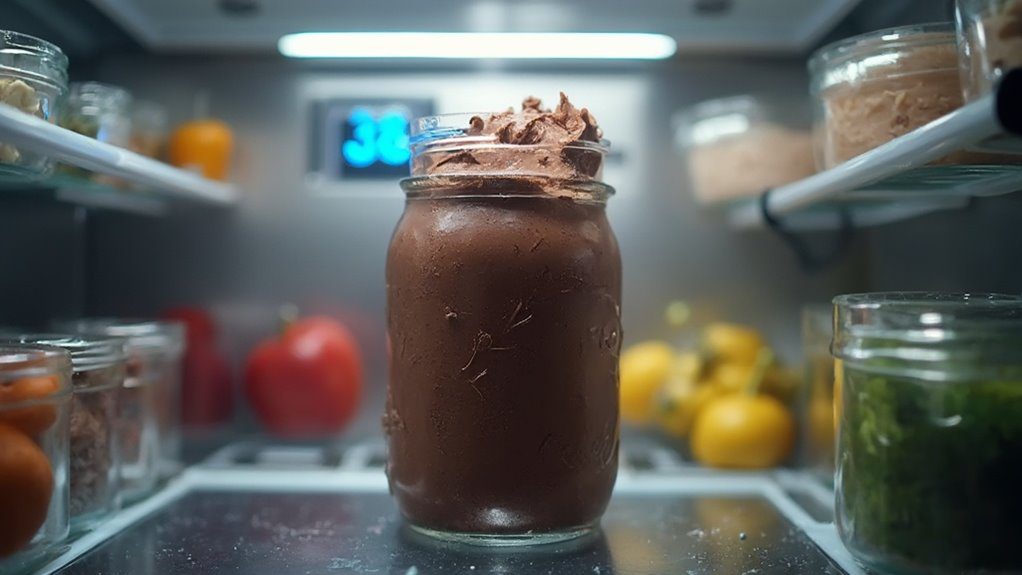
Once you’ve poured your mousse into serving dishes, the next critical step is letting it chill in the refrigerator for at least 30 minutes. During this time, the proteins in the cottage cheese will continue to bind with the other ingredients, creating that perfect mousse-like texture you’re looking for. You’ll notice the mixture becoming firmer and more set as it chills.
I’ve found that patience really pays off here – sometimes I’ll even let mine chill for an hour if I’m not in a hurry. While you’re waiting, you can prep your toppings or clean up your workspace. The chilling process isn’t just about texture; it also allows the chocolate flavors to deepen and develop, giving you a richer-tasting dessert.
Step 5. Serve With Whipped Topping
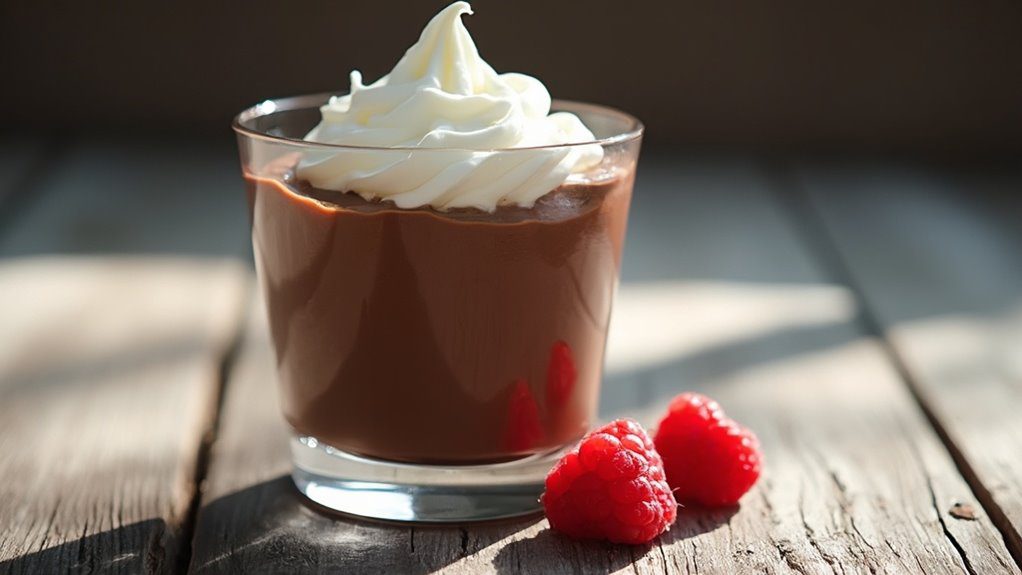
After your mousse has set to perfection, adding a dollop of whipped topping takes this treat to the next level. I love using a light whipped cream that’s been lightly sweetened with a touch of vanilla extract – it complements the chocolate protein mousse beautifully without overwhelming it.
For a healthier alternative, you can make your own protein-packed whipped topping using Greek yogurt. Simply whip some non-fat Greek yogurt with a dash of vanilla and a sprinkle of stevia until it reaches a fluffy consistency. You’ll add extra protein while keeping the calories low. Whether you choose traditional whipped cream or the Greek yogurt version, make sure to add your topping right before serving to maintain its perfect, cloud-like texture.
Customization Options
The beauty of this protein-packed chocolate mousse lies in how easily you can customize it to match your taste preferences and nutritional goals. You can swap the honey for stevia or monk fruit sweetener to reduce calories, or try different protein powder flavors like vanilla or mocha for variety. Want more protein? Add an extra scoop of powder or mix in some Greek yogurt.
For texture variations, blend in frozen banana chunks for added creaminess, or stir in chia seeds for omega-3s and fiber. I love mixing in peanut butter powder for a chocolate-peanut butter combo, and sometimes I’ll add mint extract for a fresh twist. You can also experiment with toppings like granola, coconut flakes, or sugar-free chocolate chips to create your perfect dessert.
Ingredients list (with precise measurements)
Now that you’ve explored ways to customize your mousse, let’s get specific about exactly what you’ll need to whip up this protein-packed treat. Here’s your complete shopping list with precise measurements:
- 1 cup low-fat cottage cheese (well-drained)
- 1 scoop chocolate protein powder (about 30-35g)
- 1 tablespoon unsweetened cocoa powder
- 2 tablespoons honey (or to taste)
- 1/2 teaspoon pure vanilla extract
You’ll want to make sure you’re using fresh ingredients for the best results. I’ve found that small-curd cottage cheese works better than large-curd, as it blends more smoothly. Don’t worry if you need to adjust the sweetness – you can always add a bit more honey once you’ve blended everything together.
Storage Information
Proper storage keeps your protein cottage cheese mousse fresh and delicious for multiple days. You’ll want to transfer your mousse into an airtight container before placing it in the refrigerator, where it’ll stay good for up to 3 days.
If you notice your mousse becoming too thick during storage, don’t worry – it’s an easy fix. Simply pop it back in the blender with a splash of milk and give it a quick pulse until you reach your desired consistency. The texture should be smooth and creamy, just like when you first made it.
For best results, store your mousse away from strong-smelling foods in the fridge, as dairy products can absorb other flavors. You’ll also want to keep it on a middle shelf where the temperature remains most consistent.
Health Benefits or Special Features
Packed with protein and essential nutrients, this chocolate cottage cheese mousse offers impressive nutritional benefits while satisfying your sweet tooth. You’ll get a healthy dose of calcium, vitamin D, and probiotics from the cottage cheese, plus the added protein boost from both the cheese and protein powder.
What you’ll love about this treat is its versatility as a guilt-free indulgence. It’s perfect for post-workout recovery, can replace sugary breakfast options, or serve as a nutritious dessert. The natural sweetness from honey provides sustained energy, while the cocoa powder delivers antioxidants and mood-enhancing compounds. If you’re watching your calories or following a high-protein diet, you’ll appreciate that this mousse fits perfectly into your meal plan without compromising on taste or texture.
Prep Time
Getting this protein-packed chocolate mousse ready takes just 10 minutes of active prep time, making it a perfect quick treat when you’re craving something sweet but nutritious. You’ll spend about 2-3 minutes gathering your ingredients and another 2-3 minutes blending everything until smooth. The remaining time involves transferring the mixture to serving bowls and cleaning up your workspace.
While the active prep is minimal, you’ll want to factor in at least 30 minutes of refrigeration time for the mousse to set properly. I’ve found that planning ahead helps – I often make this the night before or in the morning before work. This way, it’s perfectly chilled and ready when I need a protein boost or dessert fix.
Cook Time
The best part about this chocolate protein cottage cheese mousse is that there’s zero actual cooking involved! You’ll only need to blend the ingredients and let them chill in the fridge. I love that there’s no need to turn on the stove or worry about tempering chocolate.
While traditional mousse recipes often require careful heat application and multiple cooking steps, this protein-packed version skips all that hassle. You’re simply combining cottage cheese, protein powder, cocoa, honey, and vanilla in a blender until smooth. The “cooking” process is actually just letting it set in your refrigerator for at least 30 minutes. I’ve found this waiting time is perfect for cleaning up or getting in a quick workout while your healthy dessert chills to the right consistency.
Total Time
Since you’ll spend just 10 minutes blending the ingredients and need 30 minutes of chill time, this chocolate protein cottage cheese mousse comes together in about 40 minutes total. You won’t believe how quickly you can whip up this protein-packed treat! While the actual hands-on prep work is minimal, that 30-minute chill time is essential for achieving the perfect mousse-like texture.
I love that you can use this waiting period to get other tasks done – maybe squeeze in a quick workout or prep your meals for tomorrow. If you’re in a hurry, you can even pop it in the freezer for 15 minutes instead, though the texture won’t be quite as silky smooth as the refrigerated version.
Yield
One delicious batch of this protein-rich chocolate mousse yields about 2-3 servings, depending on your portion sizes. I like to divide mine into three 1/2-cup portions, which gives you the perfect amount for a satisfying treat without going overboard. You’ll find that each serving packs roughly 15 grams of protein, making it an excellent choice for your fitness goals.
If you’re serving this at a gathering, you can easily double the recipe to accommodate more people. I’ve found that using small dessert bowls or ramekins creates an elegant presentation while naturally controlling portion sizes. For meal prep, consider dividing the mousse into individual containers – you’ll thank yourself later when you’re reaching for a quick, healthy snack.
Final Thoughts
After making this protein-packed chocolate mousse countless times, I’m convinced it’s a game-changer for anyone craving a healthier dessert option. I’ve served it to friends who couldn’t believe it was made with cottage cheese, and it’s become my go-to treat when I want something sweet but nutritious.
You’ll love how versatile this recipe is – perfect for breakfast, post-workout fuel, or a late-night snack. Don’t hesitate to experiment with different protein powder flavors or toppings to make it your own. I’ve found that adding a handful of fresh raspberries or a sprinkle of crushed almonds takes it to another level. Trust me, once you’ve mastered this simple recipe, you’ll wonder how you ever lived without it.
Frequently Asked Questions
Can This Mousse Be Frozen and Thawed Later?
You can freeze the mousse, but you’ll notice texture changes when thawed. For best results, you should blend it again with a splash of milk after thawing to restore creaminess.
Is It Possible to Make This Recipe Without Protein Powder?
Just like traditional French chocolate mousse, you’ll still get a delicious dessert without protein powder. You can simply increase the cocoa powder to 2-3 tablespoons and adjust the honey to taste.
Will Greek Yogurt Work as a Substitute for Cottage Cheese?
You can use Greek yogurt instead of cottage cheese, but you’ll get a tangier flavor and slightly different texture. It’s still creamy and protein-rich, so it makes a good alternative.
Does the Type of Protein Powder Affect the Final Texture?
The protein powder type will affect your mousse’s texture. You’ll get smoother results with whey isolate, while plant-based proteins can make it slightly grainy unless you blend thoroughly.
Can Artificial Sweeteners Be Used Instead of Honey?
You can substitute honey with artificial sweeteners, but you’ll need to adjust the amount since they’re more concentrated. Start with less and taste-test to achieve your desired sweetness level.
Conclusion
You’ll love how this protein-packed chocolate mousse transforms basic ingredients into a creamy cloud of chocolate heaven. Like a magician’s trick, it takes humble cottage cheese and turns it into a luxurious dessert that’ll fool your taste buds while fueling your body. Best of all, you’re just minutes away from enjoying this guilt-free treat that perfectly balances indulgence with nutrition. Give it a try – your sweet tooth will thank you!


