Introduction
While I’ve always enjoyed chocolate hazelnut spreads, I discovered something even better when experimenting in my kitchen – a protein-packed cocoa cashew spread that’s become my go-to breakfast companion. I know you’ll love how this creamy, nutrient-rich spread transforms ordinary toast into something extraordinary.
What makes this recipe special isn’t just its delicious taste – it’s the wholesome ingredients that’ll fuel your day. You’re getting protein from cashews, antioxidants from cocoa, and natural sweetness from honey. I’ve spent months perfecting this recipe, and now you can skip the trial and error. Whether you’re spreading it on apple slices, swirling it into oatmeal, or eating it straight from the spoon (I won’t judge!), this versatile spread will become your new favorite healthy indulgence.
Recipe
This protein-rich homemade spread offers a healthier alternative to commercial chocolate spreads while delivering a smooth, luxurious texture. The combination of raw cashews and cocoa creates a perfect balance of nutty and chocolate flavors, enhanced by natural sweeteners and a touch of vanilla.
The key to achieving the perfect consistency lies in properly soaking the cashews, which softens them for blending and results in a creamy, spreadable texture. This simple yet sophisticated recipe requires minimal ingredients and basic equipment, making it accessible for home cooks of all skill levels.
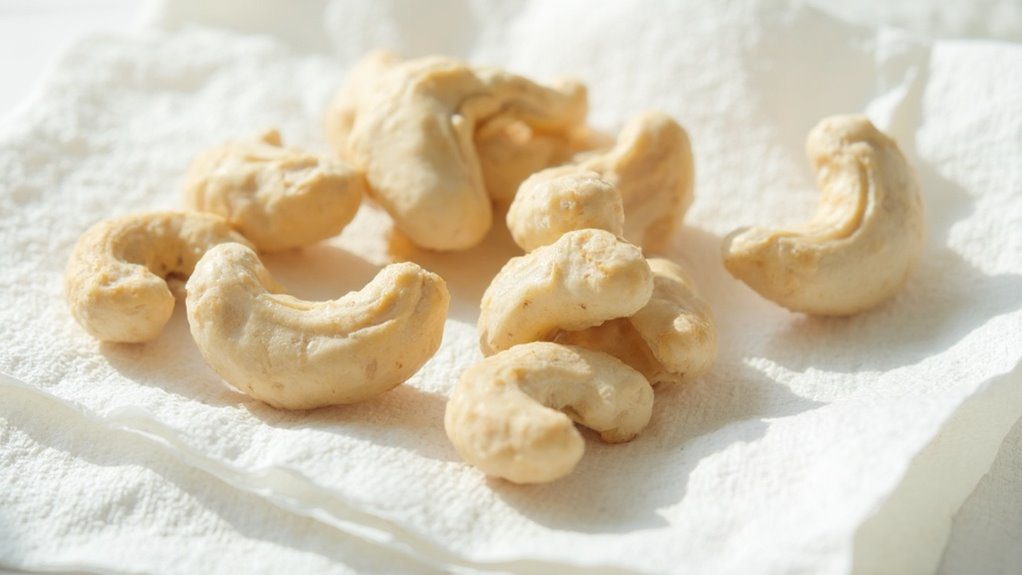
- 2 cups raw cashews
- 1/4 cup unsweetened cocoa powder
- 3 tablespoons honey
- 1/4 teaspoon sea salt
- 1 teaspoon vanilla extract
Place the cashews in a bowl and cover with water, allowing them to soak overnight or for at least 8 hours. Drain and pat the cashews dry, then transfer them to a food processor. Process until smooth, scraping down the sides as needed. Add the cocoa powder, honey, sea salt, and vanilla extract, then continue processing for 5-7 minutes until the mixture becomes creamy and achieves a spreadable consistency.
For best results, use room temperature ingredients and guarantee the cashews are completely dry before processing. The spread can be stored in an airtight container in the refrigerator for up to two weeks. If it becomes too firm, allow it to sit at room temperature for 15 minutes before use. Adding a tablespoon of coconut oil during blending will create a smoother consistency but may reduce shelf life.
Prep Time
Making this delicious cocoa cashew spread requires about 8 hours and 15 minutes of total prep time, though most of that is hands-off soaking time for the cashews. You’ll want to plan ahead since the cashews need to soak overnight, but don’t worry – your active prep time is only about 15 minutes.
Here’s how your time breaks down:
- Cashew soaking: 8 hours
- Draining and drying: 5 minutes
- Processing cashews: 5-7 minutes
- Adding ingredients: 2 minutes
- Final blending: 1 minute
I always start soaking my cashews right before bed, so they’re ready to process first thing in the morning. Trust me, the wait is worth it – properly soaked cashews create that silky-smooth texture we’re after.
Equipment needed
Once you’ve got your cashews soaking, let’s get your kitchen tools ready. You’ll need a few essential items to create this creamy spread:
- A food processor or high-powered blender – this is vital for achieving that smooth, buttery texture
- A rubber spatula for scraping down the sides
- Measuring cups and spoons for precise ingredients
- A fine-mesh strainer to drain the soaked cashews
- Clean kitchen towels or paper towels to pat the cashews dry
- An airtight container for storage
I’ve found that a food processor works better than a blender for this recipe, as it’s easier to scrape down the sides and achieve that perfect consistency. If you’re using a blender, you might need to work in smaller batches and blend a bit longer.
Basic Cooking Method and Time
Creating this protein-rich spread takes about 15 minutes of active time, not counting the overnight soak for the cashews. You’ll start by draining and drying your pre-soaked cashews thoroughly – I’ve found a clean kitchen towel works perfectly for this step.
Next, you’ll process those cashews in your food processor, which typically takes 3-4 minutes until they’re smooth. Don’t worry if you need to stop and scrape down the sides occasionally. Once your cashews have reached a creamy consistency, you’ll add the cocoa powder, honey, salt, and vanilla extract. Keep processing for another 3-4 minutes until everything’s well combined and silky smooth. Trust me, your patience during the processing stage will be rewarded with an incredibly creamy spread.
Cooking Steps
The journey from raw ingredients to finished spread follows a straightforward path that I’ve perfected through plenty of trial and error. Here’s what you’ll need to do:
First, soak your cashews overnight – I’ve found this makes them super creamy when blended. After draining and drying them thoroughly, pop them into your food processor. You’ll want to blend until they’re smooth and buttery, which usually takes about 3-4 minutes.
Next, add your cocoa powder, honey, salt, and vanilla extract. Keep processing for another 3 minutes, scraping down the sides occasionally. I’ve learned that patience is key here – the mixture will gradually transform from grainy to silky smooth. Trust me, those extra minutes of blending make all the difference in texture.
Step 1. Soak Cashews Until Soft

Before you can achieve that silky-smooth spread, properly soaking your cashews is absolutely essential. Start by placing your raw cashews in a large bowl and covering them completely with cool, filtered water. You’ll need enough water to allow for expansion since the nuts will plump up considerably during soaking.
Let your cashews soak for at least 8 hours, though I find overnight works best. If you’re in a hurry, you can speed up the process by using hot water and soaking for 2 hours, but I’ve noticed the results aren’t quite as creamy. Once they’re done soaking, drain the water and gently pat the cashews dry with a clean kitchen towel. They should feel tender when you press them between your fingers.
Step 2. Drain and Blot Cashews
Properly draining and drying your soaked cashews marks an essential turning point in creating that perfectly smooth spread. After your cashews have soaked overnight, you’ll want to drain them thoroughly in a colander, giving them a good shake to remove excess water. Then, spread them out on a clean kitchen towel or paper towels.
Here’s my favorite trick: gently pat the cashews with another towel, rolling them around to get them as dry as possible. You don’t need to obsess over getting every drop of moisture out, but removing most of the surface water helps achieve that ideal texture we’re after. When I skip this step, I end up with a slightly watery spread that just isn’t quite right. Trust me, these extra few minutes make all the difference.
Step 3. Blend Cashews Until Creamy
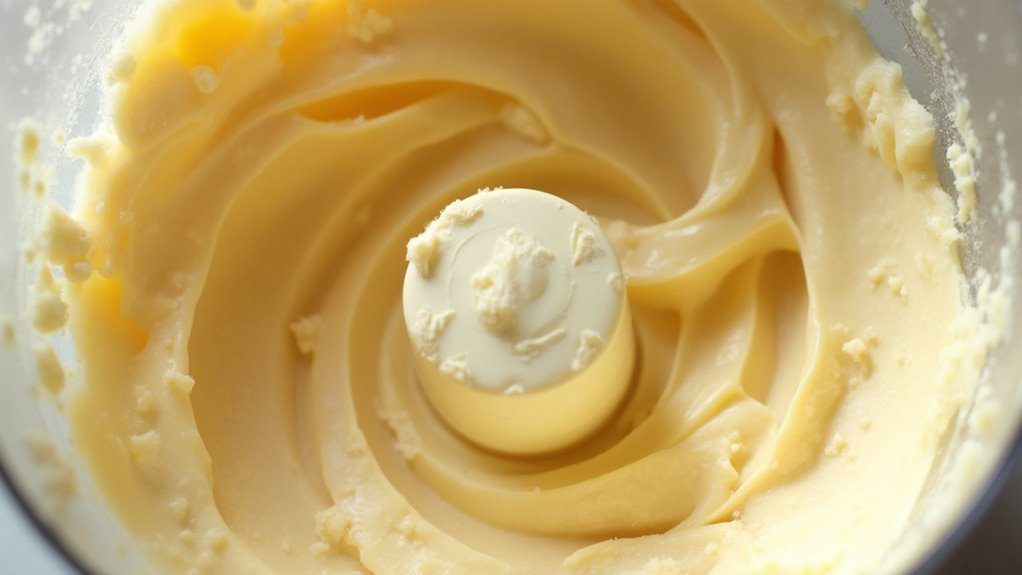
Watching those cashews transform into silky-smooth butter is one of my favorite parts of making this spread. I’ve learned that patience is key here – you’ll need to blend for about 3-4 minutes, scraping down the sides of your food processor every minute or so.
Start by running your processor on high speed, and you’ll see the cashews go through several stages. First, they’ll break into a fine powder, then form small clumps, and finally release their natural oils. That’s when the magic happens! Keep blending until you see the mixture turn creamy and start swirling smoothly around the bowl. Trust me, you’ll know it’s ready when it looks like a rich, flowing river of cashew goodness.
Step 4. Add Cocoa and Honey

Once your cashew butter reaches that perfect creamy stage, it’s time for the chocolate transformation! Add your cocoa powder gradually while the food processor runs, letting each spoonful fully incorporate before adding more. You’ll see the color deepen to a rich chocolate brown.
Now comes the fun part – sweetening to taste. Drizzle in the honey slowly, pausing to scrape down the sides as needed. I like to start with two tablespoons and adjust up, since you can always add more but can’t take it away. Don’t forget the vanilla extract and that pinch of sea salt – they’ll enhance the chocolate flavor and bring everything together. Keep processing until your spread is silky smooth and completely blended.
Step 5. Blend Until Silky Smooth

The final blending stage takes your spread from good to incredible. You’ll want to keep processing until you see a noticeable change in texture – we’re talking silky smooth, with no grainy bits in sight. This usually takes between 5-7 minutes of continuous blending.
Don’t worry if the mixture seems thick at first; it’ll gradually become creamier as the natural oils release from the cashews. I’ve found that scraping down the sides of your processor every minute or so helps guarantee everything blends evenly. You’ll know you’ve reached the perfect consistency when the spread looks glossy and flows smoothly off your spatula. If it’s still too thick for your liking, try adding a tablespoon of coconut oil – it’ll give you that perfect, spreadable texture.
Customization Options
Making this spread your own opens up endless possibilities for customization. You’ll love experimenting with different add-ins to create your perfect flavor profile. Try mixing in cinnamon for a Mexican chocolate twist, or add a pinch of espresso powder to enhance the cocoa’s richness.
For texture variations, you can fold in chopped nuts, cacao nibs, or even dried fruit pieces after blending. If you’re watching your sugar intake, swap the honey for monk fruit sweetener or stevia. Want more protein? Mix in your favorite unflavored protein powder during the final blend.
You can also play with different nut combinations – try replacing half the cashews with almonds or macadamia nuts. Just remember to keep the total amount of nuts the same to maintain the right consistency.
Ingredients list (with precise measurements)
Before diving into the recipe, gathering precise measurements of each ingredient guarantees your cocoa cashew spread turns out perfectly balanced and deliciously smooth. You’ll need:
- 2 cups raw cashews (unsalted)
- 1/4 cup unsweetened cocoa powder
- 3 tablespoons honey
- 1/4 teaspoon sea salt
- 1 teaspoon vanilla extract
I’ve found these measurements create the ideal texture and flavor profile. If you’re looking to make a larger batch, simply double the ingredients while maintaining these proportions. The quality of your cocoa powder matters – I recommend using Dutch-processed for a smoother, less bitter taste. When measuring the honey, spray your measuring spoon with a light coating of oil first; it’ll slide right off without wasting a drop.
Storage Information
Since proper storage plays an essential role in maintaining freshness, you’ll want to keep your homemade cocoa cashew spread in an airtight container in the refrigerator. When stored properly, your spread will stay fresh for up to two weeks, maintaining its rich flavor and creamy texture.
If you notice the spread becoming too firm in the fridge, don’t worry – it’s completely normal. Just let it sit at room temperature for about 15 minutes before using. I’ve found that glass containers work best for storage, as they don’t absorb any flavors and keep the spread tasting fresh. Remember to always use clean utensils when scooping out your spread, as introducing food particles or moisture can reduce its shelf life and affect the quality.
Health Benefits or Special Features
The nutritional profile of this cocoa cashew spread goes well beyond its delicious taste. You’ll get healthy fats and protein from the cashews, while the raw cocoa powder provides antioxidants and minerals like magnesium. Since you’re controlling the ingredients, there’s no need to worry about preservatives or artificial sweeteners.
I love how versatile this spread is for special diets. If you’re vegan, simply swap the honey for maple syrup. For those watching their sugar intake, you can adjust the sweetener to your liking or use a natural sugar substitute. Plus, the protein content makes it an excellent pre-workout snack. As someone who’s struggled with finding healthy alternatives to commercial chocolate spreads, I can tell you this recipe’s been a game-changer for satisfying cravings while staying nutritious.
Prep Time
Making this protein-rich spread requires about 15-20 minutes of active prep time, though you’ll need to plan ahead for the overnight cashew soaking. You’ll spend most of your hands-on time operating the food processor, occasionally stopping to scrape down the sides and check the consistency.
The actual prep work is pretty straightforward. After draining your soaked cashews, you’ll need about 2-3 minutes to measure out your ingredients and get your food processor ready. The blending process takes 5-7 minutes, during which you can tackle other kitchen tasks. I often use this time to clean up or prep my storage container. Once you’ve achieved that perfect creamy texture, you’re just minutes away from enjoying your homemade spread.
Cook Time
Actually, this recipe doesn’t require any traditional cooking time at all! Instead, you’ll need about 5-7 minutes of processing time in your food processor to transform those soaked cashews into a silky-smooth spread. I love that there’s no stove or oven involved – it’s just pure blending magic.
You’ll notice the mixture getting creamier as you process it, and that’s exactly what we want. Just keep an eye on your food processor – it’ll be working hard, so you might want to give it a brief rest every couple of minutes. When I make this spread, I use this time to scrape down the sides of the bowl, ensuring everything blends evenly into that perfect, spreadable consistency we’re after.
Total Time
From start to finish, you’ll need about 8-9 hours to make this protein-rich spread – but don’t worry, most of that is hands-off soaking time for the cashews. The actual hands-on prep work only takes about 15-20 minutes of your time.
Here’s how the time breaks down: You’ll spend 8 hours soaking the cashews overnight, 5 minutes draining and drying them, and another 10-15 minutes processing everything together. The final blending step is essential – don’t rush it! Those full 5-7 minutes of processing time help create that perfectly smooth, creamy texture you’re looking for. Trust me, the end result is worth every minute you’ll invest in making this delicious spread.
Yield
This recipe yields approximately 2 cups (16 ounces) of rich, creamy spread that’ll keep you and your family satisfied for weeks. You’ll find that a little goes a long way – just one tablespoon packs plenty of protein and flavor into your favorite snacks.
I typically portion the spread into two 8-ounce mason jars, keeping one in the fridge and one in the freezer for later use. You can also divide it into smaller 4-ounce containers, which are perfect for gifting to friends or taking to work. If you’re planning to use it mainly as a dip for fruit platters or party spreads, consider filling mini 2-ounce containers that you can easily pull out when needed.
Final Thoughts
Making your own cocoa cashew protein spread opens up a world of possibilities for healthier snacking and creative recipe ideas. You’ll love how versatile this spread can be, whether you’re spreading it on your morning toast or using it as a protein-packed dip for fresh fruit. I’ve found that making this at home gives me complete control over the ingredients, ensuring I’m getting the nutrition I want without any unwanted additives.
Frequently Asked Questions
Can I Substitute Cashews With Other Nuts in This Recipe?
You can swap cashews with almonds, macadamia nuts, or hazelnuts, but you’ll get different textures and flavors. Cashews create the smoothest, creamiest consistency in this spread.
Will This Spread Become Grainy if Frozen?
Old habits die hard, but you’ll want to avoid freezing this spread. It’ll become grainy and lose its smooth texture since the cashew’s natural oils separate and form crystals during freezing.
How Does the Protein Content Compare to Store-Bought Chocolate Spreads?
You’ll get considerably more protein from this cashew-based spread compared to store brands. Two cups of cashews provide about 40g of protein, while typical chocolate spreads contain only 2-3g per serving.
Can I Use Stevia or Maple Syrup Instead of Honey?
You can substitute both stevia and maple syrup for honey. While stevia will reduce the calories considerably, maple syrup will maintain a similar texture and add its unique flavor.
Does This Spread Work Well in Baked Goods as an Ingredient?
Like a rich chocolate ganache, you’ll find this spread works beautifully in brownies, cookies, and muffins. It’ll add moisture and depth while maintaining its structure during baking.
Conclusion
You’ll love having this protein-rich cocoa cashew spread in your kitchen arsenal. Like a chocolate-loving ninja, you can sneak it into smoothies, spread it on toast, or enjoy it straight from the jar with fresh fruit. It’s healthier than store-bought alternatives and completely customizable to your taste preferences. Best of all, you’re in control of the ingredients, making this spread a delicious way to fuel your active lifestyle.


