Introduction
While I’ve always loved snacking on chips and other crunchy treats, discovering roasted chickpeas completely changed my snacking game. You’ll be amazed at how these protein-packed legumes transform into irresistibly crunchy bites that satisfy those afternoon cravings without the guilt.
I’m excited to share my foolproof recipe for crispy roasted chickpeas that you can customize with your favorite seasonings. Whether you’re looking for a healthy alternative to chips, a protein boost for your salads, or just a wholesome snack, these crunchy gems have got you covered. They’re naturally dairy-free, budget-friendly, and packed with fiber and nutrients. Trust me, once you try making these at home, you’ll wonder why you didn’t start sooner. Let’s get started on creating your new favorite snack!
Recipe
These crispy roasted chickpeas make an irresistible healthy snack that’s both nutritious and satisfying. With just a few simple ingredients and proper technique, you can transform ordinary canned chickpeas into crunchy, flavorful bites that rival traditional snack foods.
The secret to achieving the perfect crunch lies in thoroughly drying the chickpeas before roasting and seasoning them well. This simple yet versatile recipe can be customized with different spice combinations, and the finished product works great as a snack, salad topping, or soup garnish.
- 2 (15-ounce) cans chickpeas
- 2 tablespoons olive oil
- 1 teaspoon salt
- 1 teaspoon garlic powder
- 1 teaspoon paprika
Drain and rinse the chickpeas thoroughly, then spread them on paper towels or a clean kitchen towel to dry completely. Remove any loose skins you find. Preheat your oven to 400°F (200°C). Place the dried chickpeas in a large bowl and toss with olive oil and seasonings until evenly coated. Spread them in a single layer on a baking sheet and roast for 30-35 minutes, shaking the pan halfway through cooking. The chickpeas are done when they’re golden brown and crispy. Allow them to cool completely before storing.
For best results, verify the chickpeas are thoroughly dried before roasting, as any residual moisture will create steam and prevent proper crisping. If the chickpeas become soft during storage, you can restore their crunch by reheating them in a 350°F (175°C) oven for 5-10 minutes. Store in an airtight container at room temperature for up to 4 days, though they’re best consumed within 24 hours of roasting. Feel free to experiment with different seasoning combinations like curry powder, cumin, or chili powder to create variety.
Prep Time
Preparing crispy roasted chickpeas takes about 10 minutes of active prep time before they go into the oven. You’ll spend most of this time draining, rinsing, and thoroughly drying the chickpeas – trust me, the drying step is essential for that perfect crunch! I like to spread my chickpeas between two clean kitchen towels and gently roll them around to remove excess moisture.
The remaining prep is super quick. You’ll need just a minute to measure your seasonings and another minute to toss everything together in a bowl. Don’t forget to remove any loose skins you spot while drying – they’ll just burn in the oven. Once you’ve spread the seasoned chickpeas on your baking sheet, you’re good to go!
Equipment needed
Now that you’ve gathered your ingredients and cleared your prep time, let’s look at the simple tools you’ll need for perfect roasted chickpeas. You’ll be happy to know that this recipe doesn’t require any fancy equipment!
Here’s what you’ll need:
- A large colander for rinsing
- Clean kitchen towels or paper towels for drying
- A large mixing bowl
- A rimmed baking sheet (I prefer one with low sides for better air circulation)
- Measuring spoons
- An airtight storage container
I love how basic these items are – you probably already have them in your kitchen. The most important tool is that rimmed baking sheet, which prevents any chickpeas from rolling off during roasting. Just make sure your baking sheet is large enough to spread the chickpeas in a single layer.
Basic Cooking Method and Time
The simple roasting method transforms ordinary chickpeas into crunchy, flavorful bites in just about 35 minutes. You’ll want to start by preheating your oven to 400°F (200°C) while you prep the chickpeas. After thoroughly drying them, toss them with olive oil and your chosen seasonings until they’re well-coated.
Spread your seasoned chickpeas in a single layer on a baking sheet – I’ve learned the hard way that crowding leads to steaming instead of crisping. Pop them in the oven for 30-35 minutes, giving the pan a good shake halfway through. You’ll know they’re done when they’re golden brown and crispy on the outside. Don’t worry if they’re still slightly soft when you take them out – they’ll continue to crisp up as they cool completely.
Cooking Steps
Start your crispy chickpea journey by gathering all your ingredients and tools before diving in – I’ve found this makes the whole process flow smoothly. Trust me, you’ll want everything within reach as you move through these steps.
Begin by draining and rinsing your chickpeas, then pat them completely dry with paper towels. I always take an extra minute to remove any loose skins – it’s worth the effort for maximum crispiness. Next, toss your dried chickpeas with olive oil and seasonings in a large bowl until they’re evenly coated. Spread them in a single layer on your baking sheet (overcrowding is the enemy of crispiness!). Pop them in your preheated 400°F oven for 30-35 minutes, giving the pan a good shake halfway through. You’ll know they’re done when they’re golden brown and making that satisfying crunch.
Step 1. Rinse and Drain Chickpeas
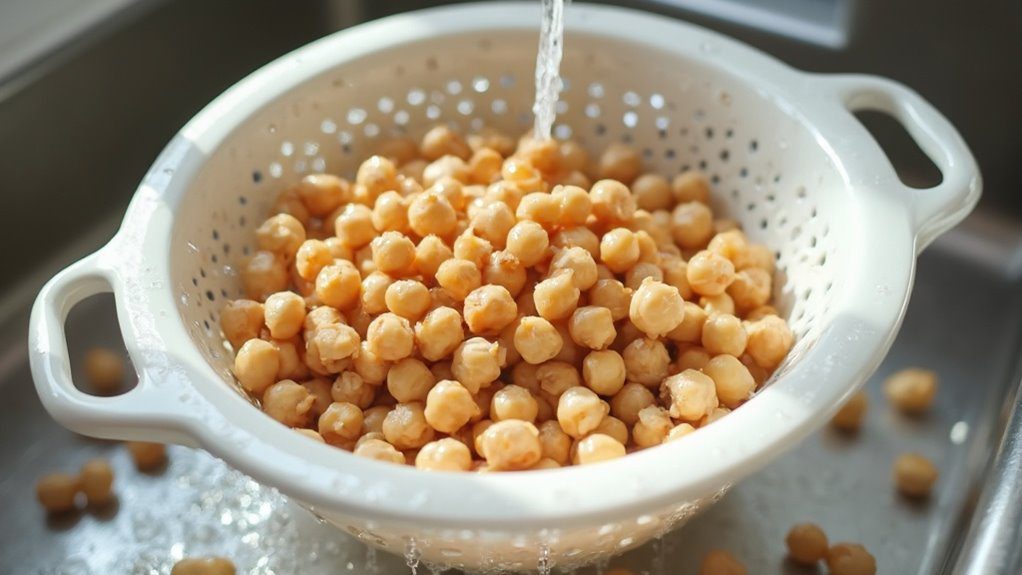
Plunging your canned chickpeas into a colander starts the essential first step of this recipe. Run cold water over them, using your hands to gently swish them around, making sure you’ve rinsed away all the canning liquid. I’ve found this not only cleans the chickpeas but also helps remove those loose skins that can prevent even crisping.
Once they’re thoroughly rinsed, give the colander a few good shakes to remove excess water. You’ll want to spread the chickpeas on a clean kitchen towel or several layers of paper towels. Take time to pat them dry – and I mean really dry! Trust me, I learned the hard way that even a little moisture can turn your hoped-for crispy snack into a chewy disappointment.
Step 2. Pat Chickpeas Completely Dry
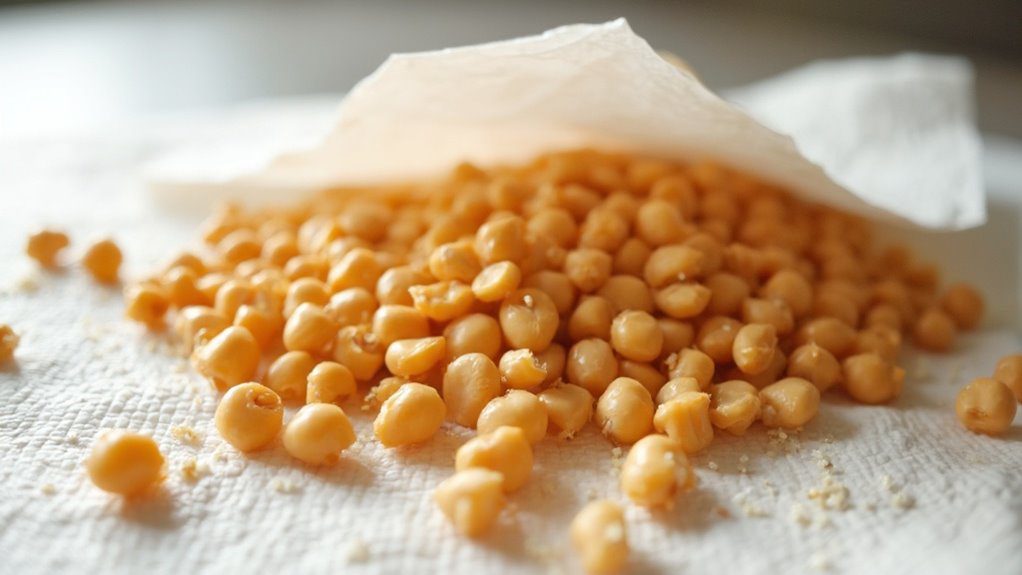
Properly drying your chickpeas might seem like a fussy step, but I’ve discovered it’s absolutely essential for achieving that satisfying crunch we’re after. I spread my rinsed chickpeas on a clean kitchen towel or several layers of paper towels, then gently roll them around to remove surface moisture.
Here’s my tried-and-true method: After the initial pat-down, let them air dry for about 10 minutes, then give them another thorough wipe. You’ll want to remove any loose skins you spot during this process – they’ll just burn in the oven anyway. Trust me, I’ve learned from experience that even slightly damp chickpeas will steam rather than crisp up. When I take this extra time to dry them properly, the results are consistently amazing.
Step 3. Remove Loose Chickpea Skins

While removing chickpea skins isn’t strictly mandatory, I’ve found that peeling off those loose outer membranes makes a huge difference in the final crispiness. After you’ve dried your chickpeas, gently roll them between your hands or a clean kitchen towel – you’ll notice some skins naturally falling off. I like to pinch each chickpea lightly between my thumb and forefinger, and the skin usually slips right off.
Don’t stress if you can’t get every single skin off – it’s more about removing the ones that are already loose. In my experience, about 75% of the skins will come off easily, while the rest might be more stubborn. That’s perfectly fine! The chickpeas that do lose their skins will become extra crispy, creating a nice texture variation in your final snack.
Step 4. Season With Olive Oil

The right amount of olive oil makes all the difference in achieving perfectly crispy chickpeas. You’ll want to use 2 tablespoons of olive oil for every two cans of chickpeas – this guarantees they’re evenly coated without becoming soggy. I’ve learned through trial and error that too much oil leads to greasy results, while too little leaves them dry and bland.
Place your dried chickpeas in a large bowl, then drizzle the olive oil over them. Using your hands or a spatula, toss them thoroughly until each chickpea has a light, even coating. Don’t worry if some chickpeas seem to have more oil than others at first – keep tossing until the coating is uniform. This step is essential because the oil helps your seasonings stick while creating that irresistible crispy exterior we’re aiming for.
Step 5. Roast Until Golden Brown

Once your chickpeas are coated with oil, it’s time for the magic to happen in the oven. Spread them in a single layer on your baking sheet – I’ve learned the hard way that crowding leads to steaming instead of crisping. You’ll want to roast them at 400°F for about 30-35 minutes.
I always set a timer for the halfway point so I can give the pan a good shake. This helps guarantee even browning and prevents any chickpeas from getting too dark on one side. You’ll know they’re done when they’re a beautiful golden brown color and making a light rattling sound when you shake the pan. Trust me, that satisfying crunch is worth the wait! Let them cool completely on the pan – they’ll continue getting crispier as they rest.
Customization Options
Making these roasted chickpeas your own is half the fun, and I’ve discovered countless flavor combinations over years of experimenting in my kitchen. You’ll love trying these flavor variations:
- Taco seasoning with chili powder and cumin
- Italian herbs with oregano and basil
- Curry powder with turmeric and garam masala
- Sweet cinnamon sugar (add after roasting)
- Ranch seasoning mix
- Buffalo style with cayenne
I’ve found that about 1-2 teaspoons of seasoning per can of chickpeas works perfectly. Just remember to keep the olive oil constant at 1 tablespoon per can – it helps your seasonings stick while ensuring that perfect crunch. My personal favorite is a spicy curry blend that’ll wake up your taste buds and keep you reaching for more.
Ingredients list (with precise measurements)
Before diving into this simple recipe, you’ll need to gather a precise list of ingredients that I’ve carefully tested to create the perfect crispy chickpeas. I’ve found this combination works beautifully every time:
- 2 (15-ounce) cans of chickpeas, drained and rinsed
- 2 tablespoons extra virgin olive oil
- 1 teaspoon fine sea salt
- 1 teaspoon garlic powder
- 1 teaspoon paprika
Trust me on the measurements – I’ve made these countless times, and this ratio delivers the ideal balance of flavors. You’ll notice I specify fine sea salt rather than kosher salt, as it adheres better to the chickpeas. While you might be tempted to add more oil, stick to these amounts – too much will make them soggy instead of crispy.
Storage Information
Now that you’ve seasoned and roasted your chickpeas to crispy perfection, let’s talk about keeping them fresh. You’ll want to let them cool completely before storing them in an airtight container at room temperature. While they’ll stay good for up to 4 days, I’ve found they’re absolutely crunchiest within the first 24 hours after roasting.
If your chickpeas start losing their crunch (which can happen if any moisture gets trapped), don’t worry! You can easily re-crisp them in the oven. Just spread them on a baking sheet and pop them in at 350°F for 5-10 minutes. I like to check them at the 5-minute mark to make sure they don’t over-crisp. Trust me, this quick refresh works like magic to restore their satisfying crunch.
Health Benefits or Special Features
While many snacks leave you feeling guilty, these crispy roasted chickpeas pack a serious nutritional punch that you can feel good about. You’ll get about 15 grams of protein per cup, plus plenty of fiber that helps keep you feeling full between meals. They’re also packed with essential minerals like iron and magnesium.
I love that these crunchy bites are naturally gluten-free and dairy-free, making them perfect for various dietary needs. You’re getting heart-healthy benefits from both the chickpeas and olive oil, while keeping the ingredient list simple and clean. If you’re watching your sodium, you can easily adjust the salt content to suit your needs. They’re also budget-friendly – a single can of chickpeas makes enough snacks to last several days!
Prep Time
Getting these crunchy chickpea snacks ready doesn’t take much time at all – I can prep them in about 10 minutes. Most of the prep involves draining and drying the chickpeas thoroughly, which I’ve found is essential for achieving that perfect crunch.
Start by opening and draining two cans of chickpeas, then give them a good rinse. You’ll want to spend about 5 minutes patting them completely dry with paper towels or a clean kitchen towel. While you’re drying them, remove any loose skins you notice – they’ll come off easily. Then it’s just a quick toss with olive oil and seasonings, and they’re ready for the oven! Trust me, these few minutes of prep work are totally worth it for the crispy result you’ll get.
Cook Time
Once your chickpeas are prepped and seasoned, they’ll need about 30-35 minutes in a 400°F oven to reach their full crispy potential. I’ve found that keeping a close eye on them during the last 10 minutes is vital, as they can go from perfectly golden to overdone pretty quickly.
You’ll want to give the baking sheet a good shake halfway through cooking to guarantee even browning. Don’t worry if they’re still a bit soft when you take them out – they’ll continue to crisp up as they cool. I sometimes leave mine in for an extra 2-3 minutes if they’re not quite golden enough, but remember that each oven’s different. When they’re done, you should hear a satisfying crunch when you bite into one.
Total Time
The total time for making these crispy roasted chickpeas is about 45-50 minutes from start to finish. You’ll spend about 10 minutes on prep work – draining, rinsing, and thoroughly drying the chickpeas. This drying step is essential, so don’t rush it!
The actual hands-on time is pretty minimal, which is why I love this recipe. Once you’ve tossed the chickpeas with oil and seasonings (about 2-3 minutes), they’ll need 30-35 minutes in the oven. Remember to give the pan a good shake halfway through. After roasting, you’ll want to let them cool completely for about 5-10 minutes before diving in. Trust me, the wait is worth it – they’ll get even crispier as they cool!
Yield
A single batch of this recipe will yield about 3 cups of crispy roasted chickpeas, which is perfect for snacking or meal prep. I’ve found this amount typically serves 6-8 people as a snack, or it’ll last me about a week when I portion it out for my daily lunches.
If you’re serving these at a party, I’d recommend doubling the recipe – they tend to disappear quickly! Just make sure to use two baking sheets instead of crowding one, as the chickpeas need space to get crispy. When I’m meal prepping, I’ll divide the yield into ½-cup portions in small containers. That way, I’ve got a protein-rich snack ready to grab whenever hunger strikes. Each serving packs about 7 grams of protein and 4 grams of fiber.
Final Thoughts
Making crispy roasted chickpeas has become one of my favorite ways to create healthy snacks at home, and I’m confident you’ll love this recipe as much as I do. They’re incredibly versatile – I love sprinkling them on salads, adding them to grain bowls, or just munching on them straight from the container.
Frequently Asked Questions
Can I Use Dried Chickpeas Instead of Canned Ones?
You’ll need to soak dried chickpeas overnight and cook them until tender before roasting. Once they’re cooked, you can follow the same drying and roasting steps as canned ones.
Why Do My Chickpeas Sometimes Explode in the Oven?
Your chickpeas can explode if they’re still moist inside when roasting. Make sure you’ve dried them thoroughly and removed loose skins before putting them in the oven.
Are These Safe for Children to Eat as a Snack?
You can safely feed these to children over 12 months old. They’re packed with protein and fiber, but make sure pieces are small enough to prevent choking in younger kids.
Can I Roast Chickpeas in an Air Fryer?
You can air fry chickpeas at 380°F for 15-20 minutes, shaking the basket halfway through. You’ll get the same crispy results in less time than traditional oven roasting.
Does the Type of Baking Sheet Affect Crispiness?
Yes, your baking sheet choice matters. You’ll get crispier results using a dark, non-stick sheet pan since it conducts heat better than light-colored or shiny ones. Don’t use parchment paper.
Conclusion
You’ll love how these roasted chickpeas transform from simple legumes into addictively crunchy snacks. As they cool on the baking sheet, you’ll hear that satisfying crackle that signals perfect crispiness. Whether you’re tossing them into salads or enjoying them straight from the jar, you’ve now mastered a protein-rich treat that’s both healthy and budget-friendly. The only challenge? Making enough to last the week!


