Introduction
While traditional short ribs might seem intimidating to prepare, I’m excited to show you how the Instant Pot makes this luxurious dish incredibly simple and keto-friendly. As someone who’s cooked countless short ribs, I can tell you that pressure cooking is a game-changer for this cut of meat.
You’ll love how these ribs transform from tough to tender in just a fraction of the time it takes to braise them conventionally. The best part? There’s no need to worry about hidden carbs or sugar-laden sauces. We’re letting the natural flavors of the meat shine through, creating a rich, satisfying meal that fits perfectly into your ketogenic lifestyle. Trust me, once you try this method, you’ll never go back to the old way of cooking short ribs.
Recipe

Fall-off-the-bone short ribs are a delicious and satisfying keto-friendly meal that transforms tough meat into tender, flavorful bites using the convenience of an Instant Pot. The pressure cooking method reduces cooking time considerably while maintaining the rich, robust flavors that make short ribs a beloved dish.
The beauty of this recipe lies in its simplicity, requiring minimal ingredients while delivering maximum flavor. The natural fats from the short ribs create their own luscious sauce during cooking, and the high-pressure environment guarantees the meat becomes fork-tender while staying juicy and succulent.
- 3 pounds beef short ribs
- 2 tablespoons olive oil
- 2 teaspoons sea salt
- 1 teaspoon black pepper
- 1 cup beef broth
Season short ribs thoroughly with salt and pepper. Heat olive oil in the Instant Pot on sauté mode. Brown the ribs on all sides for 3-4 minutes per side, working in batches if needed. Add beef broth to deglaze the pot, scraping up browned bits from the bottom. Close the lid and set valve to sealing position. Cook on high pressure for 45 minutes, then allow natural pressure release for 15 minutes before releasing remaining pressure.
For best results, select short ribs with good marbling and bring them to room temperature before cooking. The sauce can be reduced using the sauté function if it’s too thin after cooking. Store leftovers in an airtight container in the refrigerator for up to 3 days. The flavors often intensify overnight, making these ribs excellent for meal prep. For extra richness, consider saving the cooking liquid to use as a base for future soups or sauces.
Prep Time
Preparing short ribs in the Instant Pot takes minimal active time, but you’ll want to plan ahead to get the best results. I recommend setting aside about 20 minutes for initial prep work, which includes bringing the meat to room temperature (30-45 minutes) and seasoning the ribs.
The hands-on prep is straightforward: you’ll spend about 10 minutes patting the meat dry and seasoning it with salt and pepper. Then, allow 15-20 minutes for browning the ribs in batches – don’t skip this step, as it’s essential for developing deep flavor! While the actual pressure cooking is hands-off, you’ll need to factor in about 15 minutes for the pot to reach pressure and another 15 for natural release. Trust me, the rich, tender results are worth every minute.
Equipment needed
The two most essential pieces of equipment you’ll need for this recipe are a 6- or 8-quart Instant Pot and a good pair of tongs. You’ll also want silicone or heat-resistant mitts to handle the hot pot safely, especially during the pressure release phase.
Other helpful tools include a measuring cup for the broth, measuring spoons for your seasonings, and a large plate or platter to hold the browned ribs between batches. I always keep a wooden spoon handy for scraping those flavorful browned bits from the bottom during deglazing – trust me, you won’t want to skip this step! If you’re planning to reduce the sauce after cooking, you might also want a fat separator to remove excess grease before serving.
Basic Cooking Method and Time
While mastering the art of Instant Pot short ribs might seem intimidating, I’ve found that the basic cooking process breaks down into three simple phases: browning, pressure cooking, and resting.
First, you’ll want to brown your seasoned ribs in olive oil using the sauté function, about 3-4 minutes per side. I’ve learned that taking time with this step creates those delicious caramelized flavors you’ll love. Once they’re golden brown, add your beef broth and deglaze the pot – I always scrape up those flavorful bits from the bottom.
Next, seal the lid and cook on high pressure for 45 minutes. Let the pressure release naturally for 15 minutes before opening the valve. Trust me, this resting period makes all the difference in achieving that perfect, tender texture.
Cooking Steps
Let’s break down these cooking steps into bite-sized pieces you’ll actually enjoy following. Here’s what you’ll do:
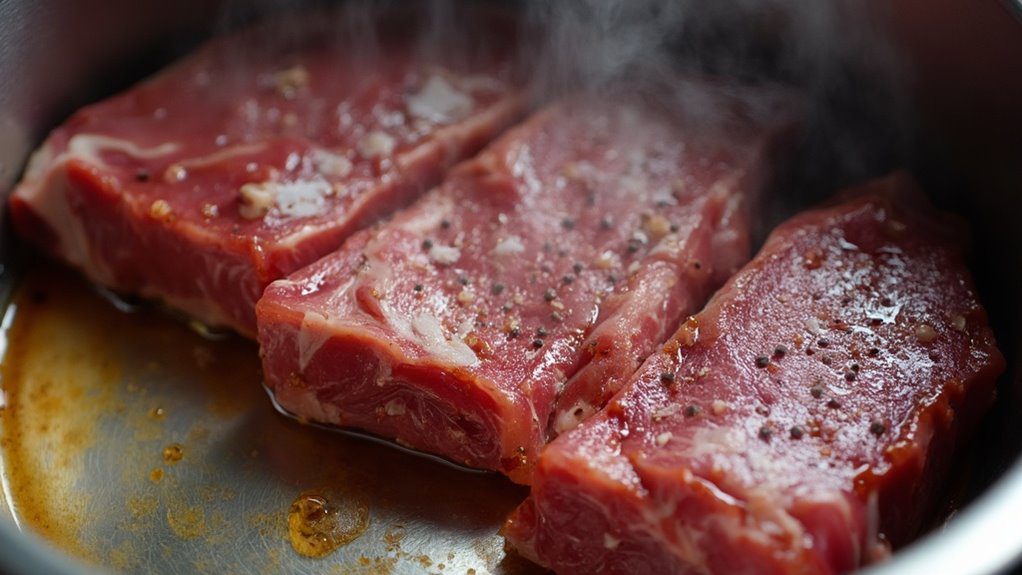
First, season your short ribs generously with salt and pepper – don’t be shy here! Switch your Instant Pot to sauté mode and let that olive oil get nice and hot. I love watching the ribs develop their beautiful brown crust, about 3-4 minutes on each side.
Once you’ve browned all sides, it’s time for my favorite part: deglazing. Pour in that beef broth and scrape up those flavorful brown bits from the bottom – they’re flavor gold! Lock the lid, set the valve to sealing, and pressure cook on high for 45 minutes. Then let it naturally release for 15 minutes before venting. Trust me, your patience will be rewarded with incredibly tender meat.
Step 1. Bring Meat to Temperature
Before you start cooking, one essential step will make or break your short ribs’ tenderness. You’ll need to let your meat come to room temperature for about 30-45 minutes before it hits the Instant Pot. I learned this trick the hard way after serving tough ribs at my first dinner party!
Here’s why it matters: When cold meat meets high heat, it can seize up and cook unevenly. Room temperature meat, on the other hand, allows for perfect browning and helps the proteins relax. While you’re waiting, it’s the perfect time to gather your other ingredients and measure out your seasonings. Trust me – this simple step is worth every minute. Just don’t leave the meat out for longer than two hours, as that’s when bacteria can start to multiply.
Step 2. Season and Brown Ribs
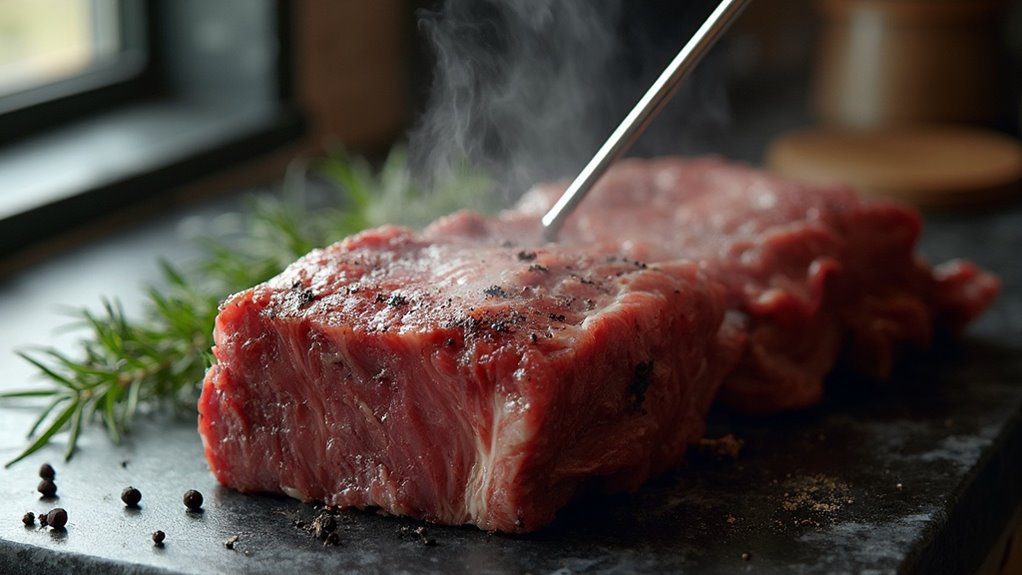
Now that your meat’s reached the perfect temperature, you’ll want to give those short ribs a proper flavor foundation. Grab your sea salt and black pepper, and don’t be shy – these big, beautiful cuts of beef can handle generous seasoning. Make sure you’re coating all sides evenly.
Heat your Instant Pot on sauté mode and add the olive oil until it’s shimmering. Here’s where the magic happens: place your ribs in the pot, giving each side about 3-4 minutes to develop that gorgeous brown crust. I’ve learned the hard way not to crowd the pot – work in batches if needed. You’ll know they’re ready when they’ve got that rich, caramelized color that screams flavor. Trust me, this step is worth every minute for that deep, savory taste you’re after.
Step 3. Add Broth and Seal

Once those beautifully browned ribs have developed their crust, you’ll need to deglaze the pot with a cup of beef broth. Using a wooden spoon, scrape up all those flavorful brown bits from the bottom – trust me, that’s where the magic happens! I always get excited during this step because those crispy pieces will infuse the broth with incredible depth.
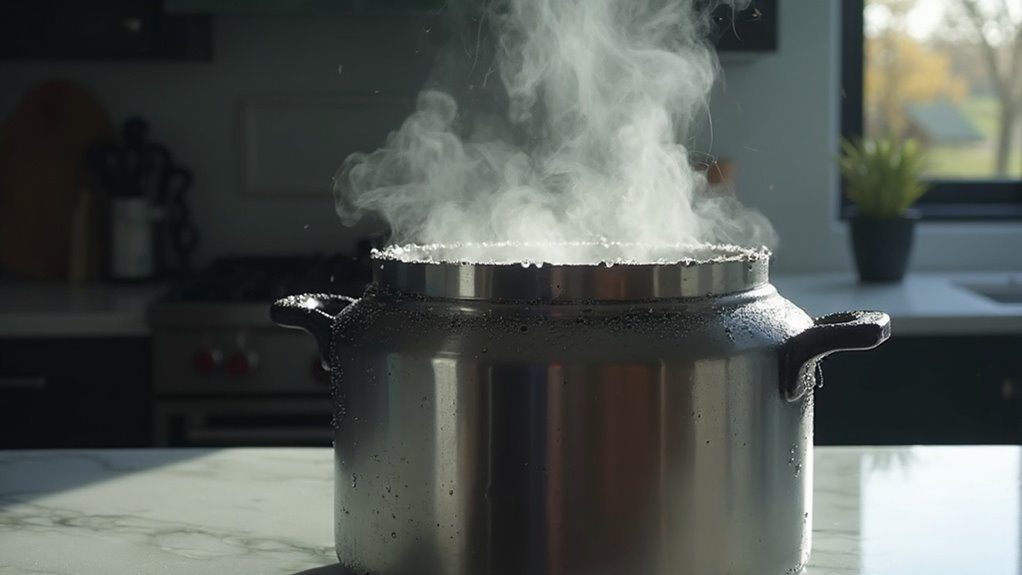
Now comes the important part: securing your Instant Pot for pressure cooking. Make sure you’ve placed the inner seal properly – I learned this lesson the hard way once! Close the lid until it clicks, then turn the valve to the sealing position. You’ll want a proper seal to achieve that fall-off-the-bone tenderness we’re after. Double-check everything before you start the pressure cooking process.
Step 4. Release Pressure Gradually
After your Instant Pot finishes its cooking cycle, I’ve learned that patience truly pays off during the pressure release stage. I know it’s tempting to quickly release the pressure valve, but trust me – those extra 15 minutes of natural release make all the difference in keeping your short ribs tender and juicy.
Let the pot sit undisturbed for 15 minutes while the pressure gradually decreases. You’ll notice the pressure valve slowly dropping during this time. Once those 15 minutes are up, you can carefully turn the valve to “venting” to release any remaining pressure. I always use a long spoon or tongs to do this – it keeps my hands safely away from the steam. Wait until the valve drops completely before opening your lid, and you’ll be rewarded with perfectly cooked, fall-off-the-bone ribs.
Step 5. Reduce Sauce if Needed

Opening your Instant Pot might reveal a sauce that’s a bit thinner than you’d like. Don’t worry – it’s easy to reduce the liquid to create a richer, more concentrated sauce that’ll perfectly complement your tender short ribs.
Simply remove the meat and set it aside on a warm plate. Switch your Instant Pot to sauté mode and let the remaining liquid simmer uncovered. You’ll want to stir occasionally while the sauce reduces, usually taking about 5-10 minutes to reach your desired consistency. I like to reduce mine until it coats the back of a spoon – that’s when you know it’s perfect. Once it’s thickened, pour the sauce over your short ribs and enjoy! The concentrated flavors will make every bite even more delicious.
Customization Options
While the classic keto short rib recipe is delicious on its own, I love experimenting with different flavors to keep things interesting. You can easily customize these ribs by adding:
- Fresh herbs like rosemary, thyme, or sage
- Minced garlic and onion powder
- Red wine (use only 1/4 cup to keep it keto-friendly)
- Asian-inspired aromatics like ginger and star anise
- Different broths such as mushroom or bone broth
I’ve found that adding 2-3 bay leaves during cooking creates an amazing depth of flavor. When I’m craving something spicy, I’ll throw in some crushed red pepper flakes or chipotle powder. For a Mediterranean twist, try adding lemon zest and oregano – it’s become one of my favorite variations. Just remember to keep your additions low-carb to maintain the keto-friendly status of this dish.
Ingredients list (with precise measurements)

The key to perfectly tender keto short ribs lies in gathering these precise ingredients before you start cooking. Here’s what you’ll need to create this mouthwatering dish:
- 3 pounds beef short ribs (choose well-marbled cuts)
- 2 tablespoons olive oil (for searing)
- 2 teaspoons sea salt
- 1 teaspoon freshly ground black pepper
- 1 cup beef broth (make sure it’s low-sodium)
I’ve found that quality ingredients make all the difference in this recipe. You’ll want to select short ribs that have good marbling throughout – those beautiful white streaks of fat will melt during cooking, creating that fall-off-the-bone texture we’re after. Trust me, I’ve made these dozens of times, and using high-quality, room-temperature meat consistently delivers the best results.
Storage Information
Since these succulent short ribs taste even better the next day, you’ll want to store them properly to maximize their flavor. Let the ribs cool completely at room temperature before placing them in an airtight container. You can safely keep them in your refrigerator for up to three days, which is perfect for meal prep or entertaining.
If you’re planning to freeze your short ribs, separate them into portion-sized servings and place them in freezer-safe containers or heavy-duty freezer bags. Don’t forget to include the cooking liquid – it’ll help keep the meat moist during reheating. They’ll maintain their best quality for up to three months in the freezer. When you’re ready to enjoy them again, thaw overnight in the refrigerator and reheat gently in the microwave or on the stovetop.
Health Benefits or Special Features
Packed with essential nutrients and healthy fats, these keto-friendly short ribs offer more than just incredible flavor. You’ll get a hearty dose of protein, B vitamins, and zinc, which support muscle maintenance and immune function. They’re also an excellent source of iron, helping maintain healthy energy levels throughout your day.
What I love about this recipe is how it fits perfectly into a ketogenic lifestyle without sacrificing taste. You won’t find any hidden carbs or sugars here – just pure, wholesome protein and fats. The pressure cooking method also helps break down the tough connective tissues, making the nutrients more bioavailable for your body to absorb. Plus, the natural collagen in short ribs supports healthy skin, joints, and gut health – a bonus for anyone following a wellness-focused eating plan.
Prep Time
Getting these keto short ribs ready takes just 15 minutes of active prep time, which I find incredibly convenient for busy weeknights. You’ll spend about 10 minutes letting the meat come to room temperature while you gather your ingredients and measuring spoons. I always use this time to prep my workspace and season the meat thoroughly.
The actual hands-on prep is straightforward: season your ribs, heat your Instant Pot, and brown the meat. I’ve found that working in batches makes the browning process much easier – don’t crowd the pot! While it might be tempting to rush this step, those few minutes of browning are essential for developing rich flavors. Once you’ve browned all sides and added the broth, you’re ready to set it and forget it.
Cook Time
The total cook time for these tender short ribs is about 60 minutes, including both the pressure cooking and natural release phases. You’ll start by browning the meat for about 10-12 minutes total, making sure to get a nice sear on all sides. Once you’ve added the broth and sealed your Instant Pot, it’s hands-off cooking time.
Set your timer for 45 minutes on high pressure, then let the pot naturally release pressure for 15 minutes. I’ve found this timing perfect for achieving that fall-off-the-bone texture you’re looking for. If you’re new to pressure cooking, don’t worry – the Instant Pot does all the hard work while you can relax. Trust me, the transformation from tough meat to succulent perfection is worth every minute.
Total Time
While the 45-minute pressure cooking time might seem lengthy, you’ll need to plan for about 90 minutes total from start to finish with this recipe. This includes bringing your meat to room temperature (about 20 minutes), seasoning and browning the ribs (15 minutes), reaching pressure (5-10 minutes), and the natural release period (15 minutes).
Don’t let the timing intimidate you – most of it is hands-off! You’ll only be actively working with the ribs during the seasoning and browning stages. The rest of the time, your Instant Pot’s doing all the work while you can tackle other tasks. Trust me, the wait is worth it – you’ll end up with incredibly tender, succulent ribs that’ll make you look like a pro chef.
Yield
Each batch of these succulent short ribs serves 4-6 people generously, with about 6-8 ounces of meat per person. You’ll find that’s plenty, as these rich, fatty cuts are incredibly filling – I often can’t finish a full portion myself! If you’re serving a smaller group, don’t worry about leftovers; they’ll reheat beautifully for lunch the next day.
For meal prep purposes, you can easily scale this recipe up or down. Just maintain the same cooking time, even if you’re making a smaller batch. If you’re feeding a crowd, you might want to double the recipe, but make sure your Instant Pot isn’t filled beyond the maximum fill line. I’d recommend cooking multiple batches rather than overcrowding the pot.
Final Thoughts
Making delicious keto short ribs in your Instant Pot couldn’t be easier once you’ve mastered these simple techniques. You’ll find yourself coming back to this recipe whenever you’re craving a rich, satisfying meal that stays within your keto goals. I’ve made these ribs countless times, and they never fail to impress my dinner guests.
Frequently Asked Questions
Can I Use Boneless Short Ribs Instead of Bone-In?
You can use boneless short ribs, but you’ll need to reduce the cooking time to 35 minutes since they’re less dense. You’ll still get tender, flavorful results.
What Wine Pairs Best With Keto Short Ribs?
With red wine accounting for 63% of dinner pairings, you’ll find a bold Cabernet Sauvignon or Malbec perfectly complements your short ribs, as their robust tannins cut through the meat’s richness.
How Do I Know if My Short Ribs Have Gone Bad?
You’ll know your short ribs are spoiled if they smell sour or rancid, have a slimy texture, or show discoloration. When fresh, they should be red-pink with white fat marbling.
Can I Substitute Other Meats if Short Ribs Aren’t Available?
You can substitute chuck roast, brisket, or beef shank in place of short ribs. They’ll provide similar rich flavors and tender results since they’re all tough cuts that benefit from slow cooking.
Why Did My Short Ribs Turn Out Tough and Chewy?
Tough, chewy ribs mean you’ve either rushed the process or skipped key steps. You’ll need to brown them thoroughly, let them reach room temperature first, and follow the full natural release time.
Conclusion
You might worry these short ribs won’t match traditional braising methods, but your Instant Pot delivers incredibly tender, flavorful results in a fraction of the time. The meat literally falls off the bone while staying keto-friendly. Trust me – once you try this method, you’ll never go back to hours of braising. Plus, cleanup’s a breeze with just one pot to wash. Give these ribs a try tonight!


