Introduction
Whether you’re a committed vegan or simply looking to add more plant-based options to your diet, homemade protein bars are a game-changer. You’ll love how these no-bake treats combine wholesome ingredients with the protein boost you need for your active lifestyle. I’ve been making these bars for years, and they’ve become my go-to snack for busy days and post-workout fuel.
What makes these bars special is their versatility and convenience. You’ll find them incredibly easy to customize with your favorite protein powder and mix-ins. Trust me, once you’ve made a batch of these creamy, protein-packed bars, you won’t believe how simple it is to create your own healthy snacks at home. Plus, they’re budget-friendly compared to store-bought alternatives and free from artificial ingredients.
Recipe
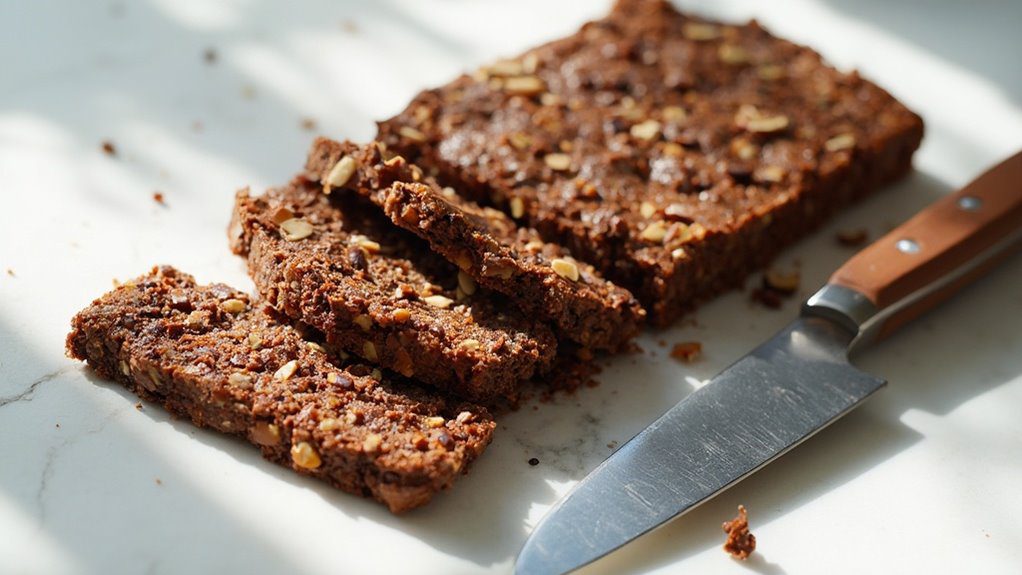
No-bake vegan protein bars offer a nutritious and convenient way to fuel your body with plant-based protein. These bars combine the wholesome goodness of rolled oats, natural peanut butter, and protein powder to create a satisfying snack that’s perfect for post-workout recovery or maintaining energy levels throughout the day.
These homemade bars are not only cost-effective but also allow you to control the quality and quantity of ingredients used. Free from artificial preservatives and excessive sugars found in many store-bought alternatives, they provide a clean source of protein while satisfying sweet cravings with natural sweeteners and dark chocolate.
- 2 cups rolled oats
- 1 cup vegan protein powder
- 1 cup natural peanut butter
- 1/3 cup maple syrup
- 1/4 cup dairy-free dark chocolate chips
Line an 8×8 inch baking pan with parchment paper. In a large bowl, combine rolled oats and protein powder, mixing well. Add peanut butter and maple syrup, stirring until a uniform, sticky dough forms. Transfer the mixture to the prepared pan, pressing down firmly to create an even layer. Melt chocolate chips in the microwave in 30-second intervals, stirring between each interval until smooth. Spread melted chocolate evenly over the top of the bars. Refrigerate for at least 2 hours until firm, then cut into 12 bars.
For ideal texture, verify your peanut butter is well-stirred and at room temperature before mixing. The consistency of the mixture should be firm but pliable – if too dry, add plant-based milk one tablespoon at a time; if too wet, add more protein powder gradually. Bars can be stored in an airtight container in the refrigerator for up to two weeks or frozen for three months. Let frozen bars thaw in the refrigerator for 30 minutes before consuming.
Prep Time
Making these protein-packed bars is remarkably quick, with a total prep time of just 15-20 minutes – and that includes melting the chocolate! You’ll spend about 5 minutes gathering your ingredients and measuring them out, followed by 5 minutes mixing the oats, protein powder, peanut butter, and maple syrup together.
The next steps are even faster: press the mixture into your pan (2-3 minutes), melt the chocolate chips (2 minutes with stirring between intervals), and spread the melted chocolate (1 minute). While you’ll need to wait 2 hours for the bars to set in the fridge, your active prep work is minimal. I love how you can prep these during a quick break and have them ready by the time you’re craving an afternoon snack.
Equipment needed
The simplicity of these protein bars extends to their required equipment – you’ll only need basic kitchen tools to whip up a batch. Here’s what you’ll want to gather before starting:
- Large mixing bowl
- Measuring cups and spoons
- 8×8-inch baking pan
- Parchment paper or wax paper
- Rubber spatula or wooden spoon
- Microwave-safe bowl for melting chocolate
- Sharp knife for cutting bars
I love that there’s no fancy equipment needed – you won’t have to track down any special gadgets or appliances. The most important tool is actually your hands, as you’ll need them to press the mixture firmly into the pan. Just line your pan with parchment paper, letting it hang over the edges, and you’ll be able to lift the bars out easily once they’re set.
Basic Cooking Method and Time
Since these protein bars require no actual cooking, you’ll love how quickly they come together in just about 15 minutes of active prep time. Simply mix your dry ingredients first, then blend in the wet ingredients until you’ve got a thick, workable dough. Press everything firmly into your lined pan – don’t skimp on the pressing part, as it helps the bars hold together better.
For the chocolate topping, you’ll need about 1-2 minutes to melt the chips in the microwave. Remember to stir between those 30-second intervals to prevent burning. Once you’ve spread the chocolate evenly, pop the pan in the fridge for at least 2 hours. That’s really all there is to it – no oven required!
Cooking Steps
Let’s break down these straightforward steps now that we’ve covered the timing basics. You’ll love how easy these protein bars come together!
- Start by combining your rolled oats and protein powder in a large mixing bowl until they’re evenly mixed.
- Add your peanut butter and maple syrup to the dry ingredients. I like to stir with a sturdy wooden spoon until everything forms a thick, sticky dough.
- Press this mixture firmly into your lined 8×8 pan – don’t be shy about using some muscle here!
- For the finishing touch, melt those chocolate chips in 30-second bursts in the microwave, stirring between each interval.
- Spread your melted chocolate evenly across the top, then pop the whole thing in the fridge for two hours.
Step 1. Mix Dry Ingredients Together

Grabbing your largest mixing bowl, you’ll want to begin with the foundation of these protein-packed bars. Start by measuring out your rolled oats – they’re the key to giving these bars their hearty texture and satisfying chew. Add your chosen vegan protein powder right on top of the oats.
Using a whisk or wooden spoon, thoroughly combine these dry ingredients until you’ve got an even mixture. I’ve found that taking an extra minute here really pays off – you don’t want any protein powder pockets in your finished bars! Make sure to break up any clumps you spot, and keep mixing until the color looks uniform throughout. If you’re working with flavored protein powder, you might notice the oats taking on a slight tint – that’s totally normal.
Step 2. Add Wet Ingredients Together

Now comes my favorite part – adding the wet ingredients that’ll bind everything together! I love watching how the creamy peanut butter and maple syrup transform our dry mixture into a perfect protein bar base.
Pour your natural peanut butter into the bowl with the oats and protein powder mixture. I’ve found that slightly warming the peanut butter makes it easier to mix. Next, drizzle in the maple syrup – it’s what gives these bars their natural sweetness and helps hold everything together. Using a sturdy spatula or your hands (I prefer using my hands), mix thoroughly until you’ve got a thick, sticky dough. If it feels too dry, don’t worry! Just add a splash of plant-based milk until the consistency feels right.
Step 3. Firmly Press Mixture Into Pan

With our perfectly mixed dough ready to go, it’s time to get this mixture into the pan. Line your 8×8 inch baking pan with parchment paper, letting it hang over the sides for easy removal later. I’ve learned from experience that this step is essential – you’ll thank me when it’s time to get those bars out!
Transfer your protein bar mixture into the lined pan, then press it down firmly with clean hands or the bottom of a measuring cup. You’ll want to apply even pressure across the entire surface to create uniform bars. Pay special attention to the corners, where the mixture tends to be looser. I like to smooth the top with the back of a spoon for that professional finish.
Step 4. Melt Chocolate for Topping

Pour your dairy-free chocolate chips into a microwave-safe bowl – I prefer using a glass measuring cup since it makes the next step easier. Heat them in 30-second intervals, stirring between each round until they’re completely melted. I’ve learned the hard way that overheating chocolate can make it seize up and become grainy, so keep a close eye on it!
Once your chocolate is smooth and glossy, pour it evenly over your pressed protein bar mixture. I like to tilt the pan gently to help the chocolate spread into all the corners. If you’re feeling fancy, use a spatula to create subtle swirls in the chocolate – it’ll make your bars look professionally made. Just make sure you work quickly before the chocolate starts to set!
Step 5. Cut Into Serving Bars
After letting your chocolate-topped bars chill in the refrigerator for at least 2 hours, remove the pan and place it on a sturdy cutting board. Using a sharp knife, score the surface first by making light marks to divide your bars into 12 equal portions – I find it easiest to make three cuts lengthwise and three cuts across.
Now, press down firmly with your knife to cut through the layers completely. If the chocolate starts to crack, let the bars sit at room temperature for 5 minutes to slightly soften. Once you’ve cut all portions, you can lift each bar out using a spatula. I like to wrap mine individually in parchment paper before storing them back in the fridge – it makes grabbing one for my post-workout snack super convenient!
Customization Options
While the basic recipe creates delicious protein bars, I’ve found endless ways to customize these treats based on personal preferences and dietary needs. You can swap peanut butter for almond or cashew butter, or try sunflower seed butter for a nut-free version. I love adding dried fruits like cranberries or chopped dates for natural sweetness.
For extra crunch and nutrition, you’ll love mixing in:
- Chopped nuts or seeds
- Shredded coconut
- Cacao nibs
- Hemp hearts
You can also experiment with different protein powder flavors – vanilla works great with added cinnamon, while chocolate powder pairs perfectly with mint extract. If you’re watching your sugar intake, replace the maple syrup with monk fruit sweetener or stevia. I’ve even tried adding matcha powder for an energizing green tea variation.
Ingredients list (with precise measurements)
Every successful protein bar recipe starts with precise measurements of high-quality ingredients, and I’ve tested these ratios extensively to get them just right. After countless batches in my kitchen, I’ve found this combination creates the perfect texture and taste:
- 2 cups rolled oats (old-fashioned work best)
- 1 cup vegan protein powder of your choice
- 1 cup natural peanut butter (no added sugars)
- 1/3 cup pure maple syrup
- 1/4 cup dairy-free dark chocolate chips
I recommend measuring each ingredient carefully – especially the maple syrup and peanut butter, as they’re essential for binding. When I first started making these, I learned that eyeballing measurements led to bars that were either too crumbly or too sticky. Trust me, precision matters here!
Storage Information
The secret to keeping your homemade vegan protein bars fresh lies in proper storage techniques. You’ll want to store your bars in an airtight container in the refrigerator, where they’ll stay fresh for up to two weeks. Trust me, I’ve learned the hard way that leaving them at room temperature isn’t ideal!
For longer storage, you’ve got a great freezer option. Just wrap each bar individually in parchment paper, pop them in a freezer-safe container, and they’ll keep for up to three months. When you’re ready to enjoy a frozen bar, let it thaw in the fridge for about an hour. I like to prep a big batch on Sunday and freeze half – it’s my foolproof method for always having a healthy snack on hand.
Health Benefits or Special Features
Packed with plant-based protein and wholesome ingredients, these homemade bars offer impressive nutritional benefits that’ll keep you energized throughout your day. You’ll love how the rolled oats provide complex carbohydrates and fiber, while the natural peanut butter delivers healthy fats and additional protein. Dark chocolate isn’t just delicious – it’s also rich in antioxidants!
These bars are perfect if you’re following a vegan lifestyle or have dairy sensitivities. They’re naturally sweetened with maple syrup instead of refined sugars, making them a healthier alternative to store-bought options. You’ll get around 10-12 grams of protein per bar, depending on your protein powder choice. Plus, there’s no baking required, so you’ll retain more of the ingredients’ natural nutritional value.
Prep Time
Making these protein-packed bars won’t eat up your entire day – I’ve found you’ll need just 15-20 minutes of hands-on prep time. While they require a 2-hour chill time in the fridge, the actual preparation is quick and straightforward. You’ll spend about 5 minutes measuring ingredients, another 5 minutes mixing everything together, and 5-7 minutes pressing the mixture into your pan and adding the chocolate topping.
I love that there’s no baking involved, which means you won’t have to wait for anything to cool down. The hardest part is waiting for the bars to set in the fridge! I often prep these on Sunday evenings while making dinner, so they’re ready for the week ahead.
Cook Time
Since these are no-bake protein bars, you won’t spend any time waiting around the oven! Instead, your only “cooking” time involves melting chocolate chips in the microwave, which takes just a minute or two.
I love how quick these bars are to prepare. You’ll only need about 5 minutes to mix the ingredients together, and another 2-3 minutes to melt and spread the chocolate topping. The real waiting game comes with the refrigeration time – but that’s hands-off time where you can go about your day. I usually prep these bars while I’m making dinner, then let them set overnight. When you’re ready to enjoy them, just slice them up, and you’re good to go. They’re perfect for busy weekdays when turning on the oven isn’t an option.
Total Time
The total preparation time for these protein bars comes in at just under 2.5 hours, though most of that is inactive refrigeration time. You’ll only spend about 15 minutes actively mixing ingredients and pressing the mixture into the pan. Then, you’ll need just a few minutes to melt and spread the chocolate topping.
The two-hour refrigeration period is essential for achieving the perfect texture, but don’t worry – you can get other things done while you wait! I often use this time to meal prep or catch up on emails. If you’re in a hurry, you can speed up the setting process by popping them in the freezer for about 45 minutes instead.
Yield
One batch yields 12 generous protein bars that you’ll love having on hand throughout the week. Each bar is packed with protein and healthy fats, making them perfect for meal prep or quick snacks when you’re on the go.
I’ve found that these bars are quite filling, so you might want to cut them into smaller portions if you prefer lighter snacks. You can easily double the recipe to make a larger batch – just use a 9×13 inch pan instead. If you’re meal prepping for the month, consider making multiple batches since they freeze so well. When I make these for my family, we usually go through one batch per week, with everyone grabbing them for workouts, school lunches, and afternoon energy boosts.
Final Thoughts
Making homemade vegan protein bars has become a game-changer in my weekly meal prep routine, and I’m confident you’ll feel the same way. These bars aren’t just a healthy snack – they’re a reflection of how simple it can be to maintain a plant-based lifestyle without sacrificing taste or nutrition.
I’ve found that the real beauty of this recipe lies in its adaptability. You can easily swap ingredients based on what’s in your pantry, whether it’s almond butter instead of peanut butter or adding dried fruit for extra flavor. Don’t be afraid to experiment! The cost savings compared to store-bought protein bars are significant, and you’ll know exactly what’s going into your body. Trust me, once you’ve mastered these bars, you’ll never look back.
Frequently Asked Questions
Can I Substitute Almond Butter for Peanut Butter if I Have Allergies?
You can definitely substitute almond butter for peanut butter in the recipe. It’ll maintain a similar texture and protein content while being safe for those with peanut allergies.
What’s the Approximate Protein Content per Bar?
You’ll get around 12-15 grams of protein per bar, depending on your protein powder choice. The combination of oats, protein powder, and nut butter creates this substantial protein content.
Will Protein Bars Maintain Shape When Taken on Outdoor Activities?
You’ll need to keep these bars refrigerated since they can soften at room temperature. They’ll hold shape best in cooler weather or when packed with ice packs during outdoor activities.
Are These Protein Bars Suitable for Children?
You’ll love knowing these bars are fantastic for kids! Just watch their protein powder intake and consider reducing it or substituting with more oats for younger children’s nutritional needs.
Can I Add Dried Fruits or Nuts Without Affecting Consistency?
You can add chopped dried fruits and nuts – just keep the total amount to 1/2 cup or less. They’ll enhance texture and nutrition without compromising the bars’ consistency.
Conclusion
These protein-packed powerhouses are like your personal fuel tanks, ready to energize your day whenever you need them. You’ll love having a stash of these bars in your fridge for post-workout recovery or afternoon pick-me-ups. Now that you’ve mastered this simple recipe, you can customize the flavors with different nut butters and mix-ins. Say goodbye to store-bought bars and hello to your new favorite homemade snack.


