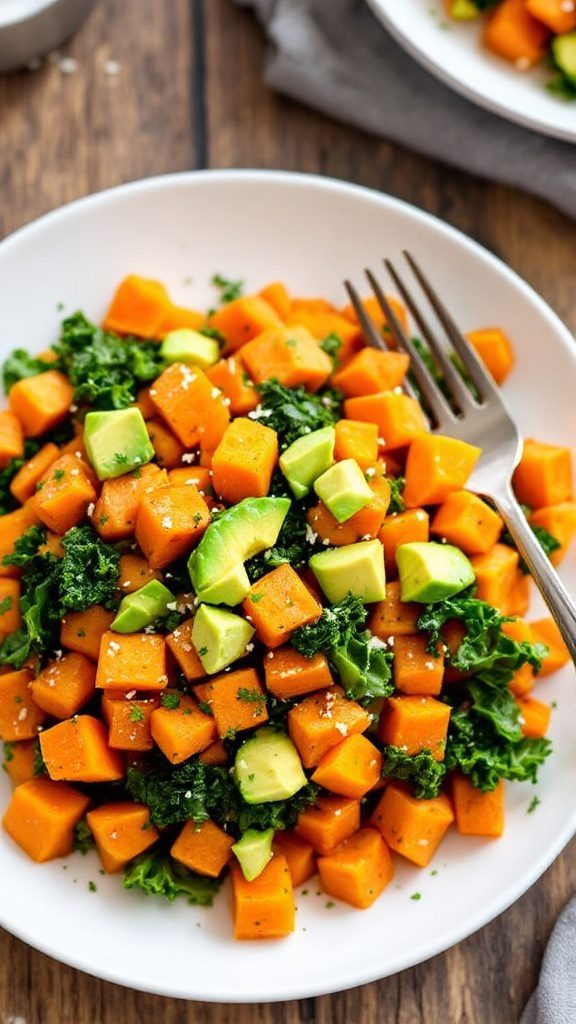
The secret weapon every parent needs in their breakfast arsenal
As a parent of a picky toddler, I’ve fought the vegetable battle more times than I can count. Those standoffs over broccoli, the negotiations over carrots, the tears over anything green—sound familiar? What if I told you there’s a way to transform those morning mealtime struggles into moments of joy? Enter: Toddler-Approved Veggie Breakfast Muffins.
These wholesome little wonders combine the goodness of vegetables with whole wheat flour and the natural sweetness of applesauce to create something magical—a breakfast treat your toddler will ask for. The best part? You’ll spend just 15 minutes of active prep time, and they’ll enjoy hidden veggies without knowing it.
As a busy parent myself, I understand the morning rush all too well. That’s why I’ve perfected this simple recipe that can be made ahead and stored for grab-and-go breakfasts throughout the week. No more stressful mornings or nutritional guilt—just soft, moist muffins that support your child’s growth while making everyone’s day a little brighter.
Ready to transform your breakfast routine? Let’s get baking!
Recipe
Toddler-approved veggie Breakfast Muffins are nutritious breakfast treats that combine the goodness of vegetables with whole wheat flour and the natural sweetness of applesauce. These muffins provide a clever way to incorporate vegetables into your toddler’s diet while creating a satisfying morning meal they’ll want to eat.
Making these muffins is straightforward and requires minimal preparation time, making them perfect for busy parents. The muffins can be prepared in advance and stored for later use, offering a convenient breakfast solution throughout the week. The recipe yields soft, moist muffins that are healthy and appealing to young children.
- 1 cup shredded zucchini
- 1 cup whole wheat flour
- 1/2 cup unsweetened applesauce
- 1/2 teaspoon baking powder
- 1/4 teaspoon cinnamon
Preheat the oven to 350°F (175°C) and prepare a muffin tin with paper liners or light greasing. Squeeze excess moisture from the shredded zucchini using a clean kitchen towel. Combine the zucchini, whole wheat flour, applesauce, baking powder, and cinnamon in a large mixing bowl. Mix until well combined. Divide the batter evenly among the muffin cups, filling each about two-thirds full. Bake for 15-20 minutes or until a toothpick inserted into the center comes clean. Cool in the pan for 5 minutes before transferring to a wire rack.
For best results, verify all ingredients are at room temperature before mixing. The zucchini must be well-drained to prevent soggy muffins. These muffins can be stored in an airtight container at room temperature for up to 3 days or frozen for up to 3 months. To reheat frozen muffins, thaw overnight in the refrigerator and warm slightly in the microwave before serving.
Prep Time
The total prep time for these nutritious muffins takes 15 minutes of your active kitchen time. You’ll spend about 5 minutes gathering and measuring ingredients, and another 10 minutes combining them together. I’ve found that shredding the zucchini ahead of time can save you precious minutes during the busy morning rush.
While your oven preheats, you can quickly line your muffin tin and mix the ingredients. I love that there’s no need for multiple bowls or complicated steps – everything goes into one mixing bowl. The actual hands-on work is minimal, and while they’re baking for 15-20 minutes, you can tackle other morning tasks. Trust me, you’ll appreciate how these muffins fit seamlessly into your busy schedule.
Equipment needed
Making these muffins requires only essential kitchen equipment that you’ll likely have on hand already. Here’s what you’ll need to get started:
- Standard 12-cup muffin tin
- Large mixing bowl
- Box grater for shredding zucchini
- Measuring cups and spoons
- Wooden spoon or spatula for mixing
- Paper muffin liners (optional)
- Clean kitchen towel for draining zucchini
- Wire cooling rack
I’ve found that a box grater with medium-sized holes best shreds the zucchini to the perfect consistency. Don’t worry if you don’t have paper liners – you can simply grease your muffin tin with a bit of cooking spray or butter. The most important thing is having a good quality muffin tin that conducts heat evenly for consistent baking results.
Basic Cooking Method and Time
Preparing these nutritious muffins follows four simple steps that’ll have you baking like a pro in no time.
First, preheat your oven to 350°F (175°C) and line your muffin tin – I love using colorful liners to make them extra appealing to little ones. Next, mix all your ingredients in a single bowl until they’re well combined. You’ll know the consistency is right when it’s thick but still spoonable. Third, fill each muffin cup about two-thirds full. I use an ice cream scoop for even portions and less mess. Finally, pop them in the oven for 15-20 minutes. You’ll know they’re done when a toothpick comes out clean, and the tops are lightly golden. Let them cool for 10 minutes before serving.
Cooking Steps
You’ll want to start by squeezing as much moisture as possible from your shredded zucchini using a clean kitchen towel. Next, mix your dry ingredients in one bowl and wet ingredients in another before combining them to create your muffin batter. Finally, pour the mixture into your prepared muffin tins and let them cool completely after baking—this cooling step is essential for the perfect texture your toddler will love.
Step 1. Squeeze Zucchini to Remove Moisture
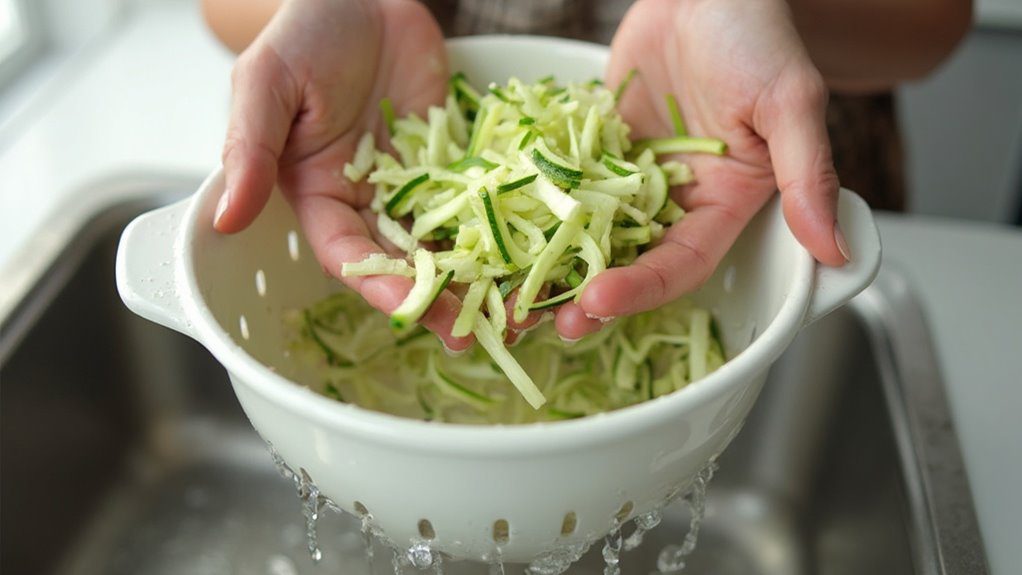
Properly draining the moisture from your shredded zucchini is essential for the perfect texture before mixing your muffin batter. Place your freshly grated zucchini in a clean kitchen towel or several layers of cheesecloth. Gather the corners together and twist tightly over your sink, squeezing out as much liquid as possible. You’ll be amazed at how much water comes out!
Through trial and error, I’ve learned that your muffins can turn out soggy and dense if you skip this vital step. Keep squeezing until only a few drops come out—you want your zucchini to feel relatively dry to the touch. Once you’ve removed the excess moisture, your zucchini is ready to be incorporated into your muffin batter for the best possible results.
Step 2. Mix Dry Ingredients Separately
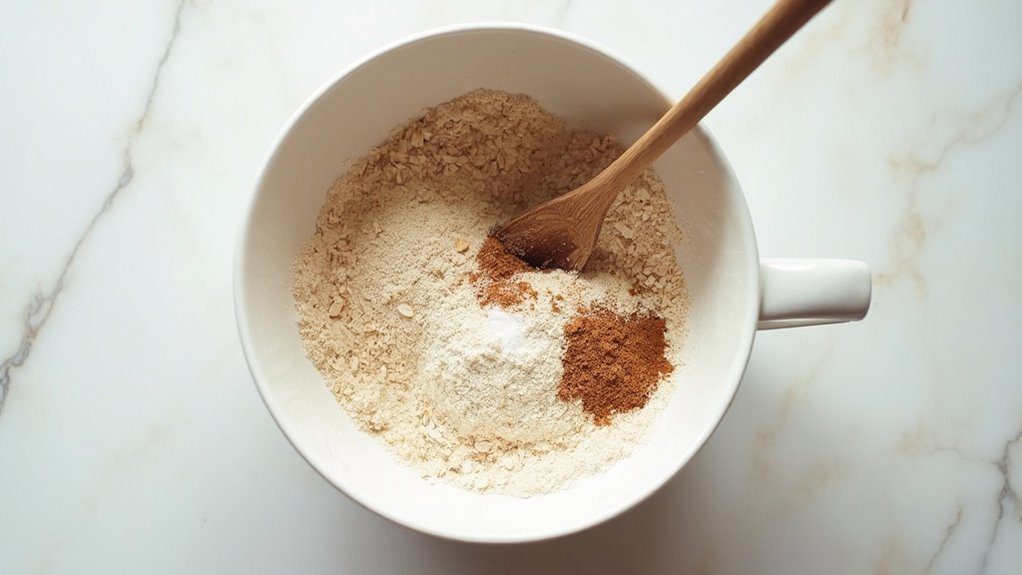
Now that your zucchini is properly drained, the next step is to combine the dry ingredients. Whisk together your whole wheat flour and baking powder in a medium mixing bowl until they’re evenly distributed. I’ve learned from experience that taking this extra step prevents those dreaded flour pockets in your finished muffins.
Add your cinnamon to the dry mixture and give it another quick whisk. You’ll notice the warm, sweet aroma that will make your muffins irresistible to little ones. While you’re mixing, break up any small clumps you spot—this will guarantee your muffins have a consistently smooth texture. Trust me, toddlers are surprisingly good at detecting even the tiniest lumps! Keep your dry ingredients separate from the wet ones for now; we’ll combine them in the next step.
Step 3.

Since the dry ingredients are ready, it’s time to combine them with our wet mixture. Pour your wet ingredients into the bowl of dry ingredients and gently fold everything together using a spatula. You’ll want to mix until you no longer see any dry flour – this usually takes 10-12 strokes. Don’t overmix, or your muffins might become dense and tough!
Now, spoon the batter into your prepared muffin tin, filling each cup about two-thirds full. I like to use an ice cream scoop for this step – it makes portioning so much easier and less messy. If you’re adding any toppings like oats or a sprinkle of cinnamon, now’s the time to do it.
Step 4. Pour Batter Into Tins

Grab your favorite muffin scoop or spoon to portion the batter into your prepared tin. Fill each cup about two-thirds full – I’ve learned through trial and error that this gives your muffins the perfect room to rise. You’ll want to distribute the batter evenly to guarantee consistent baking times.
If you’re using paper liners, don’t worry if the batter doesn’t look perfectly smooth. As the muffins bake, they’ll settle into a nice dome shape. I like to gently tap the pan on the counter a few times to release air bubbles. For extra confidence, you can use an ice cream scoop with a release mechanism – it’ll give you uniform portions every time and keep your hands clean. Just remember not to overfill, as these healthy muffins will puff up nicely while baking.
Step 5. Cool Completely Before Serving

After your muffins come out of the oven, you’ll want to let them rest in the tin for about 5 minutes – I learned this timing trick from my grandmother. This short rest period helps the muffins set up correctly and makes them easier to remove from the tin without breaking.
Next, transfer your muffins to a wire cooling rack. Proper air circulation is key to preventing soggy bottoms, which my toddler definitely notices! Let them cool completely for about 30-40 minutes. If you’re in a hurry, you can speed up the process by placing the rack near a fan, but don’t rush too much—patience results in the perfect texture. Once they’re completely cool, you’re ready to serve these veggie-packed treats to your little one.
Customization Options
While these veggie breakfast muffins are delicious, you’ll love how easily they can be customized to match your toddler’s tastes and nutritional needs. Try swapping zucchini for grated carrots or finely chopped spinach, or use a combination of veggies for extra nutrition. You can also add natural sweeteners like mashed banana or a drizzle of honey for picky eaters.
For added protein and texture, fold in chopped nuts (if age-appropriate), seeds, or a scoop of ground flaxseed. Don’t hesitate to experiment with different spices – nutmeg, ginger, or vanilla extract can create exciting flavor variations. If your little one has a sweet tooth, sprinkle some mini chocolate chips on top or mix in dried cranberries. The possibilities are endless, and you’ll soon discover your family’s favorite combination.
Ingredients list (with precise measurements)
Now that you’ve got some creative ideas for customizing these muffins let’s get down to the exact ingredients you’ll need. I’ve tested this recipe countless times with my toddler, and these measurements consistently deliver perfect results:
- 1 cup whole wheat flour
- 1 cup shredded zucchini (squeezed dry)
- 1/2 cup unsweetened applesauce
- 1/2 teaspoon baking powder
- 1/4 teaspoon cinnamon
- 1 large egg
- 2 tablespoons maple syrup (optional)
- 1/4 cup milk of choice
- 1 teaspoon vanilla extract
- 1/8 teaspoon salt
Pro tip: Don’t skip squeezing the moisture from your zucchini – this step makes the difference between perfectly moist and soggy muffins! You’ll want to measure the zucchini after it’s been squeezed.
Storage Information
These veggie breakfast muffins will stay fresh in an airtight container at room temperature for up to 3 days. I’ve found that storing them in a glass container with a tight-fitting lid works best to maintain their moisture and prevent them from drying out.
If you want to keep them longer, you can refrigerate them for up to a week. Pop them in the microwave for 10-15 seconds before serving to restore their softness. For long-term storage, these muffins freeze beautifully for up to 3 months. I like to wrap each muffin in plastic wrap, then place them in a freezer bag. When you’re ready to enjoy them, simply thaw them overnight in the fridge or defrost them in the microwave for about 30 seconds.
Health Benefits or Special Features
Packed with nutritional powerhouses, these veggie breakfast muffins offer an incredible array of health benefits for your growing toddler. The whole wheat flour provides essential fiber and B vitamins, while zucchini adds vitamin C and potassium to support immune health and growth. You’ll love that these muffins are naturally sweetened with applesauce, which means no refined sugars for your little one.
What makes these muffins truly special is their versatility and kid-friendly appeal. They’re perfect for picky eaters since the vegetables blend seamlessly into the soft, moist texture. Plus, they’re easy to eat with little hands and make an excellent on-the-go breakfast option. If your toddler has specific dietary needs, you can quickly adapt the recipe to be gluten-free or add protein-rich ingredients.
Prep Time
Getting these nutritious muffins ready takes just 15 minutes of active prep time. You’ll spend most of that time shredding the zucchini and measuring your ingredients. I’ve found that using a food processor with a grater attachment makes the veggie prep go much faster, though a regular box grater works just fine too.
While your oven preheats, you can quickly mix the ingredients in a single bowl – that’s one of my favorite things about this recipe! You won’t need any fancy equipment or complicated techniques. Just combine everything, spoon the batter into your muffin tin, and you’re done with the prep. The rest is just waiting for them to bake, which gives you time to clean up or enjoy a cup of coffee.
Cook Time
The total baking time for these veggie-packed muffins is 15-20 minutes at 350°F. You’ll know they’re done when a toothpick inserted into the center comes out clean, and the tops are lightly golden brown. I’ve found that every oven is slightly different, so start checking your muffins at the 15-minute mark.
Keep an eye on the edges—if they’re browning too quickly, tent the muffin tin with foil to prevent burning. As they bake, a wonderful aroma will fill your kitchen, and the muffins will spring back slightly when gently pressed. Once they’re done, let them cool in the tin for 5 minutes before transferring to a wire rack. This cooling step is vital for the perfect texture.
Total Time
You’ll need about 35 minutes to whip up these nutritious muffins from start to finish. The prep work takes around 15 minutes, which includes shredding your zucchini, measuring ingredients, and mixing the batter. You’ll spend another 20 minutes on baking time, but don’t worry – you can tackle other kitchen tasks while they’re in the oven.
I’ve found that having everything measured and ready to go before you start mixing makes the process even smoother. While your muffins are baking, you’ll have time to clean up and get the cooling rack ready. Remember that cooling time is extra, so plan for about 10-15 additional minutes before serving if you want them at room temperature. These timing estimates work perfectly for my busy morning routine with my toddler.
Yield
Each batch of these toddler-friendly muffins yields 12 standard-sized treats that’ll keep your little one happily munching. This amount is perfect for a week’s worth of breakfasts or snacks, especially if you’re planning to serve one muffin per day alongside fresh fruit or yogurt.
If you’re meal prepping, you can easily double the recipe to make 24 muffins and freeze the extras. I’ve found that having these on hand is a lifesaver during busy mornings! For playdates or daycare sharing, this recipe makes just enough to offer something special without going overboard. And don’t worry if you’ve got leftovers – these muffins freeze beautifully for up to three months in an airtight container.
Final Thoughts
Making these veggie-packed muffins has become a game-changer in my household, and I know they’ll make a difference in yours, too. After countless mornings of trying to convince my toddler to eat vegetables, these muffins have finally cracked the code. They’re not just healthy – they’re genuinely delicious!
You’ll love how versatile this recipe is, and your little ones won’t even notice they’re eating zucchini. I’ve found that making double batches and freezing them saves me so much time on busy mornings. Plus, watching my toddler’s face light up when I pull out these muffins makes all the effort worthwhile. Whether you’re dealing with a picky eater or want to add more vegetables to your family’s diet, these muffins are your new secret weapon.
Frequently Asked Questions
Can I Substitute Gluten-Free Flour for Whole Wheat Flour?
Like swapping dance partners, you can substitute gluten-free flour for whole wheat flour, but you’ll need to add xanthan gum to maintain the right texture and binding properties.
At What Age Can Babies Start Eating These Muffins?
You can introduce these muffins around 12 months when your baby’s comfortably eating finger foods. Just make sure to cut them into small pieces to prevent choking hazards.
How Do I Prevent the Zucchini From Making the Muffins Too Watery?
An ounce of prevention is worth a pound of cure! Before adding your shredded zucchini to the batter, squeeze out excess moisture using a clean kitchen towel or cheesecloth.
Are These Muffins Suitable for Daycare or School Lunch Boxes?
These are perfect for lunchboxes since they’re easy to pack, don’t need refrigeration, and stay fresh. If you’ve added nuts, make sure your daycare allows them.
Can I Make These Muffins Without Applesauce?
You can swap moist, sweet applesauce with mashed banana, Greek yogurt, or pumpkin puree. These alternatives will keep your muffins tender and provide natural sweetness while adding their own nutritional benefits.
Conclusion
You’ll love watching your little one devour these muffins like they’re treasure-hunting for buried vegetables. They’re as versatile as a chameleon – perfect for busy mornings, afternoon snacks, or lunchbox surprises. You’re always prepared for those hangry moments with these clever bites in your freezer arsenal. Best of all, you’ll feel like a kitchen ninja, sneaking in those essential nutrients while your toddler grins from ear to ear.