Introduction
When I first started making breakfast bars for my toddler, I discovered that finding the right balance of healthy ingredients and kid-friendly taste wasn’t easy. After months of testing different recipes, I finally created these gluten-free bars that my little one actually looks forward to eating.
You’ll love how simple these bars are to make, and your toddler will enjoy having their own special breakfast treat. I’ve made sure to include ingredients that pack a nutritional punch while keeping the texture perfect for tiny hands. The best part? You can make them ahead of time, which is a lifesaver during busy mornings. Trust me, there’s nothing better than watching your child happily munch on something you know is both delicious and good for them.
Recipe
These nutritious breakfast bars combine the natural sweetness of ripe bananas with wholesome gluten-free oats and protein-rich almond butter. The addition of dried cranberries provides bursts of flavor while adding natural antioxidants and fiber to this kid-friendly breakfast option.
Perfect for busy mornings, these bars can be made ahead of time and require minimal preparation. The simple mixing method makes them an ideal recipe for meal prep, yielding bars that maintain their shape and consistency throughout the week.
- 2 cups rolled oats (certified gluten-free)
- 3 ripe bananas, mashed
- 1/2 cup almond butter
- 1/4 cup honey
- 1/2 cup dried cranberries
Preheat oven to 350°F (175°C). Line an 8×8 inch baking pan with parchment paper. In a large bowl, thoroughly combine mashed bananas, almond butter, and honey. Add rolled oats and dried cranberries, mixing until evenly distributed. Press mixture firmly into the prepared pan, ensuring even thickness. Bake for 20-25 minutes or until edges are golden brown. Allow to cool completely before cutting into squares.
For best results, use very ripe bananas with brown spots for maximum natural sweetness. The mixture should be moist but hold together when pressed; if too wet, add oats one tablespoon at a time, and if too dry, incorporate additional mashed banana. Store bars in an airtight container in the refrigerator for up to one week, or freeze individually wrapped pieces for up to three months. Let frozen bars thaw overnight in the refrigerator before serving.
Prep Time
Getting these toddler-friendly breakfast bars ready takes just 10 minutes of hands-on prep time, making them perfect for busy parents like me who need quick and efficient breakfast solutions. You’ll spend most of that time mashing bananas and measuring ingredients, which I often do while my little one plays nearby.
The actual assembly is super quick – just mix, press, and pop in the oven. I’ve found that lining the pan beforehand saves precious minutes during cleanup. While the bars bake for 20-25 minutes, you can tackle other morning tasks or enjoy a quiet cup of coffee. Trust me, I’ve made these countless times during my toddler’s nap time, and the prep work is manageable even when you’re running on limited sleep.
Equipment needed
Kitchen essentials for making these bars are wonderfully minimal, which I love as a busy parent. You’ll need:
- A large mixing bowl
- An 8×8-inch baking pan
- Parchment paper or non-stick liner
- Measuring cups and spoons
- A sturdy spoon or spatula for mixing
- A potato masher or fork for the bananas
I’ve found that using parchment paper with overhang makes it super easy to lift the bars out after baking. While you could use a stand mixer, I prefer mixing by hand – it’s one less thing to clean! You’ll also want an airtight container for storage once they’re done. Trust me, these simple tools are all you need to whip up these nutritious bars in no time.
Basic Cooking Method and Time
Once you’ve gathered your simple kitchen tools, the baking process couldn’t be more straightforward. Start by preheating your oven to 350°F, then mix your mashed bananas, almond butter, and honey in a large bowl until well combined. You’ll want to stir in the oats and cranberries until everything’s evenly distributed.
Press the mixture firmly into your lined 8×8 baking pan – don’t be shy about really packing it down! Pop it in the oven for 20-25 minutes, keeping an eye out for those golden-brown edges that tell you it’s done. I’ve found that 22 minutes usually hits the sweet spot in my oven, but you might need to adjust the time depending on yours. Let the bars cool completely before cutting – trust me, this step makes all the difference!
Cooking Steps
You’ll want to start by thoroughly mixing your wet ingredients – the mashed bananas, almond butter, and honey – until they form a smooth paste. Next, slowly fold in your oats and cranberries, making sure they’re evenly distributed throughout the mixture before pressing it firmly into your lined baking pan. Finally, pop the pan into your preheated oven and bake until you see those golden edges forming, then let it cool completely before cutting into perfectly sized bars for tiny hands.
Step 1. Mix Wet Ingredients Together
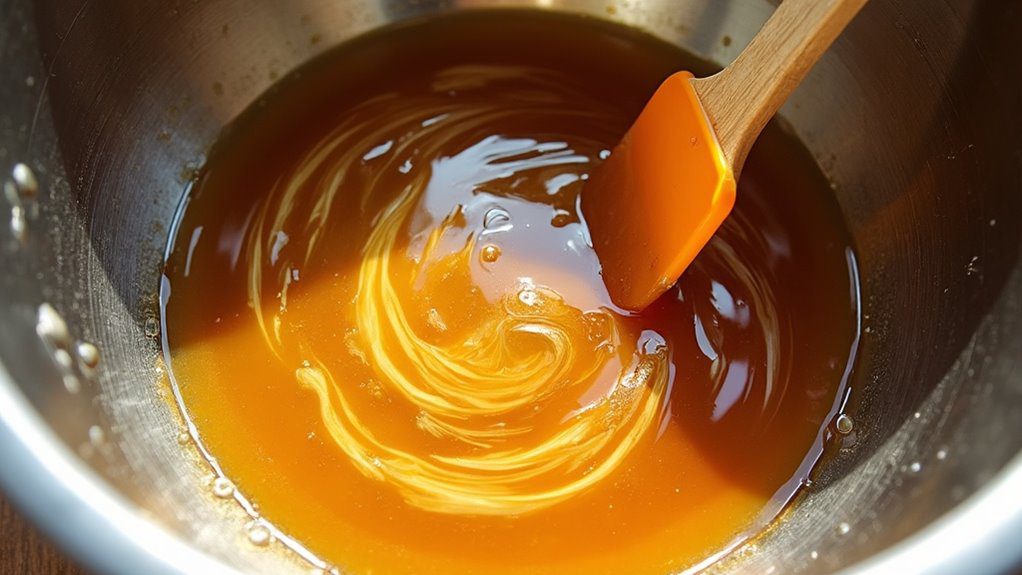
Before moving on to the dry ingredients, let’s combine our wet ingredients in a large mixing bowl. You’ll want to start by thoroughly mashing your three ripe bananas – I find using a fork works perfectly for this step. Next, add in your almond butter and honey, making sure they’re both at room temperature for easier mixing.
Now here’s a pro tip I’ve learned from making these bars countless times: don’t rush the mixing process. You’ll want to stir until the mixture becomes smooth and uniform, which usually takes about 2-3 minutes. If you’re seeing any chunks of banana or streaks of almond butter, keep going! The more thoroughly you mix these wet ingredients, the better your bars will hold together once they’re baked.
Step 2. Add Dry Oats Slowly
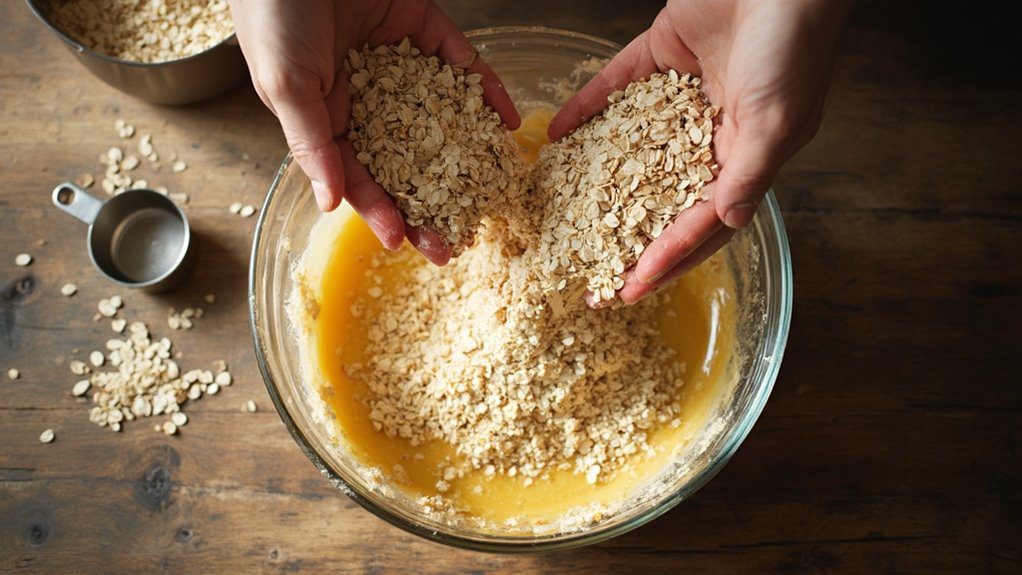
With our perfectly mixed wet ingredients ready to go, it’s time to incorporate the star of our breakfast bars – the gluten-free rolled oats. I’ve learned through countless batches that adding the oats gradually, about 1/2 cup at a time, helps achieve the ideal texture without overworking the mixture.
As you sprinkle in the oats, use a sturdy wooden spoon or spatula to fold them into the wet ingredients. You’ll notice the mixture becoming thicker and more structured with each addition. Don’t worry if it seems a bit loose at first – that’s exactly what we want! The oats will continue absorbing moisture as they bake. Once all two cups are incorporated, you’ll have a perfectly balanced mixture that’s ready for the cranberries.
Step 3. Press Mixture Into Pan

Grabbing your lined 8×8 pan, transfer the oat mixture into it with care – this essential step determines the final texture of your bars. Using the back of a spatula or your clean hands, press the mixture firmly and evenly into every corner of the pan. Don’t rush this part; even pressure guarantees your bars won’t crumble when cut later.
I’ve learned that creating a smooth, level surface makes a big difference in how these bars turn out. Pay special attention to the edges and corners, where mixture tends to be thinner. If you notice any gaps or uneven spots, simply redistribute the mixture until you’re satisfied. Trust me, taking an extra minute here will give you perfect, toddler-friendly squares that hold together beautifully.
Step 4. Bake Until Edges Golden

The next twenty-five minutes are essential for achieving perfectly baked breakfast bars. Place your pan in the preheated 350°F oven and set your timer. You’ll want to keep an eye on the edges – they’ll tell you when your bars are ready by turning a lovely golden brown. I’ve learned through experience that checking at the 20-minute mark gives you the perfect window to assess doneness.
Watch for these visual cues that tell you they’re done:
- Edges turn golden brown
- Surface looks set and dry
- Slight pulling away from pan sides
- Gentle spring-back when touched
Don’t worry if the center seems slightly soft – it’ll firm up as the bars cool. Trust me, I’ve made these countless times for my own toddler, and this timing creates the perfect texture every time.
Step 5. Cool Before Cutting Bars

Once your perfectly golden breakfast bars emerge from the oven, you’ll probably want to dig right in – but patience pays off here! Let the bars cool completely in the pan for at least 30 minutes before attempting to cut them. I’ve learned from experience that warm bars will crumble and stick to your knife.
After cooling at room temperature, you can speed up the firming process by popping them in the fridge for 15 minutes. When you’re ready to cut, lift the bars out using the parchment paper edges, then slice with a sharp knife into squares. I like to wipe the blade clean between cuts for the neatest results. Trust me – those few extra minutes of waiting will give you picture-perfect bars that’ll hold together beautifully for your little ones.
Customization Options
While these breakfast bars are delicious as-is, you’ll love how easily they can be customized to match your toddler’s preferences and dietary needs. Try swapping dried cranberries for raisins, chopped dates, or diced dried apricots. You can also add mini chocolate chips, sunflower seeds, or finely chopped nuts if your child is old enough.
For extra nutrition, mix in a tablespoon of chia seeds or ground flaxseed. If your little one isn’t a fan of almond butter, substitute it with peanut butter or sunflower seed butter. Need them sweeter? Replace honey with maple syrup, or add a dash of cinnamon and vanilla extract. Just remember to keep the wet-to-dry ratio balanced – if you’re adding more dry ingredients, increase the mashed banana accordingly.
Ingredients list (with precise measurements)
After exploring those creative variations, let’s get down to the exact measurements you’ll need for these toddler-friendly bars. You’ll want to gather:
- 2 cups of certified gluten-free rolled oats (make sure they’re labeled specifically as gluten-free)
- 3 ripe bananas (the spottier, the better!)
- 1/2 cup smooth almond butter
- 1/4 cup honey
- 1/2 cup dried cranberries
I’ve found these proportions work perfectly for achieving that ideal, holdable texture that won’t crumble in tiny hands. The key is using really ripe bananas – they’ll give you the best natural sweetness and binding power. If you’re like me, you might keep a few extra bananas on your counter just waiting to brown for recipes like this one.
Storage Information
Since proper storage keeps these breakfast bars fresh and delicious, you’ll want to follow a few simple guidelines. Store your bars in an airtight container in the refrigerator, where they’ll stay fresh for up to a week. I’ve found that stacking them with parchment paper between layers prevents sticking and makes grabbing one easier during hectic mornings.
For longer storage, you can freeze these bars for up to three months. Simply wrap each portion individually in parchment paper, pop them in a freezer bag, and you’re set. When you’re ready to enjoy a frozen bar, just transfer it to the fridge the night before. Trust me, your future self will thank you for having these ready-to-go breakfast options on hand!
Health Benefits or Special Features
Because these breakfast bars pack multiple nutritional benefits into each bite, you’ll feel good about serving them to your little ones. The gluten-free oats provide fiber and sustained energy, while bananas offer potassium and natural sweetness. You’re also giving your toddler healthy fats and protein from the almond butter, which helps with brain development.
I love that these bars don’t contain any artificial preservatives or refined sugars. The dried cranberries add antioxidants and a touch of tartness that most kids enjoy. When my daughter started preschool, these bars became our go-to breakfast because they’re not only nutritious but also mess-free. Plus, they’re soft enough for young toddlers to eat safely, while being firm enough to hold their shape in lunch boxes.
Prep Time
The preparation time for these breakfast bars fits perfectly into a busy parent’s schedule. You’ll need about 10 minutes to gather and mix the ingredients, and another 20-25 minutes for baking. While they’re in the oven, you can tackle other morning tasks or spend quality time with your little one.
I’ve found that measuring ingredients ahead of time can make the process even smoother. Here’s a time-saving tip: mash the bananas the night before and store them in an airtight container in the fridge. When you’re ready to bake, simply combine everything in one bowl – there’s no need for multiple mixing steps or fancy equipment. Once they’ve cooled, you can slice them into squares in just a few minutes.
Cook Time
Precise timing makes all the difference when baking these toddler-friendly bars. You’ll want to keep a close eye on them during their 20-25 minute bake time at 350°F (175°C). I’ve found that checking them at the 18-minute mark helps prevent over-browning, which can make them too crispy for little ones.
Look for that perfect golden-brown edge – it’s your signal that they’re done. If you’re using a dark-colored pan, you might need to reduce the time by 2-3 minutes. Trust me, I learned this the hard way! Different ovens can vary slightly, so on your first batch, I’d recommend setting a timer for 20 minutes and then checking every 2 minutes until you find that sweet spot for your oven.
Total Time
Planning around 45 minutes from start to finish will guarantee these breakfast bars turn out perfectly. You’ll need about 10 minutes to gather and prep your ingredients, including mashing those bananas and measuring everything out. The actual hands-on mixing time only takes about 5-7 minutes – it’s super quick!
The baking time of 20-25 minutes gives you a chance to clean up or tackle other morning tasks. Don’t forget to factor in at least 10 minutes of cooling time – I know it’s tempting to cut into them right away, but trust me, they’ll hold together much better if you wait. I’ve learned this the hard way with my own toddler bouncing impatiently around the kitchen!
Yield
One batch of these wholesome bars yields 16 perfect squares – I like cutting them into a 4×4 grid which gives you toddler-friendly portions that are just the right size for little hands.
You’ll find these portions work perfectly for most toddlers, but don’t hesitate to cut them smaller if that’s what works better for your little one. I’ve found that each square provides just enough energy and nutrients for a satisfying breakfast or snack. When I make these for my daughter’s playgroup, I’ll often double the recipe to get 32 squares, which is perfect for sharing or storing extras in the freezer. The bars maintain their shape well when cut, making them easy to portion out and pack in lunch boxes.
Final Thoughts
Whether you’re a busy parent or caregiver, these gluten-free breakfast bars have become my go-to solution for hectic mornings with toddlers. After countless test batches in my kitchen, I’ve found this recipe hits all the right notes – nutritious, delicious, and perfectly sized for little hands.
I love watching my two-year-old’s face light up when she spots these bars in the morning, and you’ll appreciate how they keep well in the fridge or freezer. You can easily customize them by swapping dried cranberries for other fruits or adding chia seeds for extra nutrition. When life gets chaotic (and with toddlers, it always does), you’ll be thankful to have these ready-made bars on hand. Trust me, they’re a game-changer for morning routines.
Frequently Asked Questions
Can My Baby Under 12 Months Eat These Breakfast Bars?
You shouldn’t give these bars to babies under 12 months because they contain honey, which can cause infant botulism. Also, the texture could be a choking hazard for young infants.
Are These Bars Safe for Children With Nut Allergies?
While these bars look perfect for nut-free kids, they’re actually not safe due to the almond butter. You’ll need to swap it with sunflower seed butter to make them allergy-friendly.
Will These Bars Help My Toddler Stay Full Until Lunchtime?
You’ll find these provide steady energy through the morning thanks to protein from almond butter, complex carbs from oats, and natural sugars from bananas and honey.
Can I Send These Breakfast Bars to Daycare?
You can send these bars to daycare since they’re stable at room temperature and easy to pack. Store them wrapped individually, and let staff know they contain almond butter due to potential allergies.
How Should I Introduce These Bars to My Picky Toddler?
Like a playful adventure, you’ll want to get your toddler involved in making these bars. Let them mash bananas and mix ingredients. They’re more likely to eat food they’ve helped create.
Conclusion
Like Mary Poppins’ spoonful of sugar, these breakfast bars make mornings more manageable while delivering wholesome nutrition your toddler will love. You’ll find yourself reaching for these bars time and again, knowing you’re providing a healthy start without the usual morning chaos. Whether you’re heading to the playground or tackling errands, these versatile treats will become your new secret weapon for successful mornings with your little one.


