So, you grabbed some Trader Joe’s Grass Fed Beef Sirloin Roast, huh? Awesome choice! This stuff is super tasty and can make a really good meal. But, like, how do you even cook it so it’s not tough or dry? And what about making it taste amazing? Don’t worry, I’ve got you covered. This guide will walk you through everything, from picking out the best roast at the store to making a gravy that’ll have everyone asking for seconds. Get ready to impress yourself and anyone else lucky enough to be at your dinner table!
Key Takeaways
- Always sear your Trader Joe’s Grass Fed Beef Sirloin Roast before cooking it to lock in flavor.
- For a really tender roast, slow cooking or pressure cooking works best.
- Don’t throw away those pan drippings! They’re the secret to a great gravy.
- The right side dishes can make your roast even better. Think about what goes well with beef.
- If your roast isn’t as tender as you hoped, don’t give up. There are ways to fix it for next time.
Selecting Your Trader Joe’s Grass Fed Beef Sirloin Roast
Understanding Roast Cuts and Their Qualities
Okay, so you’re at Trader Joe’s, staring at the beef. It can be a little confusing, right? The sirloin roast is a pretty solid choice because it’s leaner than, say, a chuck roast, but it still has enough fat to give you good flavor. Think of it as a middle-ground option. Chuck roasts are great for slow cooking because they get super tender, but they can be fatty. Sirloin is a bit more refined. Trader Joe’s grass-fed beef is generally good quality, but knowing your cuts helps.
Identifying the Ideal Weight for Your Meal
How much roast do you actually need? This depends on how many people you’re feeding, obviously, and whether you want leftovers (pro tip: always aim for leftovers!). A good rule of thumb is about 1/2 pound of uncooked roast per person. So, for a family of four, you’re looking at a 2-pound roast. If you want sandwiches the next day, bump that up to 3 pounds. Remember, the roast will shrink a bit during cooking, so it’s better to overestimate slightly. Pay attention to the grass-fed beef weight on the package.
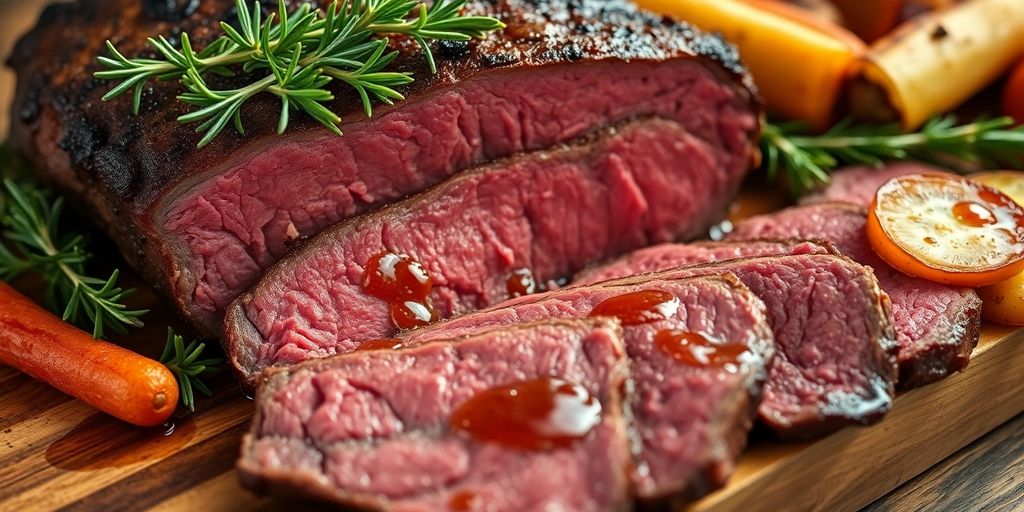
Visual Cues for a Quality Roast
Alright, let’s talk about what to look for when you’re picking out your roast. You want to see good color – a nice, deep red is ideal. Avoid roasts that look brown or gray. Some marbling (those little streaks of fat within the meat) is good, as that adds flavor and keeps the roast moist. But you don’t want too much fat on the outside, unless you plan on trimming it. Also, check the packaging for any tears or leaks. Here’s a quick checklist:
- Color: Deep red
- Marbling: Present, but not excessive
- Fat: Not too much external fat
- Packaging: Intact, no leaks
Picking the right roast is half the battle. Take your time, don’t be afraid to inspect the meat, and you’ll be well on your way to a delicious meal.
Essential Ingredients for Flavorful Roasting
Building a Robust Flavor Profile
Okay, so you’ve got your Trader Joe’s grass-fed beef sirloin roast. Now what? It’s time to think about flavor. Don’t be shy! A good roast needs a solid base. I usually start with salt and pepper, of course. But then I like to add garlic powder, onion powder, and maybe a little smoked paprika for depth. Don’t underestimate the power of a good dry rub.
The Role of Aromatics and Herbs
Aromatics are your friends. Seriously. They infuse the meat with so much flavor as it cooks. I’m talking onions, garlic, carrots, and celery. Throw them in the bottom of the roasting pan. For herbs, I’m a big fan of fresh rosemary and thyme. They just smell amazing and add a really nice touch. You can also use dried herbs if that’s what you have on hand. Just remember that dried herbs are usually more potent, so use less.
Balancing Sweet and Savory Notes
This is where things get interesting. A little bit of sweetness can really balance out the savory flavors of the beef. I like to add a splash of balsamic vinegar or a touch of brown sugar to my beef pot roast. It doesn’t make the roast taste sweet, but it enhances the other flavors and adds complexity. You could also use a little bit of honey or maple syrup. Just don’t overdo it! You want a subtle sweetness, not a dessert.
I always make sure to have a good balance of flavors. Too much of one thing can throw off the whole dish. It’s all about experimenting and finding what you like best. Don’t be afraid to try new things!
Mastering the Art of Roasting Trader Joe’s Grass Fed Beef Sirloin
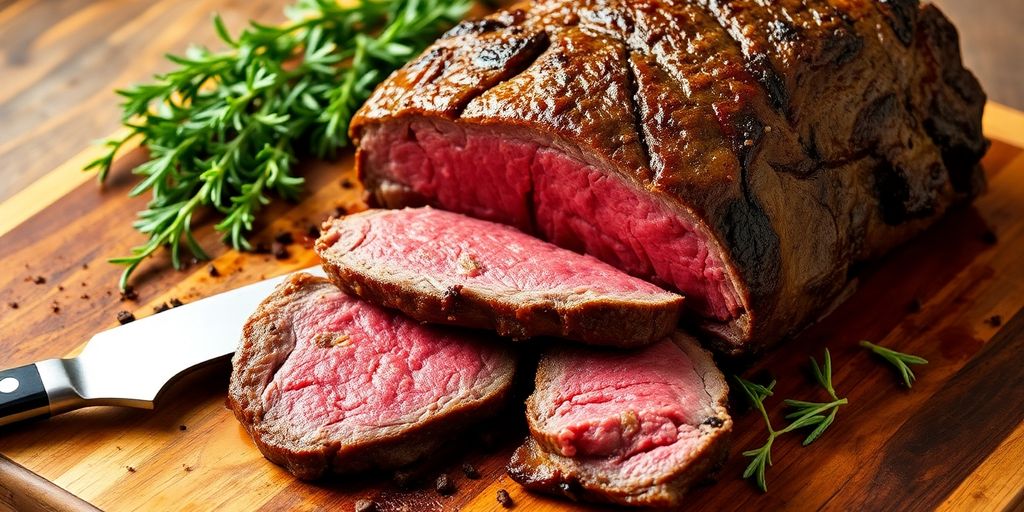
Achieving the Perfect Sear
Okay, so you’ve got your beautiful Trader Joe’s grass-fed sirloin roast. First things first: the sear. Don’t skip this step! A good sear is key to developing a rich, deep flavor and a beautiful crust. Get your pan screaming hot – I’m talking smoking point with some oil that can handle the heat (avocado or grapeseed oil work great). Sear each side for a few minutes until it’s nicely browned. This locks in the juices and adds a ton of flavor. Trust me, it’s worth the extra effort.
Slow Cooking for Tenderness
Slow cooking is your best friend when it comes to grass-fed beef. It can be a bit tougher than grain-fed, so low and slow is the way to go. I usually aim for around 275°F (135°C) in the oven. This allows the connective tissues to break down, resulting in a super tender roast. Use a meat thermometer to monitor the internal temperature. You’re looking for around 130-135°F (54-57°C) for medium-rare. Remember, it will continue to cook a bit after you take it out of the oven, so don’t overcook it!
Pressure Cooking for Efficiency
Alright, let’s talk Instant Pot (or any pressure cooker). If you’re short on time, this is a fantastic option. It drastically reduces the cooking time while still producing a tender roast. The key is to not overcook it. Here’s a basic guideline:
- Sear the roast first (yes, even in the Instant Pot!).
- Add about a cup of beef broth or water to the pot.
- Cook on high pressure for about 20 minutes per pound.
- Let the pressure release naturally for at least 10 minutes before releasing the rest manually.
I’ve found that a natural pressure release makes a huge difference in the tenderness of the roast. Quick release can sometimes result in tougher meat. Also, don’t forget to deglaze the pot after searing to avoid that dreaded ‘burn’ notice. I usually use beef broth for this, but a splash of balsamic vinegar can also add a nice depth of flavor.
Here’s a table showing approximate cooking times for different roast sizes in a pressure cooker:
| Roast Size (lbs) | Cooking Time (minutes) |
|---|---|
| 2 | 40 |
| 3 | 60 |
| 4 | 80 |
Remember to always use a meat thermometer to ensure your roast reaches the desired internal temperature. This is the best way to avoid overcooking and achieve optimal tenderness.
Crafting Delicious Gravy and Accompaniments
Utilizing Pan Drippings for Rich Gravy
Okay, so you’ve got this amazing roast, right? Don’t even think about tossing those pan drippings! That’s liquid gold right there. Seriously, it’s the base for the most incredible gravy you can imagine. The key is to deglaze the pan properly. After you take the roast out, put the pan on the stove over medium heat. Add some broth (beef, obviously) and scrape up all those browned bits from the bottom. That’s where all the flavor is hiding. Let it simmer for a bit, then strain it to get rid of any chunky bits. Now you’re ready to make some savory gravy.
Complementary Vegetable Pairings
Roast beef and veggies? Classic combo for a reason. But let’s think beyond just throwing some carrots and potatoes in the pan. I mean, those are good, but we can do better. Consider roasting some root vegetables like parsnips, sweet potatoes, or even beets. They add a touch of sweetness that balances the richness of the beef. Asparagus or green beans are great for a pop of color and freshness. And don’t forget about onions! Roasted onions become incredibly sweet and tender. Here’s a quick guide:
- Root Vegetables: Parsnips, sweet potatoes, carrots, beets
- Green Vegetables: Asparagus, green beans, Brussels sprouts
- Alliums: Onions, garlic
Honestly, the best part about roasting vegetables with your beef is that they soak up all those delicious juices. It’s like a flavor explosion in every bite. Plus, it’s a super easy way to get your veggies in.
Thickening Techniques for a Smooth Finish
So, you’ve got your pan drippings, you’ve got your broth, but your gravy is still too thin? No problem! There are a few ways to thicken it up. The most common is a cornstarch slurry. Just mix equal parts cornstarch and cold water until smooth, then whisk it into your simmering gravy. Be careful not to add too much, or it’ll get gloopy. Another option is a roux, which is a mixture of butter and flour cooked together. This gives the gravy a richer flavor and a smoother texture. You can also try using arrowroot powder for a gluten-free option. Here’s a quick comparison:
| Thickener | Pros | Cons |
|---|---|---|
| Cornstarch | Easy, readily available | Can get gloopy if overused |
| Roux | Rich flavor, smooth texture | Requires more cooking time |
| Arrowroot | Gluten-free | Can be more expensive than cornstarch |
No matter which method you choose, make sure to whisk constantly to prevent lumps. And always add the thickener gradually, until you reach your desired consistency. You want a gravy that’s thick enough to coat the back of a spoon, but not so thick that it’s like pudding. You want it to be perfect for braised meat served over rice.
Achieving Optimal Tenderness and Texture
Understanding Natural Release Versus Quick Release
Okay, so you’ve got your beautiful Trader Joe’s grass fed beef sirloin roast all prepped and ready. Now comes the moment of truth: cooking it to perfection. But what happens after the cooking time is up in your pressure cooker or slow cooker? That’s where understanding natural release versus quick release comes in. With a natural release, you let the pressure dissipate on its own, which can take anywhere from 15 minutes to an hour. This method is generally better for larger cuts of meat because it allows the roast to continue cooking gently, resulting in more tender results. A quick release, on the other hand, involves manually releasing the pressure by opening the valve. This stops the cooking process immediately and is better suited for smaller cuts or when you’re short on time. However, a quick release can sometimes result in tougher meat, especially with a sirloin roast. I’ve found that erring on the side of natural release is usually the way to go for the most tender outcome.
Factors Influencing Meat Texture
Several things can affect how tender your roast turns out. First, the cut of meat itself plays a big role. Sirloin, while flavorful, isn’t naturally as tender as, say, a tenderloin. That’s why slow cooking or pressure cooking is so important – it helps break down those tougher fibers. Marbling, or the amount of fat within the muscle, also contributes to tenderness. Grass-fed beef tends to have less marbling than grain-fed, so you need to be extra careful not to overcook it. Cooking time and temperature are also critical. Overcooking will dry out the meat, making it tough, while undercooking will leave it chewy. Finally, don’t forget about carryover cooking! The internal temperature of the roast will continue to rise even after you take it out of the oven or pressure cooker, so it’s important to account for that when determining doneness. You might even consider Australian beef for a different flavor profile.
Tips for Fork-Tender Results
Want that melt-in-your-mouth, fork-tender roast? Here are a few tips I’ve picked up over the years:
- Sear the roast before cooking. This helps to develop a flavorful crust and lock in moisture.
- Use a meat thermometer to monitor the internal temperature. Aim for around 130-135°F for medium-rare, keeping in mind carryover cooking.
- Let the roast rest for at least 15-20 minutes before slicing. This allows the juices to redistribute, resulting in a more tender and flavorful roast.
- Slice against the grain. This shortens the muscle fibers, making the meat easier to chew.
I once made the mistake of skipping the resting period, and the roast was noticeably tougher. Now, I always make sure to let it rest, even if I’m impatient. It really does make a difference!
And if you’re using a pressure cooker, don’t be afraid to experiment with the cooking time and release method to find what works best for your particular cooker and roast size. Some people swear by a natural release, while others prefer a quick release followed by a short resting period. The key is to keep experimenting and taking notes until you achieve that perfect, fork-tender result every time.
Creative Serving Suggestions for Your Roast
Transforming Leftovers into New Meals
Okay, so you’ve roasted this amazing Trader Joe’s roast, and now you have leftovers. Don’t let them go to waste! Leftover roast beef is incredibly versatile. Think beyond just reheating slices. Here are some ideas:
- Roast Beef Sandwiches: Classic, but always a winner. Use crusty bread, horseradish mayo, and some sharp cheddar. Maybe even caramelize some onions.
- Beef Stroganoff: Slice the roast thinly and add it to a creamy mushroom sauce. Serve over egg noodles or mashed potatoes.
- Shepherd’s Pie: Dice the beef and mix it with vegetables in a gravy, then top with mashed potatoes and bake until golden brown.
- Beef Tacos or Quesadillas: Shred the beef and use it as a filling for tacos or quesadillas. Add your favorite toppings like salsa, guacamole, and sour cream.
- Beef and Barley Soup: A hearty and comforting soup perfect for a chilly day. Add diced roast beef, barley, and your favorite vegetables to a flavorful broth.
Pairing with Classic Side Dishes
Roast beef is a pretty rich dish, so you want sides that complement it without being too heavy. Here are some classic pairings that always work:
- Mashed Potatoes: Creamy mashed potatoes are a must-have. You can add garlic, herbs, or even roasted vegetables for extra flavor.
- Roasted Vegetables: Root vegetables like carrots, parsnips, and potatoes roast beautifully alongside the beef. Toss them with olive oil, salt, pepper, and herbs before roasting.
- Yorkshire Pudding: A classic British side dish that’s perfect for soaking up the gravy. It’s basically a popover made with beef drippings.
- Green Beans: A simple side dish that adds a pop of color and freshness to the meal. You can steam, sauté, or roast them.
- Creamed Spinach: A rich and decadent side dish that pairs perfectly with roast beef. Use fresh or frozen spinach and a creamy sauce made with butter, flour, and milk.
Elevating Your Dining Experience
It’s not just about the food; it’s about the whole experience. Here are some tips to make your roast beef dinner extra special:
- Set the Table: Use your best china, silverware, and glassware. Add a tablecloth and some candles for a touch of elegance.
- Choose the Right Wine: A bold red wine like Cabernet Sauvignon or Merlot pairs well with roast beef. If you prefer white wine, try a Chardonnay or Viognier.
- Serve a Starter: A simple salad or soup is a great way to start the meal. It will whet your appetite and add some variety to the menu.
- Offer a Dessert: A classic dessert like apple pie or chocolate cake is the perfect way to end the meal. Or, keep it simple with some fresh fruit and whipped cream.
- Play Some Music: Choose some background music that sets the mood. Classical music, jazz, or even some mellow pop music can work well.
Don’t be afraid to experiment with different flavors and combinations. The most important thing is to have fun and enjoy the process. Cooking should be enjoyable, not stressful. So, relax, put on some music, and get creative in the kitchen!
Troubleshooting Common Roasting Challenges
Addressing Tough or Dry Meat
So, you’ve roasted your Trader Joe’s grass fed beef sirloin, and it’s… not quite right. Maybe it’s tough, maybe it’s dry. Don’t panic! There are a few things that could have gone wrong, and even better, a few things you can do to fix it, or at least avoid it next time. The most common culprit is undercooking or overcooking.
- Check the internal temperature with a reliable meat thermometer. Aim for medium-rare to medium (130-145°F) for optimal tenderness. Remember that the temperature will continue to rise a bit after you take it out of the oven.
- Consider the cut. Sirloin can be a bit leaner, so it’s more prone to drying out. A fall-apart sirloin tip roast might be a better choice if you prefer very tender meat.
- Make sure you’re searing the roast properly before cooking. This helps to lock in juices.
If your roast is already cooked and tough, try slicing it very thinly against the grain. You can also braise it in some beef broth or gravy to add moisture and tenderize it further. Sometimes, a little extra cooking in a moist environment can save the day.
Adjusting for Different Roast Sizes
Roast size matters, big time. A tiny roast cooked for the same time as a huge one will be dry as a bone. And vice versa, a huge roast undercooked will be inedible. Here’s a simple guide:
| Roast Size (lbs) | Approximate Cooking Time (Oven at 325°F) |
|---|---|
| 2-3 | 60-90 minutes |
| 3-4 | 90-120 minutes |
| 4-5 | 120-150 minutes |
- These are just estimates! Always use a meat thermometer to ensure accuracy.
- If you’re halving a recipe for a smaller roast, remember to adjust the seasoning and other ingredients accordingly. Don’t just throw in the same amount of spices for a smaller roast; it’ll be overpowering.
- For pressure cooking, adjust the time based on the weight of the roast. A good rule of thumb is to reduce the cooking time proportionally to the weight reduction.
Preventing a ‘Burn’ Notice in Pressure Cookers
That dreaded ‘burn’ notice on your pressure cooker can be a real dinner-ruiner. Here’s how to avoid it:
- Make sure there’s enough liquid in the pot. The liquid is what creates the steam that cooks the roast.
- Deglaze the pot after searing. Those browned bits on the bottom can scorch if they’re not loosened with liquid.
- Layer the ingredients. Put the roast on top of the vegetables to prevent it from sticking to the bottom.
Wrapping It Up
So, there you have it. The Trader Joe’s Grass Fed Beef Sirloin Roast is a solid choice for anyone wanting to make a good meal without a ton of fuss. It’s pretty versatile, and you can cook it up in different ways to get something tasty. Whether you’re new to cooking roasts or you’ve made a bunch before, this one is easy to work with. Give it a shot next time you’re at Trader Joe’s. You might just find your new favorite dinner.
Frequently Asked Questions
Should I sear the roast before cooking it in a slow cooker?
For the best taste, you should always brown your roast first. Depending on how big your roast is, cooking it on low for 6 hours or on high for 4 hours should be enough.
What’s the difference between a chuck roast and an arm roast?
A chuck roast is better than an arm roast because it comes from closer to the shoulder. This means it’s usually more tender, has more fat mixed in (marbling), and tastes better.
How much meat do I need for this recipe?
This recipe works best with a 3-pound roast. If your roast is bigger, it will take much longer to cook until it’s soft.
What’s the best way to cook a pot roast so it’s really tender?
The easiest and most reliable way to get a super tender, fall-apart pot roast is by using a pressure cooker.
How long should I cook a 3-pound chuck roast in a pressure cooker?
For a 3-pound boneless chuck roast, cooking it on high pressure in an Instant Pot (or another pressure cooker) for 35-40 minutes is plenty of time to make it tender. If you want the meat to completely fall apart, you should let the pressure release naturally instead of quickly.
Can I use stew beef instead of a roast for this recipe?
Yes, you can use stew beef if that’s what you have. One person tried it with stew beef from Trader Joe’s and said it turned out amazing!


