Introduction
Looking for a fresh take on your usual snacks? Let me introduce you to Za’atar Cottage Cheese Pita Triangles, a delightful fusion of Middle Eastern and Mediterranean flavors that I discovered during my culinary adventures.
You’ll love how the earthy, aromatic za’atar seasoning pairs perfectly with creamy cottage cheese, all nestled on top of crispy toasted pita triangles. These tasty bites are incredibly versatile – they work great as appetizers for your next gathering, a light lunch when you’re in a hurry, or a satisfying afternoon snack. The best part? They’re packed with protein from the cottage cheese and complex carbs from the whole wheat pita, so you’ll stay energized without feeling weighed down. Trust me, once you try these, they’ll become your new go-to snack!
Recipe
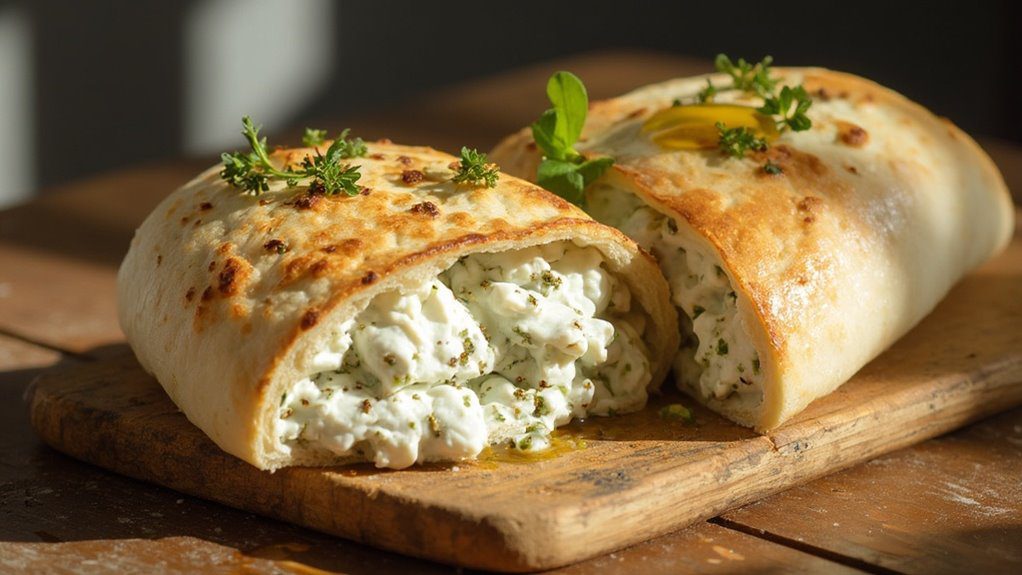
Za’atar Cottage Cheese Pita Triangles transform simple ingredients into an elegant Mediterranean-inspired dish that’s perfect for entertaining or casual snacking. The combination of crispy toasted pita, creamy cottage cheese, and aromatic za’atar creates a delightful contrast of textures and flavors.
This versatile recipe takes just minutes to prepare and can be scaled up or down depending on your needs. The savory blend of herbs and spices in za’atar perfectly complements the mild, creamy cottage cheese, while the toasted pita provides a satisfying crunch.
- 4 whole wheat pita breads
- 2 cups cottage cheese
- 3 tablespoons za’atar seasoning
- 2 tablespoons olive oil
- 1/4 teaspoon sea salt
Preheat oven to 375°F. Cut each pita bread into 6 triangles and carefully separate the layers. Brush both sides of each triangle with olive oil and sprinkle with salt. Arrange triangles on a baking sheet and toast for 5-7 minutes until golden brown and crispy. Allow to cool slightly, then top each triangle with a spoonful of cottage cheese and sprinkle generously with za’atar seasoning.
For best results, serve the pita triangles immediately after assembling to maintain their crispiness. The pita triangles can be toasted up to 2 hours in advance and stored in an airtight container at room temperature. Add the cottage cheese and za’atar just before serving to prevent the pita from becoming soggy. If za’atar is unavailable, you can make your own by combining dried thyme, sesame seeds, ground sumac, and a pinch of salt.
Prep Time
Total prep time for these Mediterranean-inspired triangles takes just 15 minutes from start to finish. You’ll spend about 5 minutes cutting the pita bread into triangles and brushing them with olive oil. While your oven preheats, you can get your cottage cheese and za’atar ready to go.
The actual hands-on work is incredibly quick – I love that about this recipe! Once your pitas are in the oven, you’ll have 5-7 minutes to clean up your prep area. After they’ve cooled for about 2 minutes, you’ll need just another minute or two to add the cottage cheese and sprinkle on the za’atar. If you’re hosting guests, I’d recommend timing it so they arrive just as you’re finishing the assembly.
Equipment needed
The essentials needed for these pita triangles are invigoratingly minimal – you’ll be glad to know you won’t need any fancy equipment!
You’ll just need:
- A sharp knife for cutting the pita into triangles
- A baking sheet (any size will do)
- A pastry brush for the olive oil
- Measuring spoons
- A small bowl for the cottage cheese
- A spoon for dolloping
I love how straightforward this recipe is – there’s no need to dig through your cabinets for specialty tools. If you don’t have a pastry brush, you can use the back of a spoon to spread the oil, and any knife that’s reasonably sharp will work for cutting the pita. The most important thing is having a clean, flat surface to work on.
Basic Cooking Method and Time
With your tools ready to go, preparing these Mediterranean-inspired triangles couldn’t be simpler. You’ll start by preheating your oven to 375°F, then carefully cutting each pita into 6 equal triangles. Once you’ve separated the layers, give them a light brush of olive oil on both sides and sprinkle with salt.
Pop those triangles into the oven for 5-7 minutes – you’re looking for that perfect golden-brown crispiness. I like to check mine at the 5-minute mark since ovens can vary. Once they’re done, let them cool for just a minute or two. Then comes the fun part: top each triangle with a generous dollop of cottage cheese and finish with a sprinkle of za’atar. Trust me, that moment when the aromatic za’atar hits the creamy cottage cheese is pure magic.
Cooking Steps
Making these Mediterranean-inspired triangles follows a straightforward sequence that’ll have you enjoying them in no time. First, you’ll want to cut each pita bread into 6 equal triangles and carefully separate the layers – I find using a sharp knife works best here. Next, grab your olive oil and brush both sides of each triangle, then sprinkle them with sea salt.
Pop these triangles into your preheated 375°F oven and let them toast for 5-7 minutes until they’re golden and crispy. Once they’ve cooled slightly, top each triangle with a generous dollop of cottage cheese. Finally, sprinkle za’atar seasoning over the cottage cheese. Trust me, don’t skimp on the za’atar – it’s what gives these bites their signature Middle Eastern flair.
Step 1. Preheat Oven to 375F

Before diving into our pita creation, you’ll need to preheat your oven to 375°F – an essential first step I’ve learned can make or break the crispiness of these triangles. I always start here because a properly heated oven guarantees even cooking and that perfect golden-brown finish we’re looking for.
While your oven’s preheating (which usually takes about 10-15 minutes), you’ll have time to prep your other ingredients. I like to use this waiting period to measure out my za’atar and olive oil, and get my cottage cheese ready. Trust me on this temperature – I’ve tested these pita triangles at various heat levels, and 375°F gives you that ideal balance of crispy exterior while maintaining a slight chewiness in the center of the pita.
Step 2. Cut Pitas Into Triangles
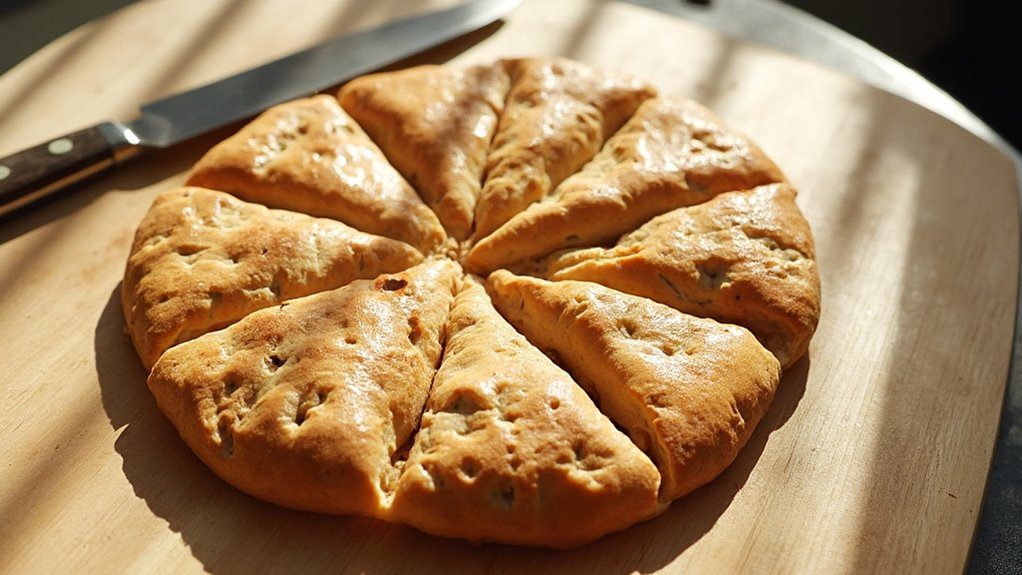
Grab your four pita breads and place them on a clean cutting board – this is where the magic begins! You’ll want to cut each pita into six equal triangles, just like you’d slice a pizza. I find it easiest to first cut the pita in half, then cut each half into three triangular pieces.
Once you’ve cut your pitas, carefully separate the two layers of each triangle. Don’t worry if some pieces don’t separate perfectly – they’ll still taste amazing! This separation technique gives you twice as many crispy pieces and creates the perfect surface for holding your toppings. When I’m done, I like to arrange all my triangles in neat rows, making sure they’re ready for the next step of brushing with olive oil.
Step 3. Brush Triangles With Oil
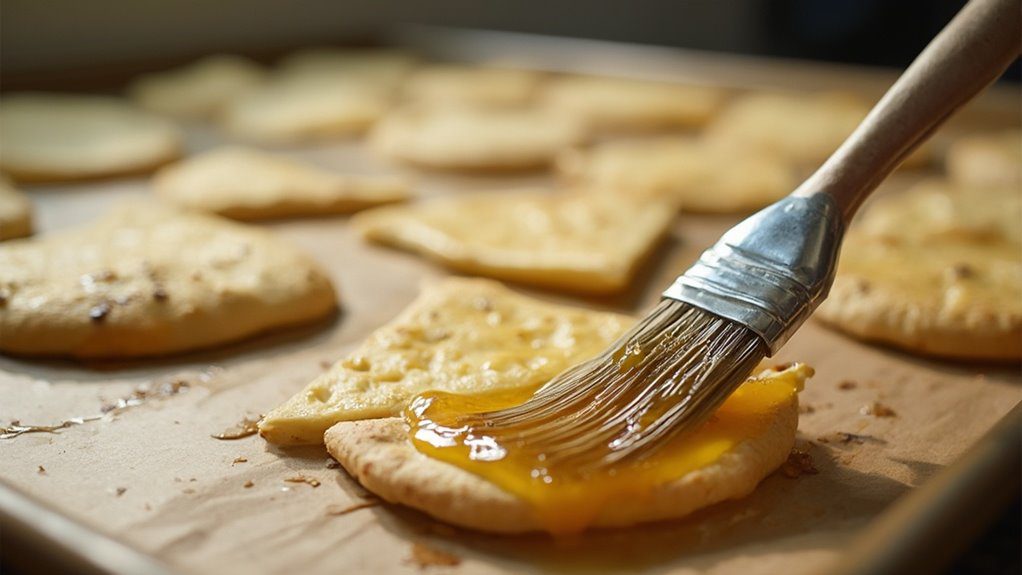
Drizzle the olive oil generously onto your pita triangles – this is where we start building those irresistible layers of flavor! I’ve found that using a pastry brush helps distribute the oil evenly on both sides of each piece. You’ll want to make sure you’re not skimping here, as the oil helps create that perfect golden-brown crunch we’re after.
Trust me on this – don’t forget those edges! I learned the hard way that neglected edges can burn while the center stays pale. A light sprinkle of sea salt at this stage makes a huge difference too. When I’m batch-cooking, I like to lay out all my triangles on a baking sheet first, then brush them assembly-line style – it’s much more efficient than doing them one at a time.
Step 4. Bake Triangles Until Golden

Once your pita triangles are prepped and oiled, it’s time for the most transformative step – baking them to crispy, golden perfection. Place the triangles in a single layer on a baking sheet and slide them into your preheated 375°F oven. You’ll want to keep a close eye on them during the 5-7 minute baking time, as they can go from perfectly golden to overdone quickly.
Watch for the edges to start curling slightly and the surface to take on a warm, honeyed hue. You’re looking for a uniform golden-brown color across each triangle. If some pieces are browning faster than others, rotate your baking sheet halfway through. Once they’re done, let them cool for a few minutes until they’re crisp and ready for topping.
Step 5. Add Toppings and Serve

The final touches transform these crispy pita triangles into an irresistible appetizer. Once your pita triangles have cooled slightly, you’ll want to dollop about a tablespoon of cottage cheese onto each piece. Don’t worry about being too precise – a rustic look adds to their charm.
Now comes my favorite part: sprinkling the za’atar seasoning. I love watching the herbs and spices cascade over the creamy cottage cheese, creating beautiful specks of green and brown. Be generous with the za’atar – you’ll want that bold flavor in every bite.
Serve these triangles right away while they’re still crispy. If you’re hosting, I suggest assembling them in small batches rather than all at once, keeping the base triangles in an airtight container until needed.
Customization Options
While the classic za’atar and cottage cheese combination is delicious, I’ve discovered countless ways to customize these pita triangles based on what’s in your pantry or personal taste preferences. Try swapping cottage cheese for Greek yogurt, labneh, or even hummus as your creamy base. I love adding fresh herbs like mint, dill, or parsley for a burst of color and flavor.
For extra crunch and nutrition, sprinkle on pine nuts, pomegranate seeds, or chopped cucumber. You can also experiment with different spice blends – I’ve had great success using dukkah, sumac, or everything bagel seasoning instead of za’atar. If you’re craving something sweeter, drizzle honey over the cottage cheese and top with fresh figs or dates.
Ingredients list (with precise measurements)

Before diving into these delightful pita triangles, you’ll need a precise list of ingredients that I’ve carefully measured through countless test batches in my kitchen. After experimenting with different ratios, I’ve found these measurements create the perfect balance of flavors and textures:
- 4 whole wheat pita breads (standard 6-inch size)
- 2 cups full-fat cottage cheese
- 3 tablespoons za’atar seasoning blend
- 2 tablespoons extra virgin olive oil
- 1/4 teaspoon fine sea salt
I’ve learned that using full-fat cottage cheese makes a big difference – it’s creamier and doesn’t water down the za’atar like low-fat versions do. Trust me, I tried both! Keep these ingredients handy, and you’ll be ready to create this Middle Eastern-inspired treat in no time.
Storage Information
After numerous taste tests in my kitchen, I’ve discovered these za’atar pita triangles stay fresh for about 2 hours at room temperature once assembled. If you’re planning ahead, I recommend storing the components separately to maintain ideal texture and flavor.
You can store the toasted pita triangles in an airtight container at room temperature for up to 24 hours – though they’ll be crispiest within the first 4 hours. Keep your cottage cheese refrigerated until you’re ready to use it, and store any leftover za’atar in a sealed jar away from heat and light. When you’re ready to serve, simply assemble the components fresh. I’ve found this method works best for entertaining, as you’ll get that perfect contrast between crispy pita and creamy cottage cheese every time.
Health Benefits or Special Features
Through my experimentation with this recipe, I’ve discovered these za’atar pita triangles pack a powerful nutritional punch. You’ll get plenty of protein from the cottage cheese, which helps build and repair muscles, while the whole wheat pita provides essential fiber and complex carbs for sustained energy.
I love that za’atar isn’t just flavorful – it’s also rich in antioxidants from herbs like thyme and oregano. Plus, the olive oil adds heart-healthy fats that help your body absorb nutrients better. When I’m watching my sodium intake, I’ll often reduce or skip the added salt since za’atar already has a naturally savory profile. These triangles make a balanced snack that’ll keep you satisfied between meals, and they’re a great alternative to processed foods when you’re craving something crunchy.
Prep Time
Speaking of healthy and satisfying snacks, you’ll be happy to know these za’atar pita triangles come together quickly. From start to finish, you’re looking at just 15-20 minutes total prep and cooking time – perfect for those busy afternoons when you need something speedy but satisfying.
The actual hands-on prep work takes about 8 minutes: cutting the pitas, brushing them with oil, and getting them ready for toasting. While they’re crisping up in the oven for 5-7 minutes, you can prepare your cottage cheese and za’atar seasoning. Once the pitas are done and have cooled slightly (about 2-3 minutes), assembly is a breeze – just top each triangle with cheese and sprinkle with za’atar.
Cook Time
The actual cooking time for these za’atar pita triangles couldn’t be simpler – just 5-7 minutes in a preheated 375°F oven. You’ll know they’re ready when they’ve turned a beautiful golden brown and have developed that perfect crunch. I’ve found that keeping a close eye on them during the last couple minutes is vital since they can go from perfectly toasted to overdone pretty quickly.
While your pita triangles are in the oven, you can use this time to prepare your cottage cheese topping and measure out your za’atar seasoning. Remember, you don’t need to cook the cottage cheese – it’ll go on cold, creating a delicious temperature contrast with the warm, crispy pita base.
Total Time
From start to finish, you’ll need about 15-20 minutes to prepare these za’atar pita triangles. The prep work is quick – just cutting pitas and brushing them with oil takes around 5 minutes. You’ll spend another 5-7 minutes watching them turn golden brown in the oven, which gives you time to get your cottage cheese and za’atar ready for topping.
The final assembly moves fast once your pita triangles have cooled slightly, usually taking only 3-4 minutes to dollop and sprinkle. If you’re making these for guests, I’d suggest timing it so they come out of the oven right before serving. I’ve found that working in batches helps when making larger quantities – just keep the first batch warm while you finish the rest.
Yield
One batch of these crispy pita triangles yields 48 individual pieces, which I’ve found serves about 8-12 people as an appetizer. When I’m hosting a smaller gathering, I’ll often make just half a batch, which still gives everyone plenty to enjoy. You’ll get about 4-6 servings if you’re planning to serve these as a light lunch or substantial snack.
I’ve learned through experience that it’s better to err on the generous side with portions, since these tasty bites tend to disappear quickly! If you’re serving them alongside other appetizers at a party, plan on each person eating 4-5 pieces. For a lunch portion, I usually count on 6-8 triangles per person being plenty filling.
Final Thoughts
Making these za’atar cottage cheese pita triangles has become one of my go-to recipes when I want to impress guests without spending hours in the kitchen. I’ve served them at everything from casual book clubs to fancy dinner parties, and they’re always a hit. The combination of crunchy pita, creamy cottage cheese, and aromatic za’atar creates an irresistible mix of textures and flavors that’ll keep everyone coming back for more.
Trust me, you’ll love how versatile these little bites are. They work perfectly as appetizers, but I’ve also packed them for lunch or enjoyed them as an afternoon snack. Just remember to keep the components separate until serving time – nobody likes a soggy pita! Give this recipe a try, and I bet it’ll become your new entertaining staple.
Frequently Asked Questions
Can I Substitute Greek Yogurt for Cottage Cheese?
You can substitute Greek yogurt for cottage cheese, though you’ll notice a tangier flavor and smoother texture. It’s best to use full-fat Greek yogurt for ideal creaminess and richness.
What Other Spices Can I Use if I Can’t Find Za’atar?
You can use dried thyme mixed with sesame seeds, sumac, and oregano. If those aren’t available, try Italian seasoning with sesame seeds or a blend of dried herbs.
How Do I Make My Own Za’atar Blend at Home?
Mix dried thyme, oregano, marjoram, sesame seeds, and sumac in equal parts. Add a pinch of salt and ground cumin. You’ll have your own magical Middle Eastern spice blend ready.
Will Gluten-Free Pita Bread Work for This Recipe?
Yes, you can use gluten-free pita bread, but you’ll need to watch it closely while toasting as it tends to crisp up faster and may become brittle compared to regular pita.
Can I Add Vegetables or Other Toppings to These Triangles?
Like a canvas awaiting color, you can brighten your triangles with sliced cucumbers, cherry tomatoes, roasted red peppers, or fresh herbs. Don’t overload them though – they’ll get soggy.
Conclusion
You’ll be amazed at how these Za’atar Cottage Cheese Pita Triangles transform your snacking game into a Middle Eastern feast fit for royalty. The combination of creamy cottage cheese and aromatic za’atar creates an explosion of flavors that’ll transport you straight to a bustling Mediterranean marketplace. Trust me, once you’ve mastered these crispy, protein-packed triangles, you’ll never look at plain pita bread the same way again. They’re absolutely addictive!


